


Scrolling through endless DIY projects can feel like a lot, right? Sometimes you just want a collection of adorable, totally doable craft ideas. That is where a stash of cheerful little makes comes in, the kind that lift your spirits without demanding expert skills or a mountain of supplies.
Let’s wander through some delightfully simple projects guaranteed to sprinkle a little extra joy into your day. After all, who couldn’t use a bit of creative therapy? You are about to discover a whole lineup of playful makes designed to brighten your space and your mood.
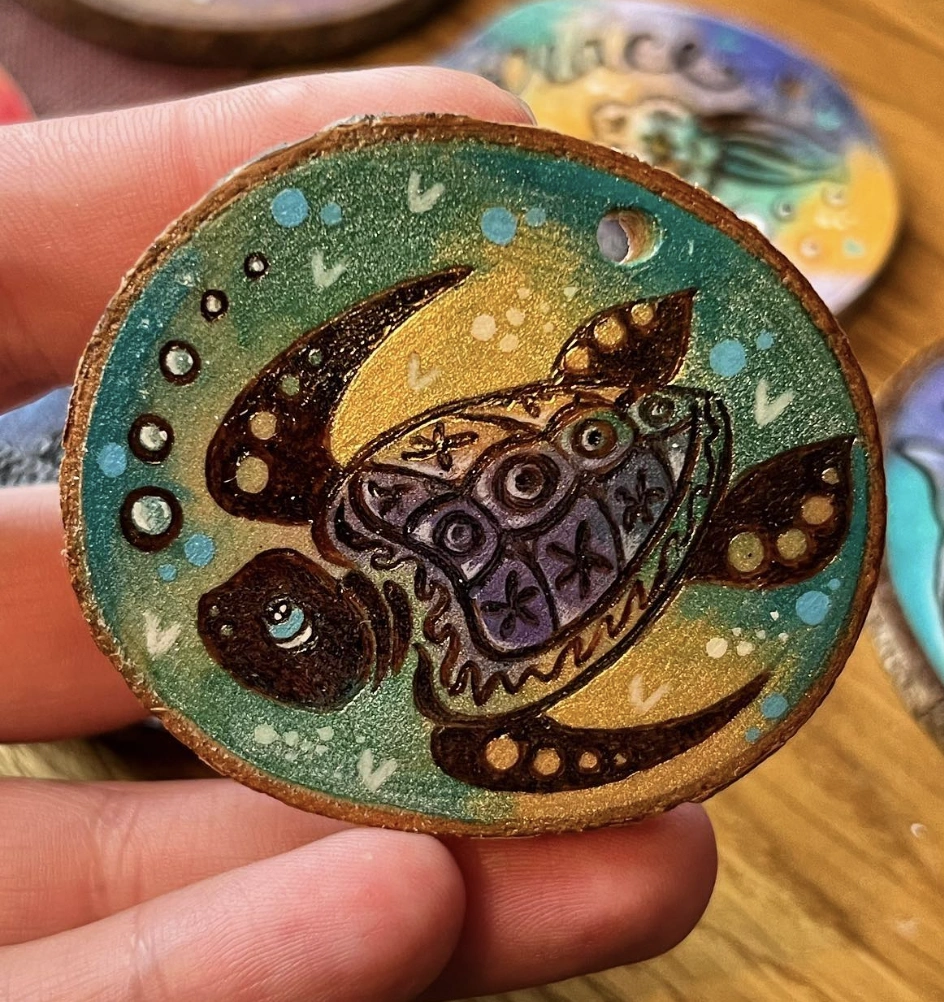
Hand-Painted Turtle on Wood Slice Ornament
Credit: @sarahdesignsuk
For those seeking one of a kind handmade treasures to craft or simply admire, this piece is a total winner. The artist’s detailed painting on that shell catches the eye immediately. Those tiny white dashes dancing along the edge to look like bubbles truly bring an underwater feeling to life.
Select a smooth, small wooden slice
Lightly sand the surface to create a smooth base
Apply a thin layer of gesso or primer
Roughly sketch turtle design onto wooden slice
Carefully paint the background with light blue and yellow acrylic paints
Create shadows by dry brushing darker colors around the edges
Outline turtle using a fine point permanent marker
Add colored pencil shading and detailing
Apply a thin coat of clear resin to protect the design
Smiley Flower Charm with Pink & Blue Beads

Credit: @_pomily
Bored with the same old keychains? There is a seriously cute fix for that.
This smiley flower charm bursts with pink and blue beads, making it wildly colorful and cheerful. It totally embodies the spirit of Cool Crafts in the most effortless way possible.
Gather your beads, stretchy string, flower charm, and keychain ring
Cut approximately 12 inches of the stretchy string
Thread one end of the string through the keychain ring and fold it in half
Tie a secure knot, leaving a small loop
Begin stringing your large beads onto the string, alternating colors and sizes
Create short strands of smaller beads and add them to either side of the flower charm
Once you’ve strung all your beads, tie the ends of the string together with a tight knot
Trim any excess string
Attach the flower charm onto the string
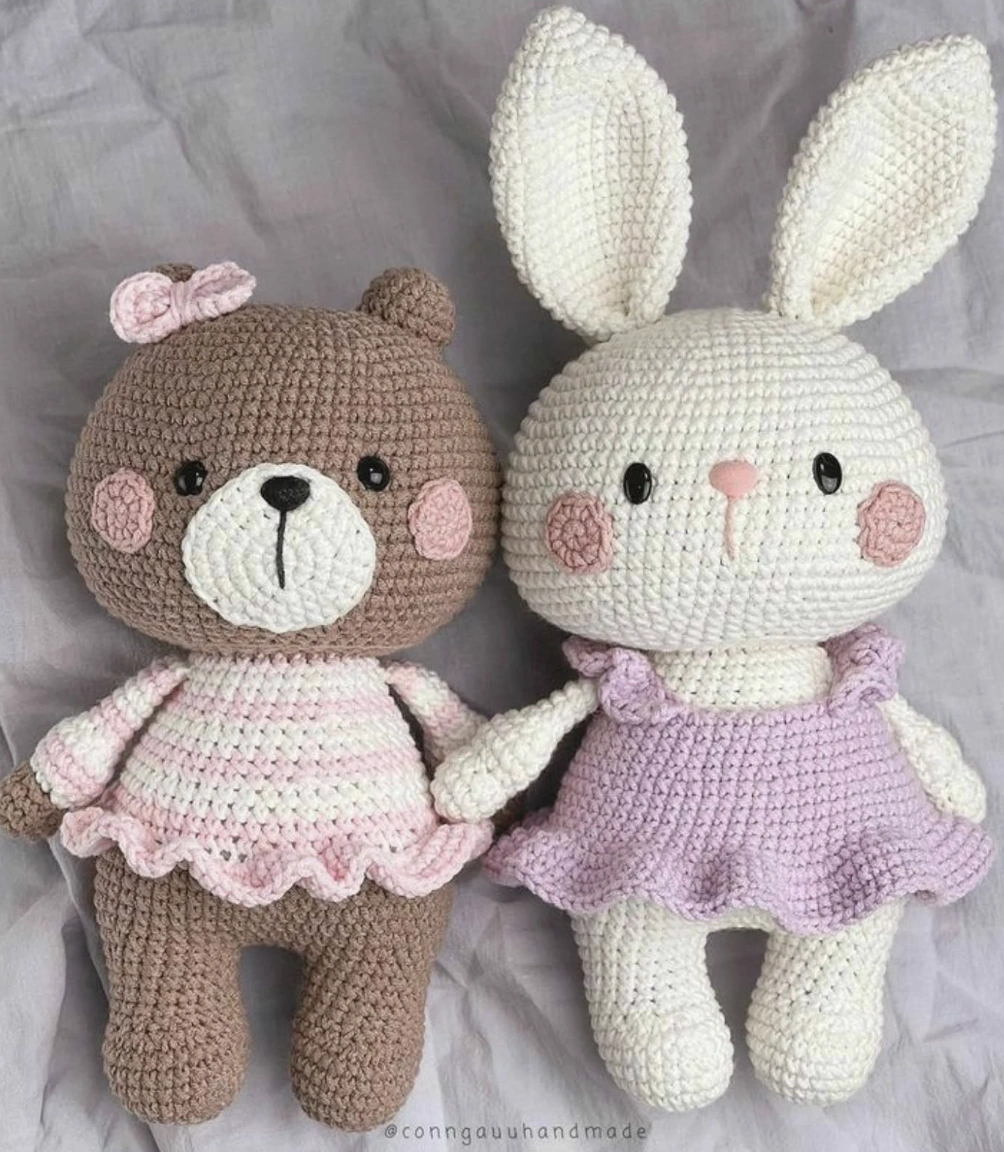
Crocheted Bear and Bunny Besties in Pastel Dresses
Credit: @threadfusions
Those pastel hues are appearing absolutely everywhere this season. Making these sweet friends is also a wonderful path for anyone eager to discover new Cute Easy Crafts to try with their hooks and yarn.
Begin by crocheting separate body parts (head, body, arms, legs, ears) using the single crochet stitch and chosen yarn color
Stuff each piece firmly with fiberfill
Sew the head onto the body
Attach arms and legs to the body using yarn or safety eyes
Crochet the dress ruffle using the pattern for the animal and attach to the body
Embroider facial features (eyes, nose, mouth) onto the head
Crochet two ears for the stuffed animal and sew them onto the head
Add details like bows with yarn or felt
Weave in all loose ends securely
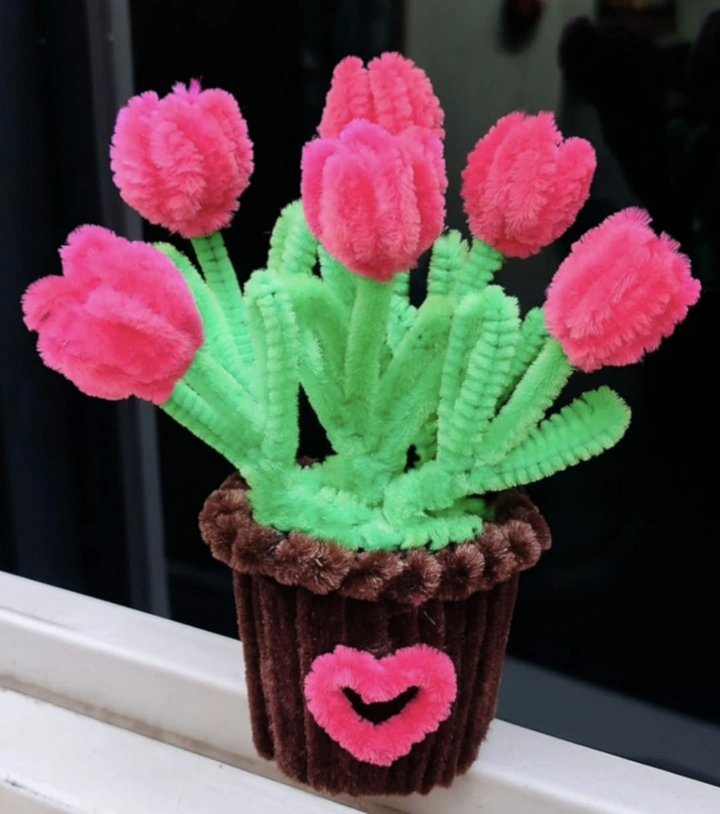
Fuzzy Pink Tulip Pipe Cleaner Bouquet
Credit: @fluffy_crafts_manu
If you need a project that’s simple and remarkably mess free, these cute arts and crafts are a massive success for creating with kids. The fuzzy texture makes the blooms look so soft and inviting.
Gather green and pink pipe cleaners, brown felt, scissors, and glue
To create the tulips, bend the pink pipe cleaners in half and shape into tulip heads
Wrap the base of each tulip head with green pipe cleaners to form the stem
Create the felt pot by cutting a rectangle, wrapping it into a cylinder, and gluing the seam
Cut a felt circle for the bottom of the pot and glue it in place
To create the soil, add brown pipe cleaners into the pot
Arrange the tulips in the pot, trimming the stems as needed
Glue the stems in place within the soil to keep them standing
Cut out a heart shape from the brown felt
Glue the heart to the front of the pot for decoration
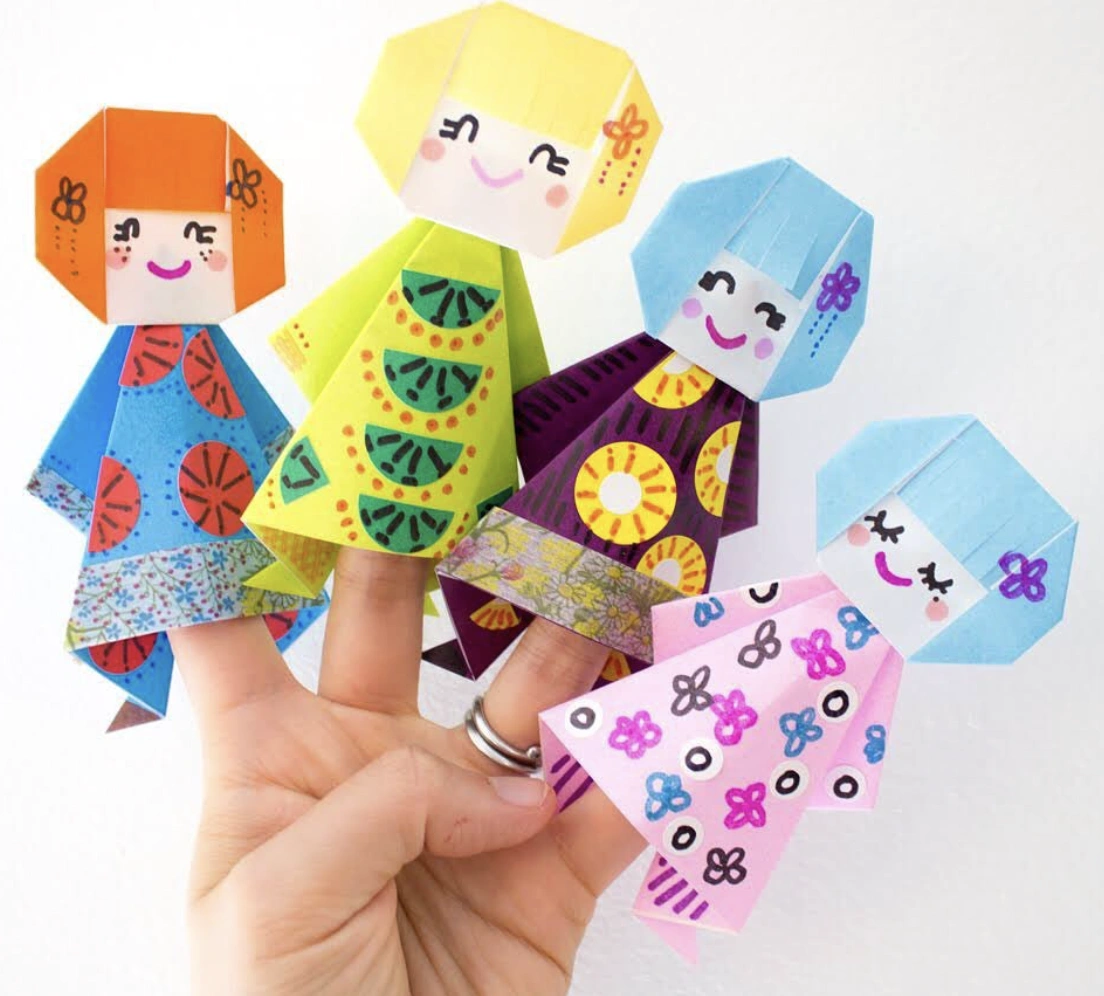
Origami Finger Puppets: A Whimsical Paper Outfit
Credit: @pinkstripeysocks
There is something so refreshing about items that don’t take themselves too seriously, and these origami finger puppets fit that description perfectly. They bring a playful, whimsical energy that feels instantly uplifting.
Select brightly colored origami paper for each doll
Follow a standard origami Kokeshi doll folding tutorial online
Fold the paper precisely to form the body and head shapes
Use markers to draw cute faces, hair accessories, and kimono designs
Cut small strips of washi tape to decorate the kimono waistbands
Gently widen the base of the doll to create a finger opening
Reinforce the base if needed with a dot of craft glue
Let the glue dry completely
Slide the dolls onto your fingers and create a puppet show
DIY Grid Wall Décor with Handmade Hanging Ornaments
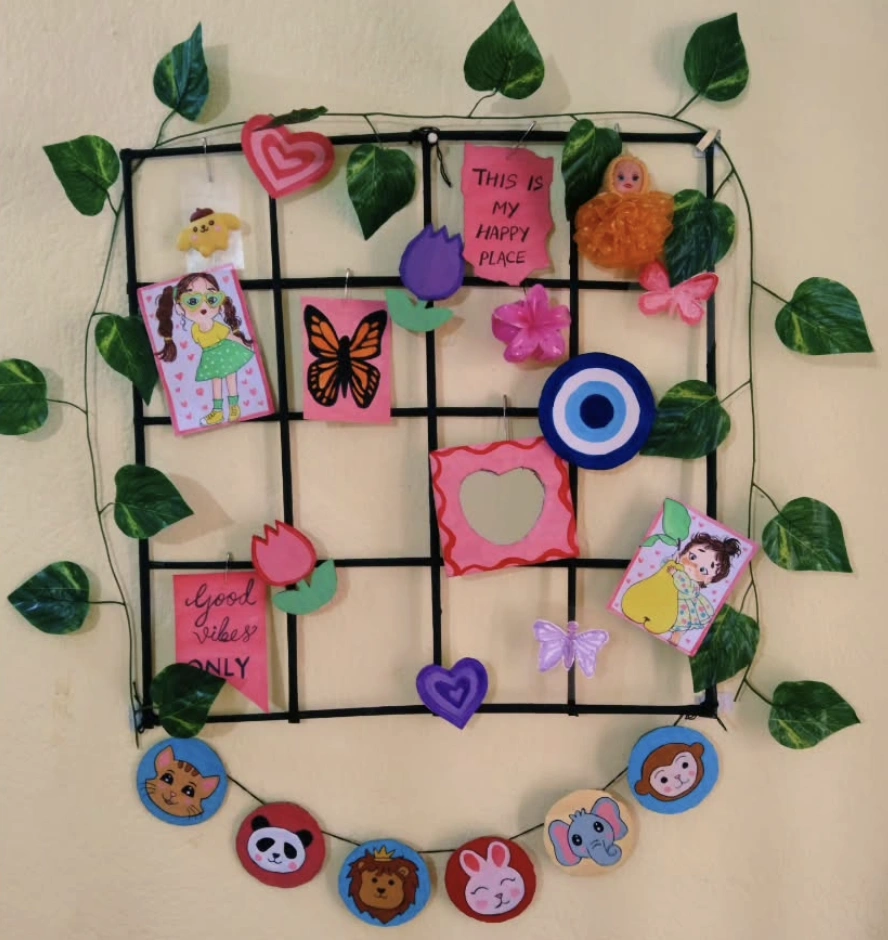
Credit: @art.by_rista
This is a handmade grid wall display, and it radiates pure charm. While similar wall decor sits on store shelves, this version feels dramatically more personal and packed with character.
Gather a metal grid, faux vines, decorative paper, and string lights
Weave the faux vines along the metal grid for a natural aesthetic
Arrange printed pictures, paper cut outs, and handmade drawings to cover a grid section
Affix items using miniature clothespins or paper clips to grid wires
Write inspiring notes on colorful cardstock and secure them on the grid
Attach string lights with tape/clips for a warm glow/ soft illumination
Create paper butterflies and flowers for extra dimensional details
Secure a garland with animal drawings to the bottom of the grid
Arrange all elements for a balanced composition
Securely mount the grid on a wall for display
Hand-Sewn Owl Charms with Floral Accents
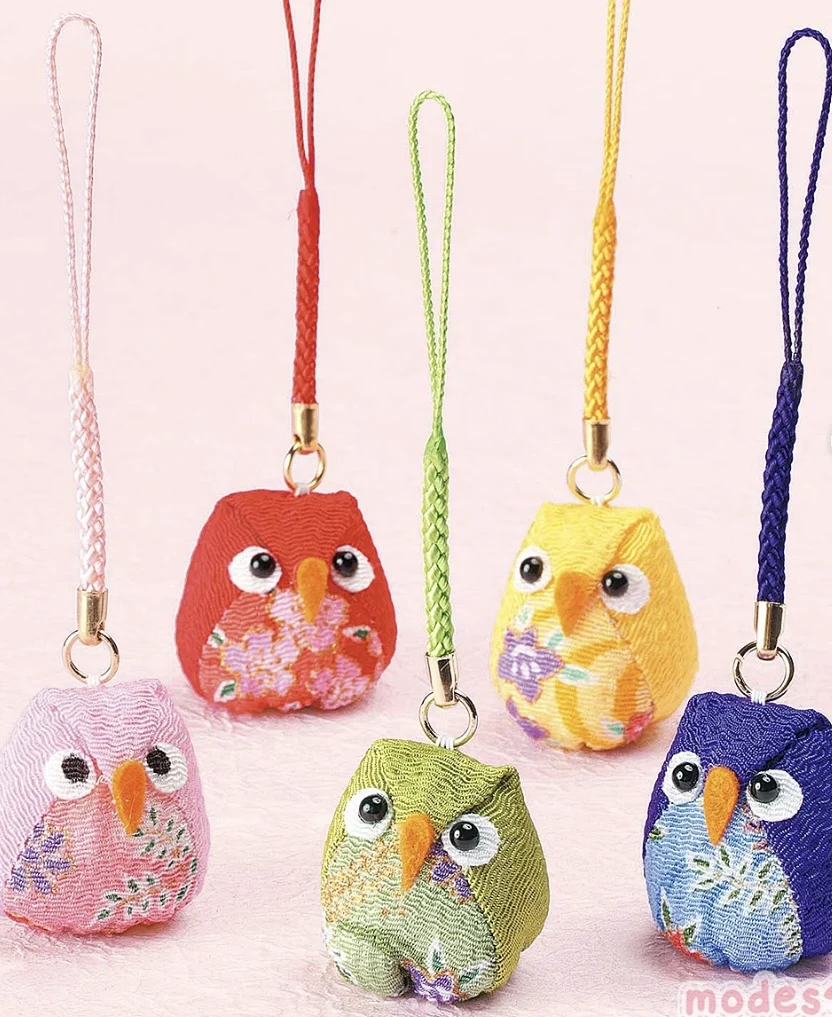
Credit: @modes4ucom
The careful hand stitching here delivers a tangible warmth that mass produced pieces simply cannot match. If subtle, delicate details speak to your soul, exploring similar Quick Crafts might bring a gentle calm to your daily rhythm. These thoughtful accents offer beauty in the simplest forms.
Cut out two owl shapes from your fabric scraps, plus smaller pieces for the belly
Embroider floral patterns onto the belly fabric pieces using different color embroidery floss
Sew the belly fabric pieces onto the owl shapes and stuff with cotton
Sew the front and back owl pieces together leaving a small gap
Turn the owl right side out and stuff with fiberfill, then close the opening with a hidden stitch
Attach plastic beads for the eyes with glue
Make a braided loop for the keychain
Attach the braid through the brass ring, secure with glue
Clip any loose threads
Crochet Frog with a Strawberry Sweater
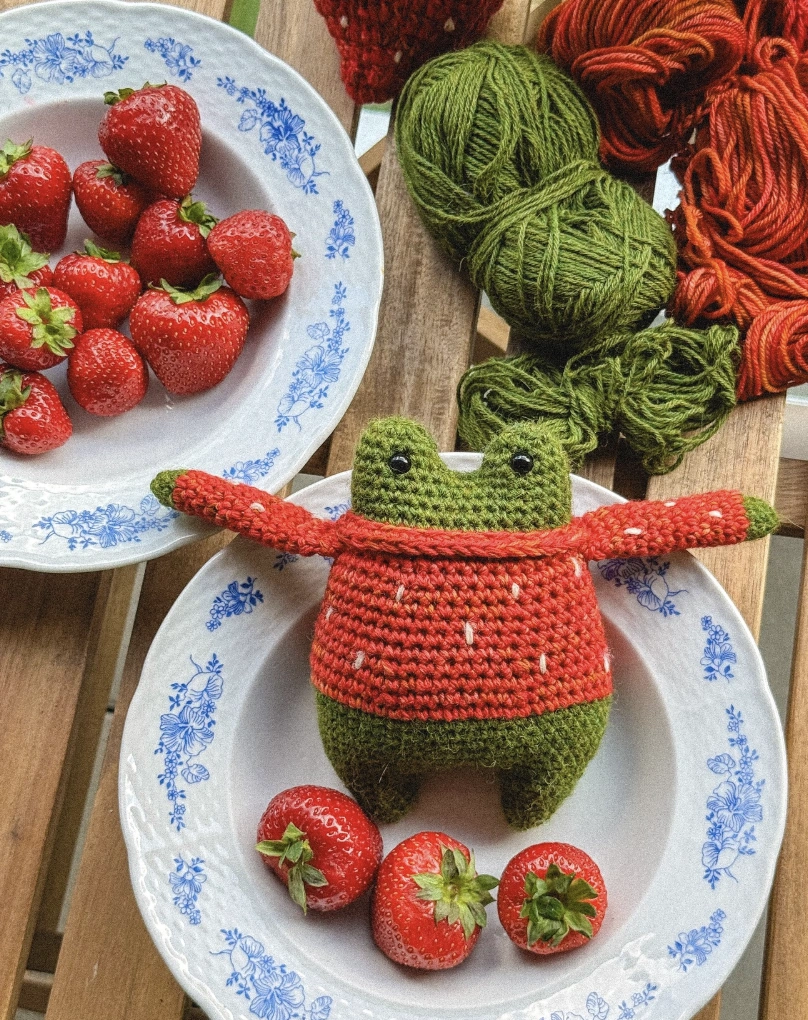
Credit: @lizakwak.knits
This little froggy fellow, lounging around in a strawberry sweater, sits firmly in beyond adorable territory. Picture it in a curated nursery or perched on a shelf in a stylish kid’s room.
These are the projects people genuinely get excited to make. Anyone obsessed with sweet trinkets or dipping into Fun Easy Crafts would absolutely swoon over this pattern.
Using green yarn and a crochet hook, create a magic ring
Crochet six single crochet stitches into the ring, pull tight to close
Increase twice in each stitch around (12 stitches total)
Continue increasing gradually for several rows to form the frog’s body
Switch to red yarn and crochet the sweater using a seed stitch pattern
Add white seed stitches to create a pattern
Change back to green and crochet the frog’s head and legs
Attach small safety eyes
Stuff the frog and sweater with fiberfill as you go
Finish off and weave in all loose ends
Adorable Felted Plant with Tiny Rosy Cheeks

Credit: @feltingfrenz
The hunt for unique decor never truly ends, and this cheerful plant definitely announces itself as a singular, one of a kind piece. Those tiny pink cheeks give it so much personality.
Roll brown wool roving into a tight ball to create the pot
Use the needle to felt it firmly
Needle felt the inside of the felted roll to form a hollow pot shape
Choose green wool and create felted leaves by shaping the wool with the needle
Use black wool for the smile and pink for the cheeks
Use grey for the legs, felt these shapes until they are semi firm
Needle felt the leaves and legs onto the pot’s body
Add small, circular pieces of pink wool roving to create blush on the face
Gently roll and felt the base of each leaf to form small stems
Add brown wool to the pot and felt the leaves to it
Ensure all pieces are firmly felted
Crocheted Green Frog Coaster with Open Mouth

Credit: @artandcraft751
Forget everything you know about plain, boring coasters. This creation is an entirely different vibe.
It is a playful, bright green, crocheted frog with its mouth wide open, seemingly ready to catch your coffee mug. This is absolutely more distinct than anything drifting around the typical Handmade Crafts scene.
Crochet a flat circle using green yarn for the coaster base
Create the lizard’s head, arms, and legs separately using the amigurumi technique
Stuff each piece lightly with fiberfill
Attach the head to the coaster base
Position and sew the arms and legs around the coaster base
Crochet the tongue using pink yarn and attach it inside the lizard’s mouth
Crochet inner mouth with white yarn
Embroider small black eyes using yarn
Weave in all loose ends
Block to shape using steam
Felt Easter Bunny with Embroidered Flowers

Credit: @sewyeah
This little felt bunny brings serious cuteness, doesn’t it? The best part is that it stays completely manageable even with a packed schedule.
Gather the crew for a bit after homework wraps up and turn this into a family activity. These are the sorts of things to craft that feel relatively simple, deeply satisfying, and perfectly festive.
Download and print a bunny template
Cut out two bunny shapes from white felt
Blanket stitch around the edges of both felt cutouts
Cut out small flowers and leaves from colorful felt scraps
Hand sew or glue the felt flowers and leaves onto one side of the bunny
Create a fluffy pompom using yarn for the tail
Securely glue or stitch the pompom to the back of the bunny
Sew the two bunny cutouts together, leaving a small opening
Lightly stuff the bunny with cotton or fiberfill
Close the opening with a few stitches
Sweet Birdhouse and Personalized Name Sign Decor
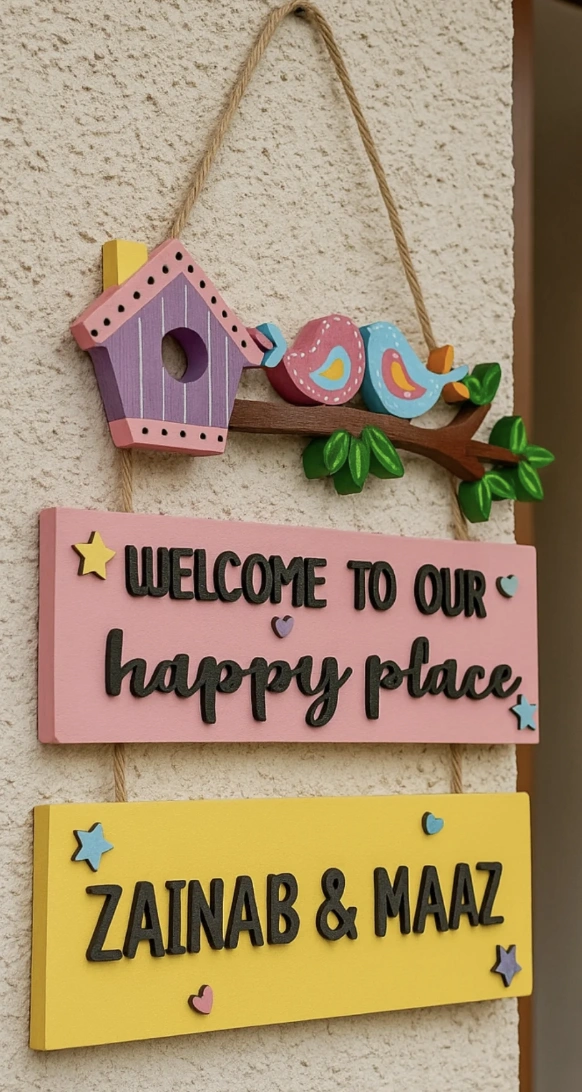
Credit: @innovative_art_zone
New parents, pay attention, because this is ridiculously precious for a nursery. It is a totally charming, handmade wooden sign featuring a birdhouse along with personalized names. Tracking down unique gifts for nieces and nephews always presents a puzzle, but something that looks like it belongs in a boutique collection of Small Crafts would be an absolute hit.
Cut wooden planks to the desired size for each tier of the sign
Cut wood pieces for birdhouse using specific measurements
Assemble birdhouse with wood glue and small nails
Paint each wooden piece in different colors
Paint “Welcome to our happy place” and “Zainab & Maaz” on the wooden planks
Glue the birdhouse, branch, and birds onto the top plank
Drill small holes in each plank for hanging
Thread twine through the holes to connect the planks
Add small wooden star and heart embellishments with glue
Hang the sign on a wall using a hook
Framed Paper-Cut Puppy Scene with Bone

Credit: @digital_gems
This framed piece would be SO perfect for a kid’s room. Picture a gallery wall with it sitting next to other vibrant pieces, it is an absolute dream.
It carries that super cute arts and crafts vibe that feels nostalgic yet completely on trend right now. Hanging this above a crib would be precious.
Sketch or download a layered design featuring the dog and background
Cut out each layer from different colors of cardstock using a craft knife
Place the largest, background layer first on a square paper
Assemble the layers of paper with foam squares for the shadow effect
Glue each layer to the background starting from the back and moving towards the front
Place white frame on top
Secure shadowbox backing
Rainbow Glass Seahorse Ornament

Credit: @explorer.laura
This little seahorse delivers a major dose of cuteness, even if the finish keeps a rustic, handmade feel. It would look stunning hanging in a window where it could catch the sunlight.
Diving into a project like this yourself could be a blast, and plenty of kits exist for quick crafts projects. It holds that unmistakable handmade charm and would splash color into any corner of a room.
Cut a base shape of clear glass in the form of a seahorse
Arrange colorful glass frit on the clear glass base in a pattern
Create a loop at the top for hanging using thin wire
Place the seahorse glass in a kiln
Fuse the glass at a high temperature
Cool the glass slowly in the kiln
Inspect finished glass
Attach the wire to the finished project
Use a polishing compound for edges
Tiny Polymer Clay Woodland Critters
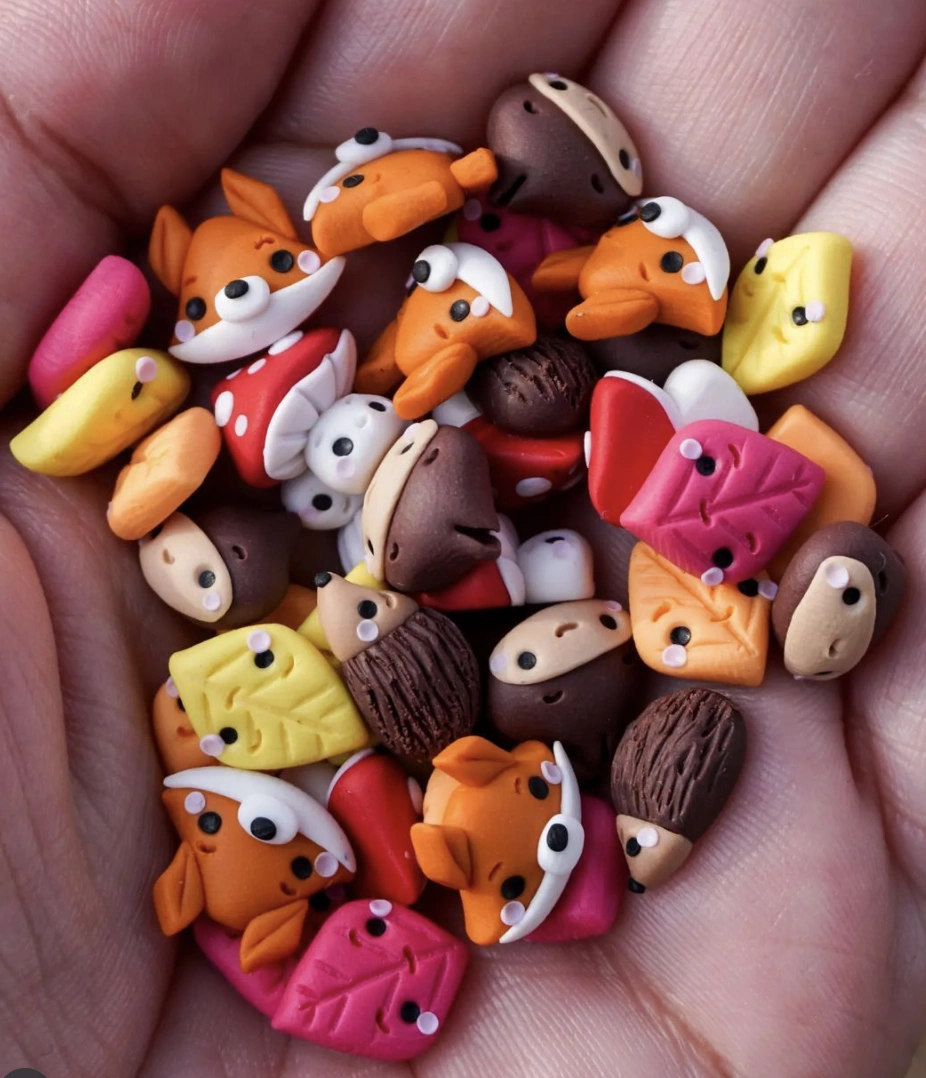
Credit: @fimostaedtler
Aren’t they just the cutest little things? The whole aesthetic leans right into forestcore vibes with those acorn and fox accents.
The excitement to start making some Cute Crafts with these polymer clay beads is totally real. Maybe forming your own custom set is the next step.
Condition various colors of polymer clay (orange, brown, red, etc)
Roll small balls of orange clay for fox heads and shape slightly
Add white details for fox snouts, and tiny black dots for eyes
Use a needle tool to add texture to brown clay for hedgehog quills
Roll white clay into small balls for mushroom stems
Flatten red clay for mushroom caps and add white dots
Form leaf shapes from various colored clay, pressing vein details with a tool
Bake all clay pieces according to the clay manufacturer’s instructions
Cool completely before handling and using in your projects
Apply gloss if you want a wet and shiny effect to your craft item
Embroidered Animal Keychain and Pin Collection
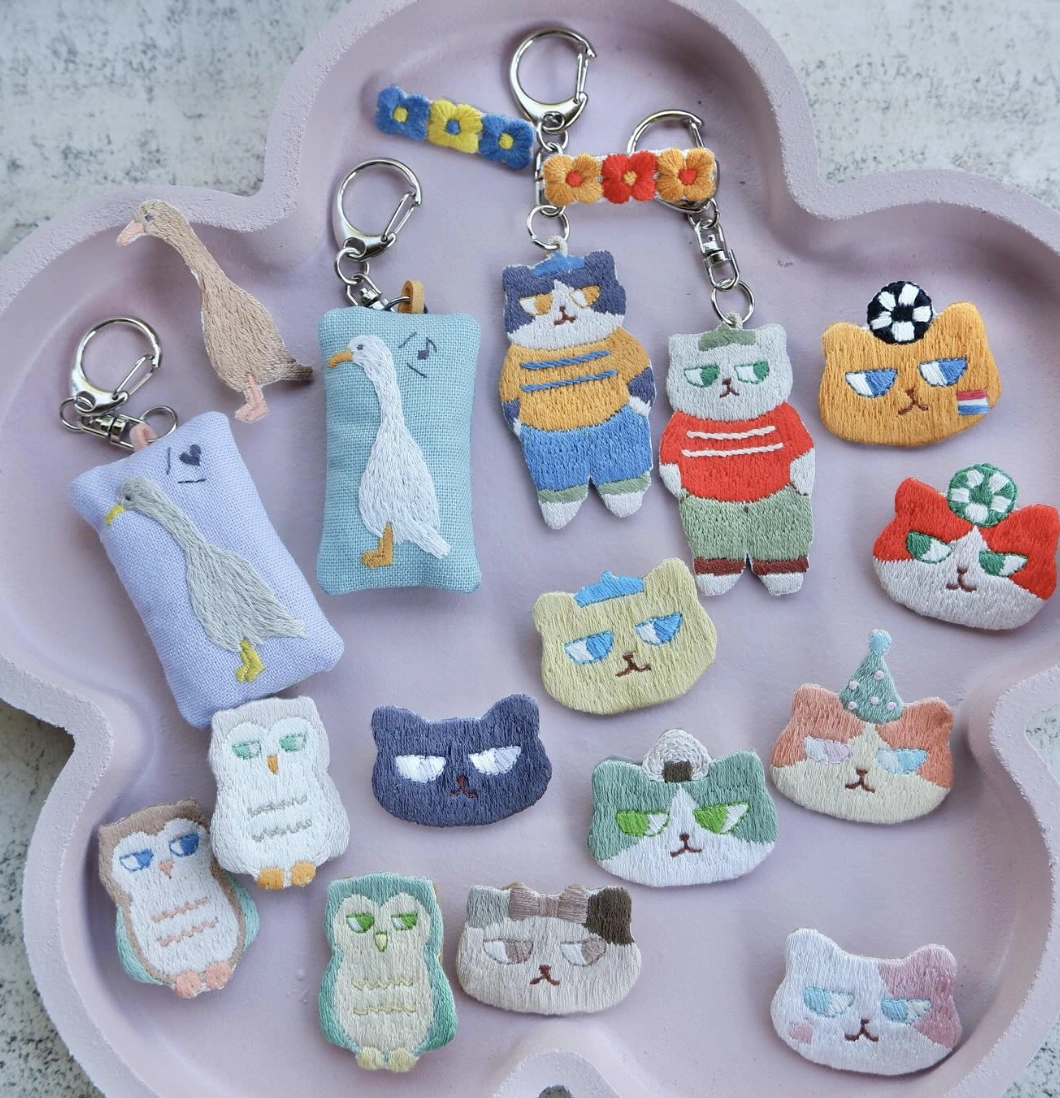
Credit: @toru_xa7
These precious little embroideries serve as a perfect match for someone who truly values the charm of handmade items. From the whimsical goose to the grumpy cat sporting a party hat, a tiny personality exists here to match everyone’s spirit.
Sketch your desired character (goose, cat, owl) onto paper
Transfer the design onto your chosen fabric, which has been stitched together in the shape of a charm or keyring
Select embroidery floss colors matching your design
Start embroidering the outline of your character with a back stitch
Fill in the details using satin stitch for solid areas
Use french knots for eyes and other small details
Secure the embroidery with a knot on the back of the fabric
Cut and add a split keyring or other ring type to your design
Attach the keyring, and attach to your purse or handbag
Be very careful to pull through the thread without damaging your design
Pastel Tamagotchi-Inspired Clay Charms
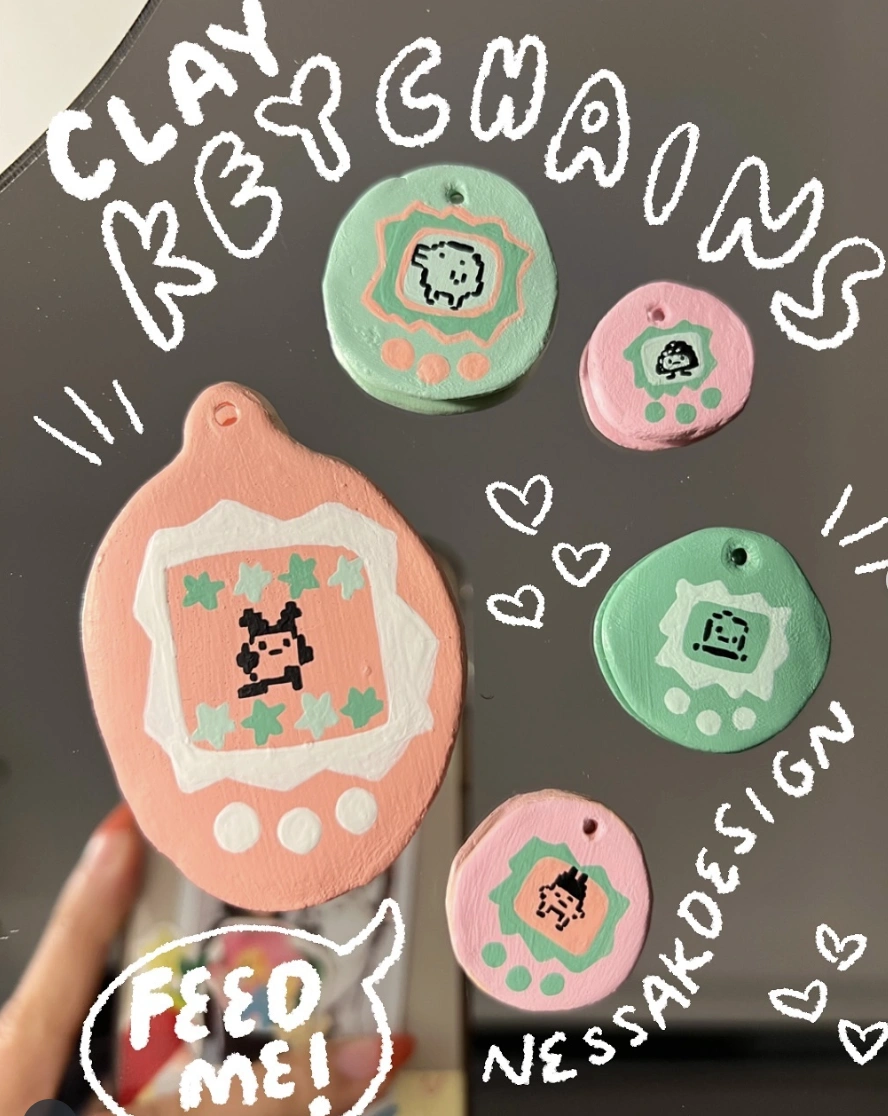
Credit: @ nessakdesign
Turning Tamagotchis into these adorable clay charms was a stroke of genius. The super cute pixelated designs painted onto each one stand out as definite Cool Crafts. The pastel color scheme also deserves a shoutout, making them look just like pieces of candy.
Roll out air dry clay to approximately 1/4 inch thickness
Use a cookie cutter or knife to cut out Tamagotchi shapes
Use a straw to create a hole for the keychain ring
Let the clay dry completely according to package directions, approximately 24 to 48 hours
Paint the base color of the keychain using acrylic paint (pink, green, etc)
Use a fine tipped brush and black paint to draw pixelated characters
Add white paint details and outlines for retro appeal
Allow the paint to dry completely
Seal the keychain with a layer of clear varnish or resin for durability and shine
Attach a keychain ring to the prepared hole
DIY Glitter Foam Christmas Bell Ornament
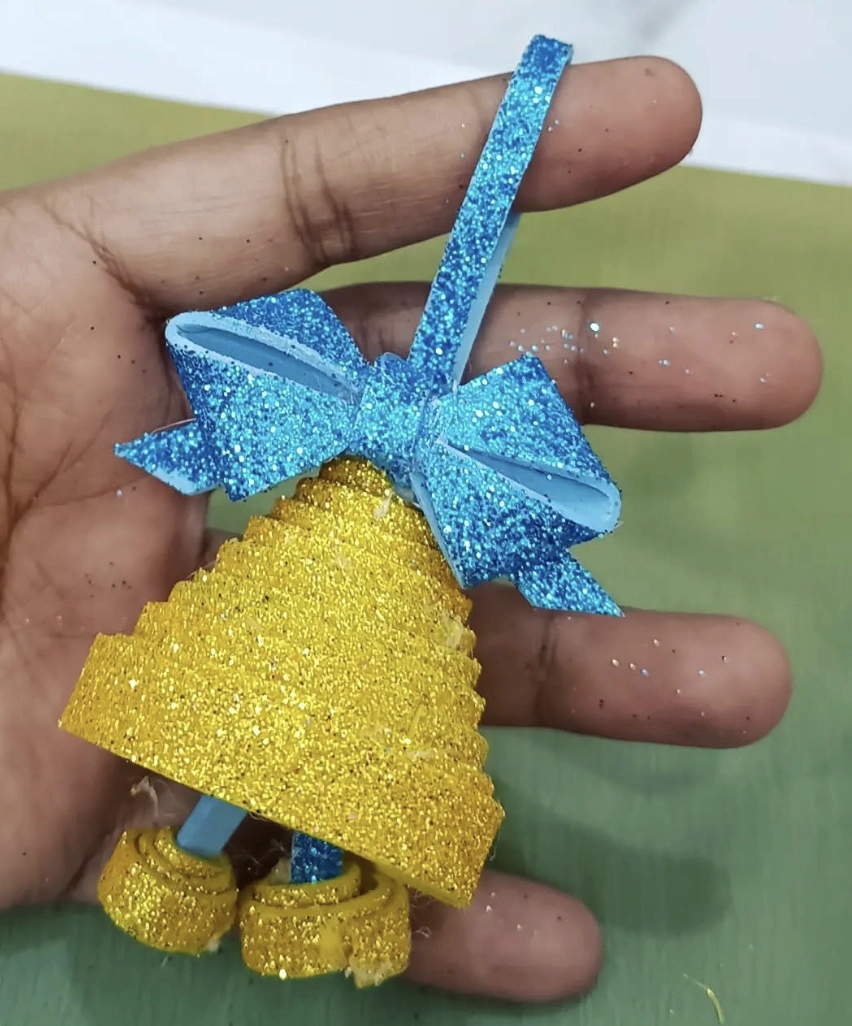
Credit: @creationbynee
Sure, hanging this on a tree is the obvious move, but think beyond the branches. Attaching it to a gift adds that extra sparkle, while dangling it from a doorknob delivers instant holiday cheer.
This is a surprisingly cool way to make the whole house feel more festive. These definitely rank among the cutest crafts to make when the holiday season rolls around.
Draw bell and bow templates on paper
Cut out bell shape twice from glittery gold foam sheet
Cut out bow shape from glittery blue foam sheet
Overlap bottom edges of bell halves and glue to create a cone
Create the clapper by cutting two circles from gold foam
Roll the clapper circles for a three dimensional effect
Glue clapper circles to the inside bottom of the bell
Fold bow pieces and glue to create a three dimensional bow
Glue the bow to the top of the bell
Add a hanging loop of ribbon or string through the top of the bell
Display as a creative Christmas Tree ornament
Festive Floral Skull Necklace and Earring Set

Credit: @fimostaedtler
Tired of seeing the same mass produced Halloween jewelry everywhere? This handmade skull necklace and earring set steps in with a unique, artisanal twist.
Each piece boasts delicate floral details. They fit perfectly for those who appreciate the artistry found in handmade items. Making your own is surprisingly straightforward.
Begin with white polymer clay and shape skull base
Create small floral elements from various colored clay – red, orange, purple
Attach flowers and leaves around the skull’s eye sockets and nose
Add additional detail using small beads or clay coils for embellishment
Cure polymer clay pendants according to manufacturer’s directions, bake or use a heat gun
Once cooled, apply a sealant or glaze for durability
Use jewelry pliers to attach jump rings at the top and bottom of each skull
String beads or clay accents between pendant elements for decoration
Attach a clasp to the end of your necklace using jewelry pliers
Admire your spooktacular necklace
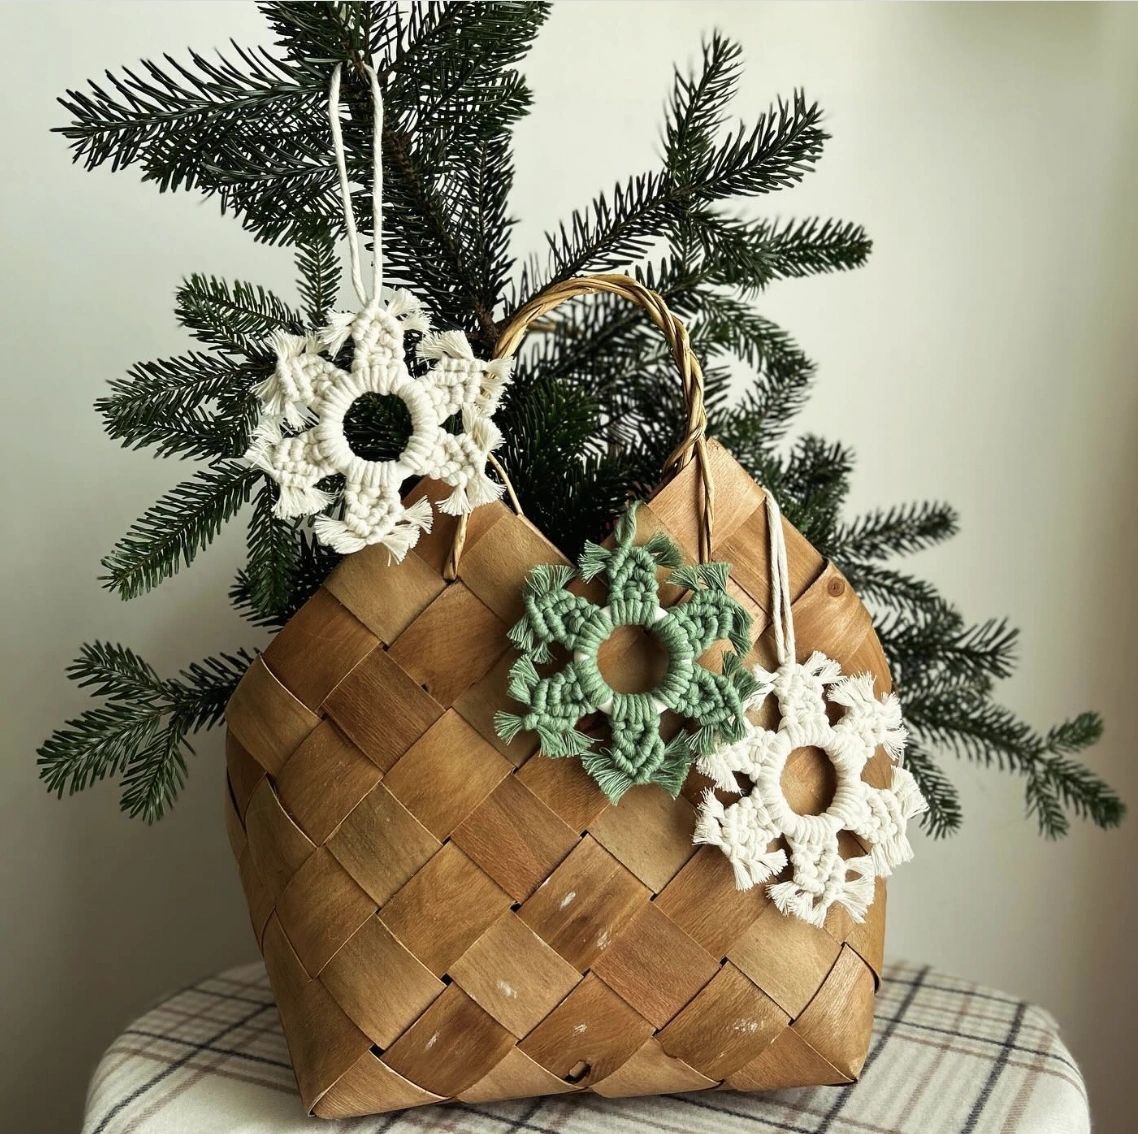
Handcrafted Macrame Snowflake Christmas Ornaments
Credit: @madebyjurgita
These little snowflake ornaments radiate pure charm. They serve as the perfect way to weave a handmade touch into your holiday setup. Picture using them to dress up a rustic, farmhouse style Christmas tree for a cozy, textured look.
Start with a metal or wooden ring 2 inches in diameter
Cut twelve 12 inch lengths of macrame cord
Fold each cord in half and attach to the ring using lark’s head knots
Divide cords into six sections of four strands each
Make a square knot with each set of four strands
Divide cords again and make another round of square knots
Tie overhand knots at the end of each strand to form the snowflake points
Trim the ends of the cords to create a tidy fringe
Attach a loop of cord for hanging
Create the ornament with multiple colors
Hopefully these ideas have lit a spark of creative energy. There is something deeply satisfying about bringing beauty into the world with your own two hands.
The lookout for more Cool Crafts to share never stops. So, what are you feeling inspired to create next? Your next favorite project might just be waiting right here.