


Hunting for festive activities to share with your tiny elves this holiday season? The excitement is real.
Toddlers thrive on tactile, messy play, and Christmas delivers the ultimate invitation to unleash their creative chaos. Prepare yourself for a wonderfully imperfect, glitter-filled adventure with these simple Christmas crafts for toddlers.
This collection gathers straightforward yet heart-meltingly sweet Christmas art for toddlers, each one scaled perfectly for small, eager hands.
Searching for december crafts for toddlers? Let this spark a flood of inspiration!
Rainbow Felt Hat Pinecone Gnomes
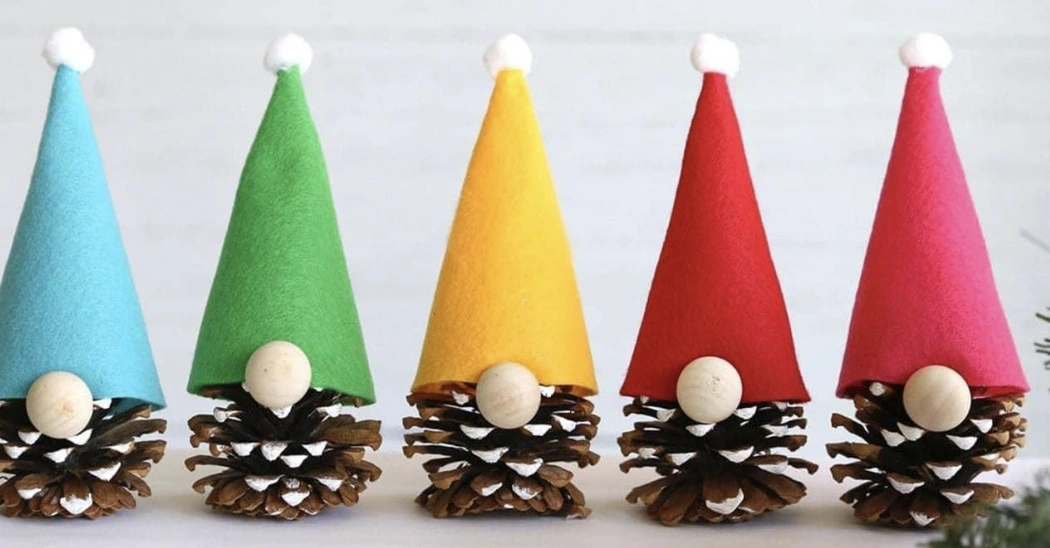
Credit: @angels_and_butterflies_crafts
These tiny woodland friends come together with surprising ease. For an afternoon of december crafts for toddlers, this project takes the prize, especially if you preassemble the felt into cone hats so little ones can focus on attaching the nose and setting it onto the pinecone.
A coat of white paint on the pinecones beforehand adds a frosty magic. Line them up along a mantle for a joyful burst of color!
How to Make This Craft Gather some medium-sized, dry pinecones and remove any loose debris Paint the pinecones, if you like, or leave them natural Let dry Cut felt into cone shapes for the gnome hats, sizing the cones to fit the pinecones Glue the felt cones to form hats Attach a small pompom to the top of each felt hat with hot glue Glue wooden beads near the top of the pinecone for the gnome’s noses Allow glue to fully dry and cure Arrange your new pinecone gnomes on a mantle or table
Easy Peasy Cupcake Liner Christmas Wreath Project
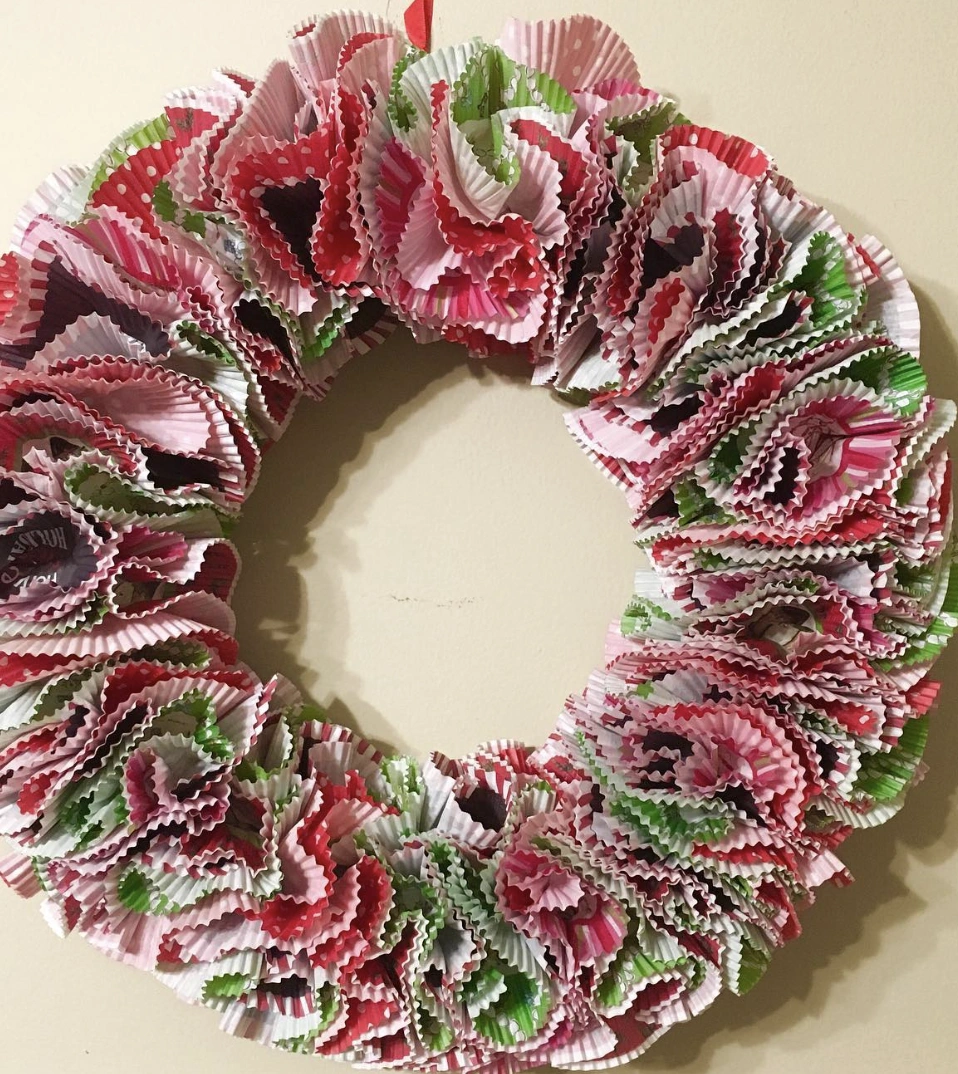
Credit: @theyulelog
The answer for a bare front door, found! Truly, this DIY cupcake liner wreath radiates charm.
What’s the move when you crave festive flair without the hefty price tag? This is exactly it.
Picture this as the ultimate indoor activity for a session of Christmas crafts for toddlers this year! Budget-friendly, fuss-free, and packed with holiday spirit!
How to Make This Craft Procure a foam wreath form – any size will do, truly! 2 Amass a horde of decorative cupcake liners; the more, the merrier! 3 Flatten a liner and fold it in half, then in half again to form a sort of triangle Dab a generous dollop of hot glue to the pointy end of the folded liner Affix the glued liner to the wreath form Repeat steps 3-5, overlapping the liners densely to conceal the wreath form Continue layering until the entire wreath is gloriously covered in cupcake liner ruffles Hang with a ribbon and bask in your thrifty masterpiece
Yarn Wrapped Cardboard Christmas Tree Ornaments
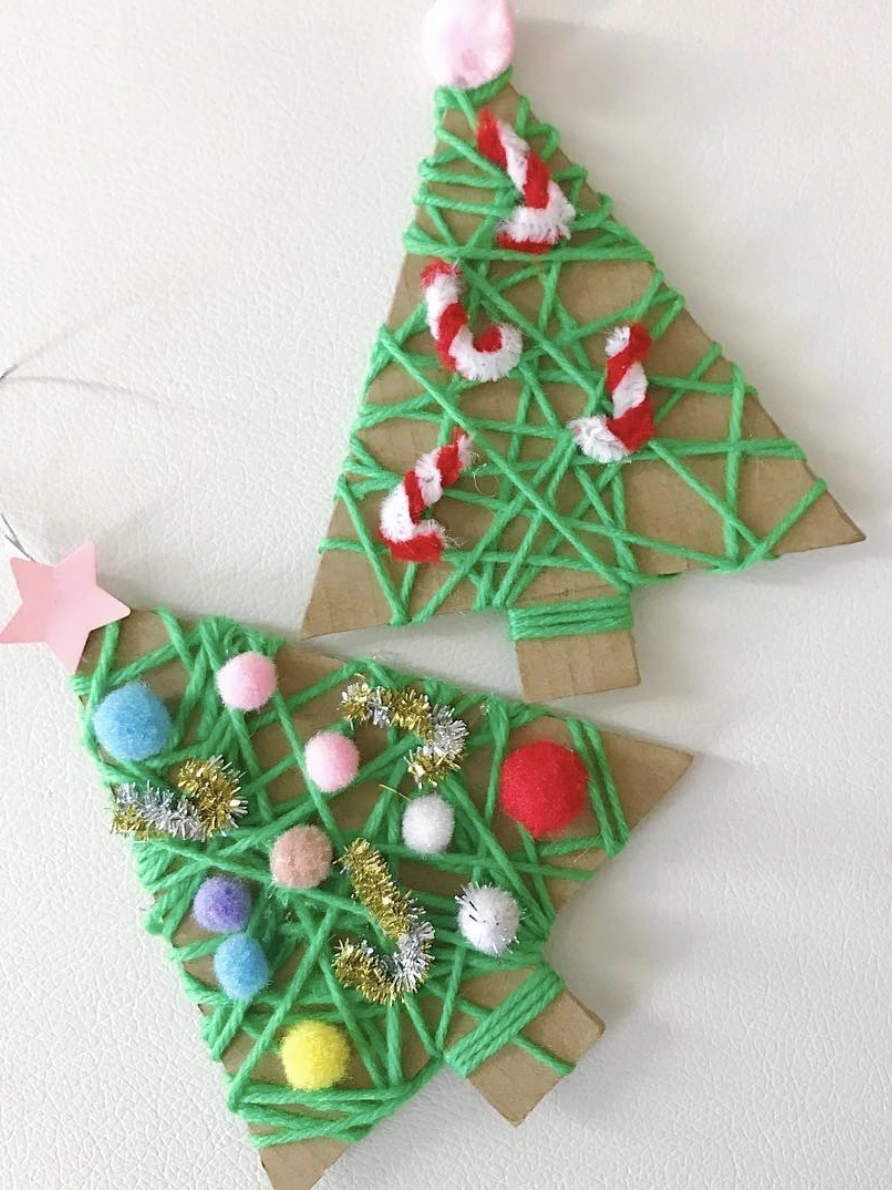
Credit: @yoursensorytherapist
How absolutely charming are these? Mamas, aunties, and everyone in the circle, this one calls your name.
Watch your child beam with accomplishment after crafting these wonderfully sweet tree ornaments. Plus, the process is straightforward, practically designed for tiny fingers.
If your search is for Christmas crafts for kids easy enough that the entire experience feels joyful, your hunt ends here. Let’s dive into the making.
How to Make This Craft Cut cardboard into Christmas tree shapes (or stars, bells, whatever floats your boat) Poke a small hole at the top for hanging Wrap yarn tightly around the cardboard form, covering it completely Glue the yarn ends in place on the back Decorate with pom poms, sequins, glitter, and/or small bits of holiday themed trims Let the glue dry Attach a piece of string or ribbon through the hole for hanging Display proudly on your Christmas tree!
Fingerprint Reindeer Pattern: A Simple Christmas Art Project
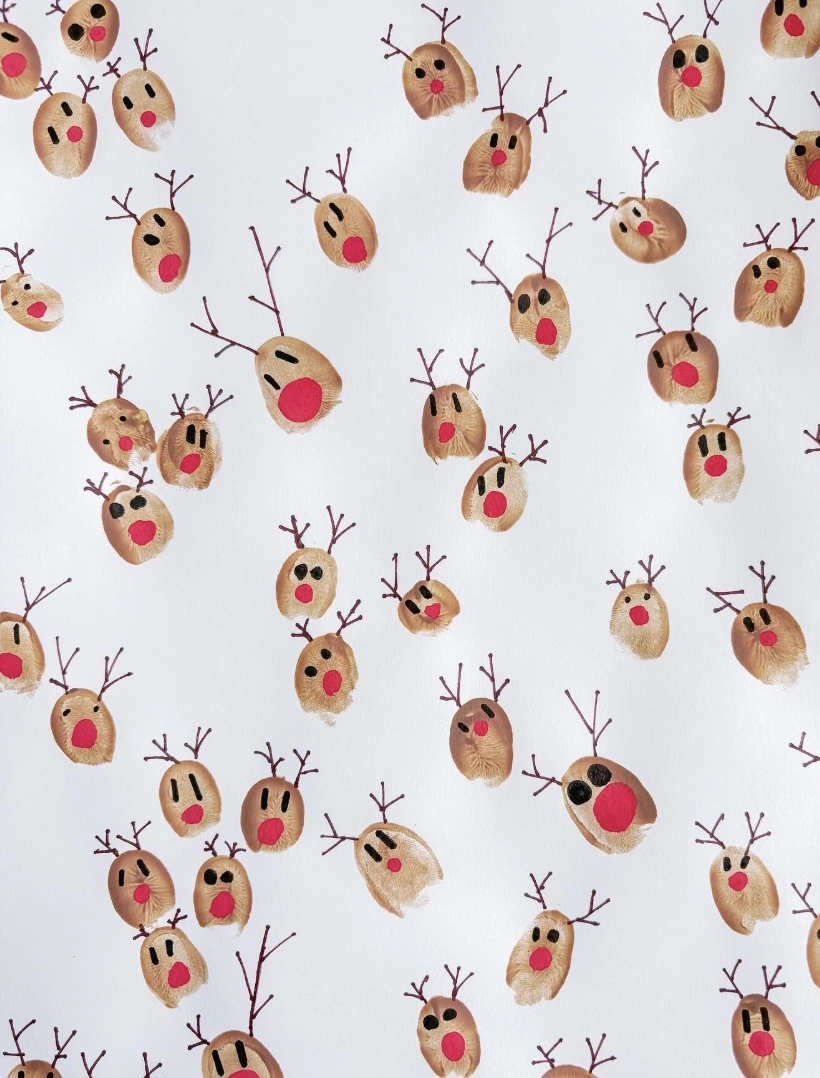
Credit: @theartstadium
Simplicity shines here, and this festive print delivers beautifully. Every reindeer stands as one of a kind, shaped from actual fingerprints in an activity that welcomes everyone.
It acts as a lovely nudge that striking art doesn’t demand elaborate steps or mountains of supplies. Let creations like this guide your other winter crafts for toddlers, celebrating the delight of making rather than chasing flawlessness.
How to Make This Craft Grab some brown ink pads Press your thumb (or a child’s) firmly onto the ink pad Transfer your inky thumbprint onto a piece of cardstock Repeat, spacing out fingerprints across the card to create a reindeer herd Once the ink is dry, use a fine-tipped brown marker to draw antlers extending from the top of each reindeer’s head Add a red nose to each reindeer with a red marker or paint Draw two eyes above the nose with a black pen Optional: add a seasonal greeting
Toddler-Friendly Christmas Handprint Crafts: Santa, Elf and Reindeer
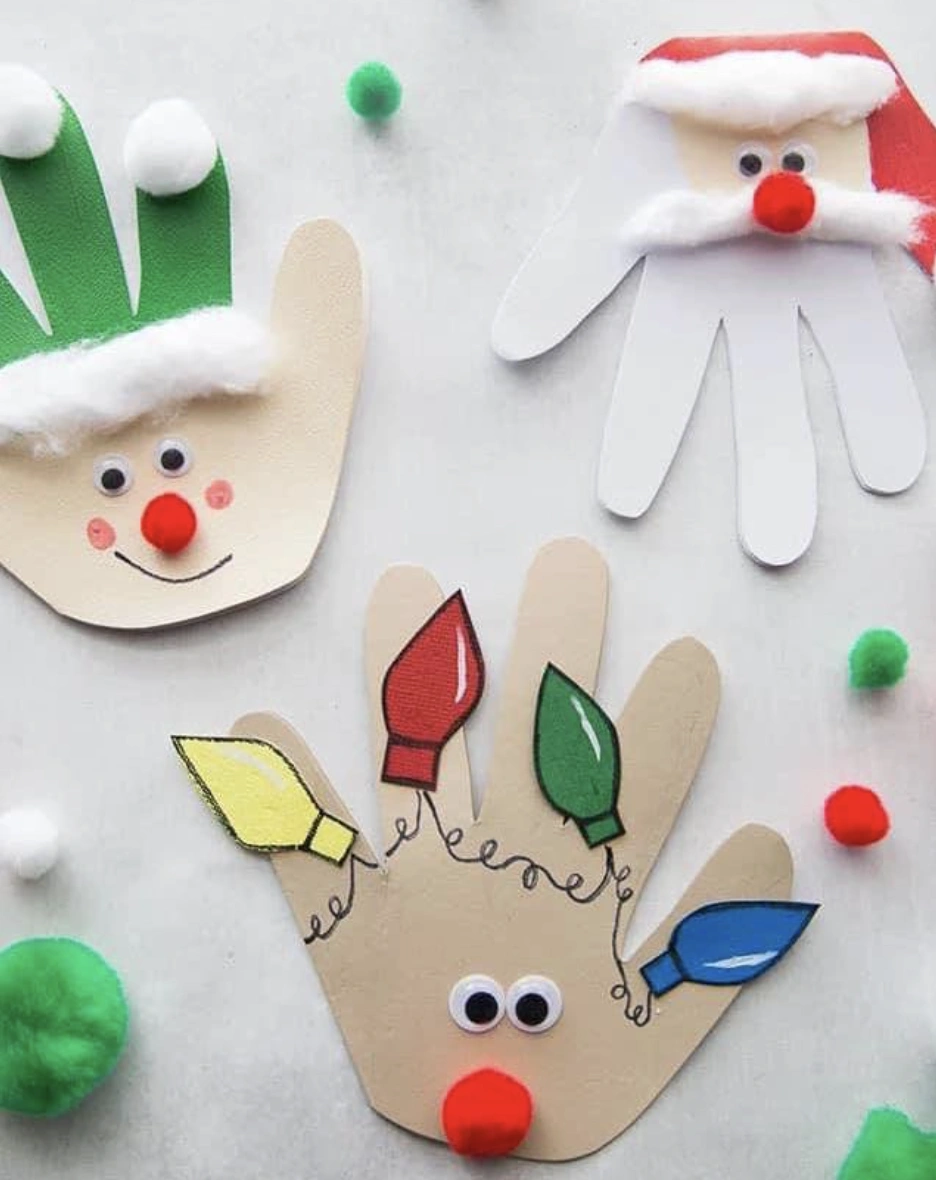
Credit: @angels_and_butterflies_crafts
Scrambling for last-minute gift ideas for the grandparents? You’re in excellent company.
Ditch the impersonal store finds; these Christmas handprint crafts are the real treasure. Imagine the look when they unwrap a handmade reindeer or Santa. Sentimental, precious, and remarkably simple to pull together, these creations solve the “thoughtful but speedy” holiday gift puzzle.
How to Make This Craft Trace your hand onto tan, green, and white construction paper Cut out the handprint shapes For Santa, add a white cotton beard and a red paper hat glued to the appropriate area Attach a red pompom for the nose For the Elf, create a green paper hat and glue it to the top of the green handprint Add a white cotton trim and red cheeks For Reindeer Lights: cut out small red, yellow, green, and blue paper lights Draw a string from the bottom to the lights and glue to the fingers Add googly eyes and red pompom noses to each character Let glue dry Display as decorations!
Toilet Paper Roll Christmas Characters: Santa, Reindeer, Elf, and Snowman
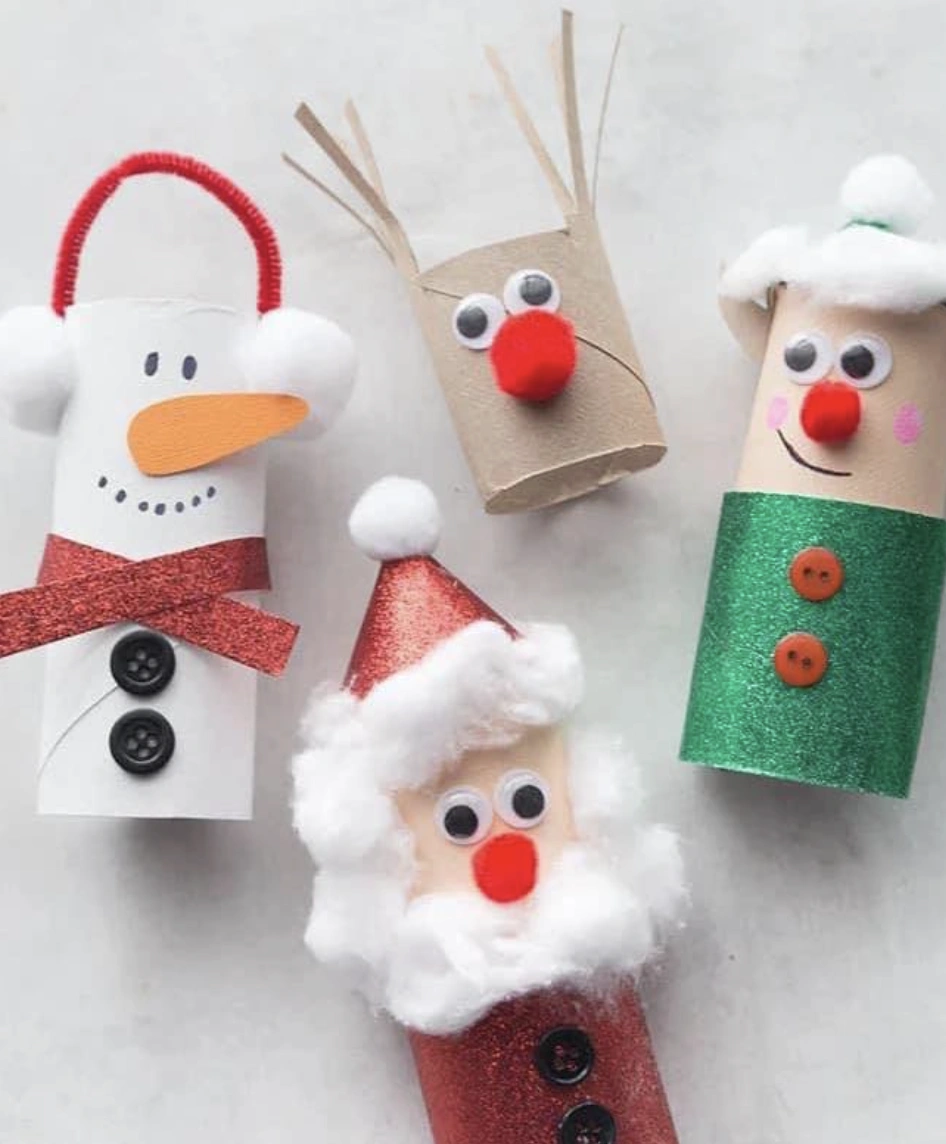
Credit: @angels_and_butterflies_crafts
Let’s be real: these saved the day when cabin fever struck during a pre-Christmas snow day. Picture the scene: snowman built, mugs drained, desperate times calling for creative measures.
Honestly, any reason to dive into a mess of glue and googly eyes is a good one! These effortless crafts deliver brilliant Christmas art for toddlers, keeping the crew engaged long enough for a much-needed breather!
How to Make This Craft Gather empty toilet paper rolls, craft paint, cotton balls, and glue Paint each roll accordingly (white for snowman, brown for reindeer, etc) Let paint completely dry before moving on Glue cotton balls to create beards and hats Cut out small paper features such as eyes, noses, and buttons Attach features using glue or double-sided tape Use pipe cleaners for snowman’s earmuffs, add red glitter for Santa’s suit Cut antlers from brown construction paper Affix antlers to reindeer Attach a hanging loop with craft glue to finish
Toilet Paper Roll Reindeer: Rudolf and Friends
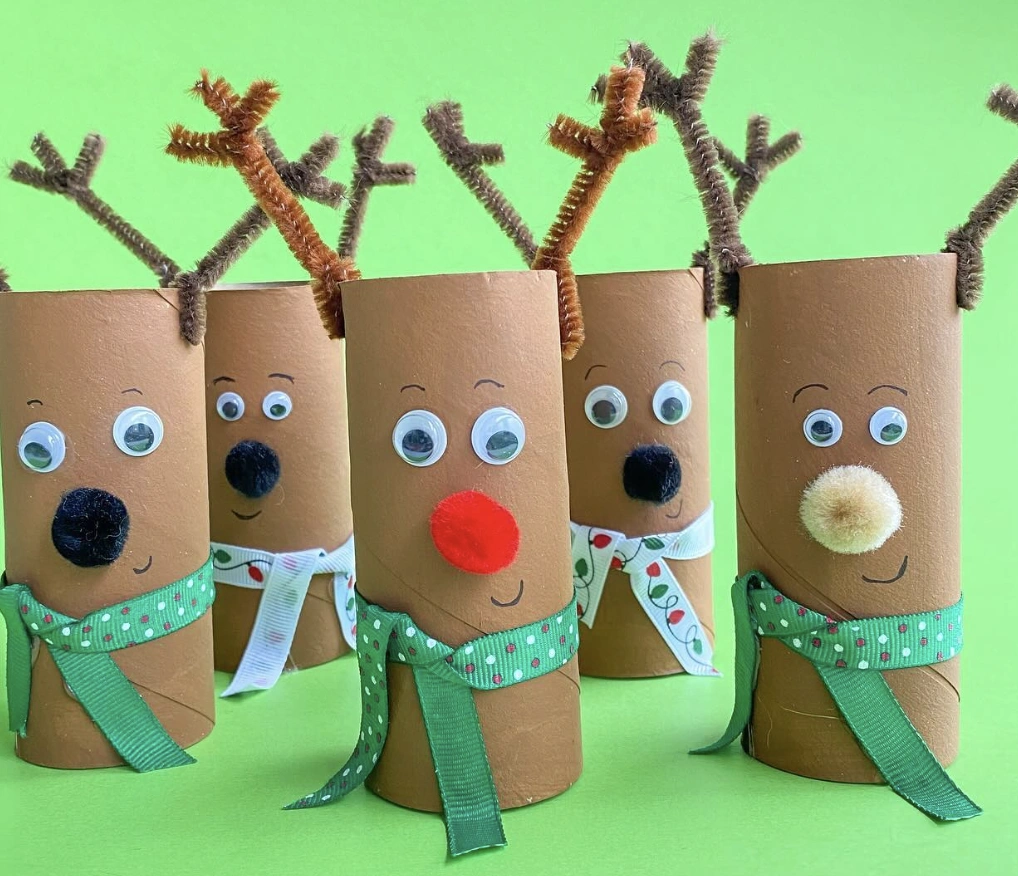
Credit: @kitchencounterchronicle
Forget the predictable, mass-produced reindeer herd. Skip the messy paint and glitter bombs typical of DIY holiday crafts for toddlers.
This version offers a fresh spin using humble toilet paper rolls. Minimalist details like googly eyes, pom poms, and pipe cleaner antlers deliver quirky, handmade appeal, and the ribbon ‘scarves’ are an unexpectedly sophisticated touch, don’t you agree?
How to Make This Craft Collect your empty toilet paper tubes and grab some brown paint Paint each tube brown and set aside to dry Patience is key Cut short sections of brown pipe cleaners and twist them to form antlers Use craft glue to attach the antlers to the tops of the tubes Stick on those googly eyes—where you place them determines their personality Choose a small pom pom for the nose and glue it on Cut ribbon pieces in festive colors and tie them around the reindeer’s -necks Finish by drawing a simple smile with a black marker
Wooden Spoon Reindeer: An Adorable DIY Ornament
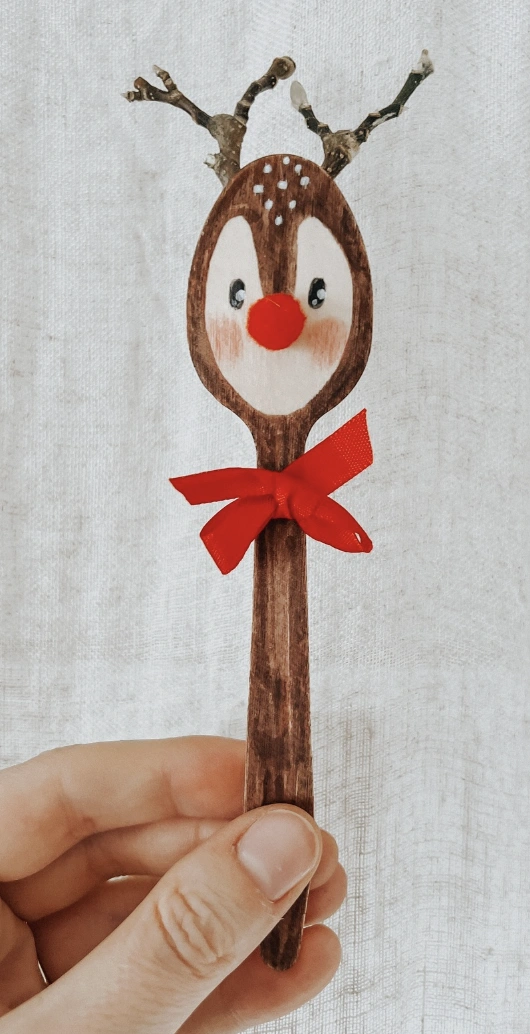
Credit: @fraeullein_jasmin
Direct your gaze toward this spoon reindeer! It registers as the sweetest creation imaginable.
The supply list stays short: a wooden spoon, a red pompom, some twigs, and paint! This little project shapes up as a delightful way to pass an afternoon indoors with the children.
When a long break stretches ahead, let this spark ideas for easy christmas crafts for toddlers! Anyone can bring this to life. Imagine an entire tree dripping with these charmers!
How to Make This Craft Start with a plain wooden spoon Lightly sand the spoon for better paint adhesion Paint the spoon head and handle with brown acrylic paint; let dry completely Apply a second coat Using a fine-tipped brush, paint the reindeer’s face: large, round eyes and light brown fur Add small white dots for a speckled effect around the face Glue a small red pom-pom for the nose Find or cut small twigs and glue them to the back of the spoon’s head for antlers Tie a small red ribbon around the handle just below the head
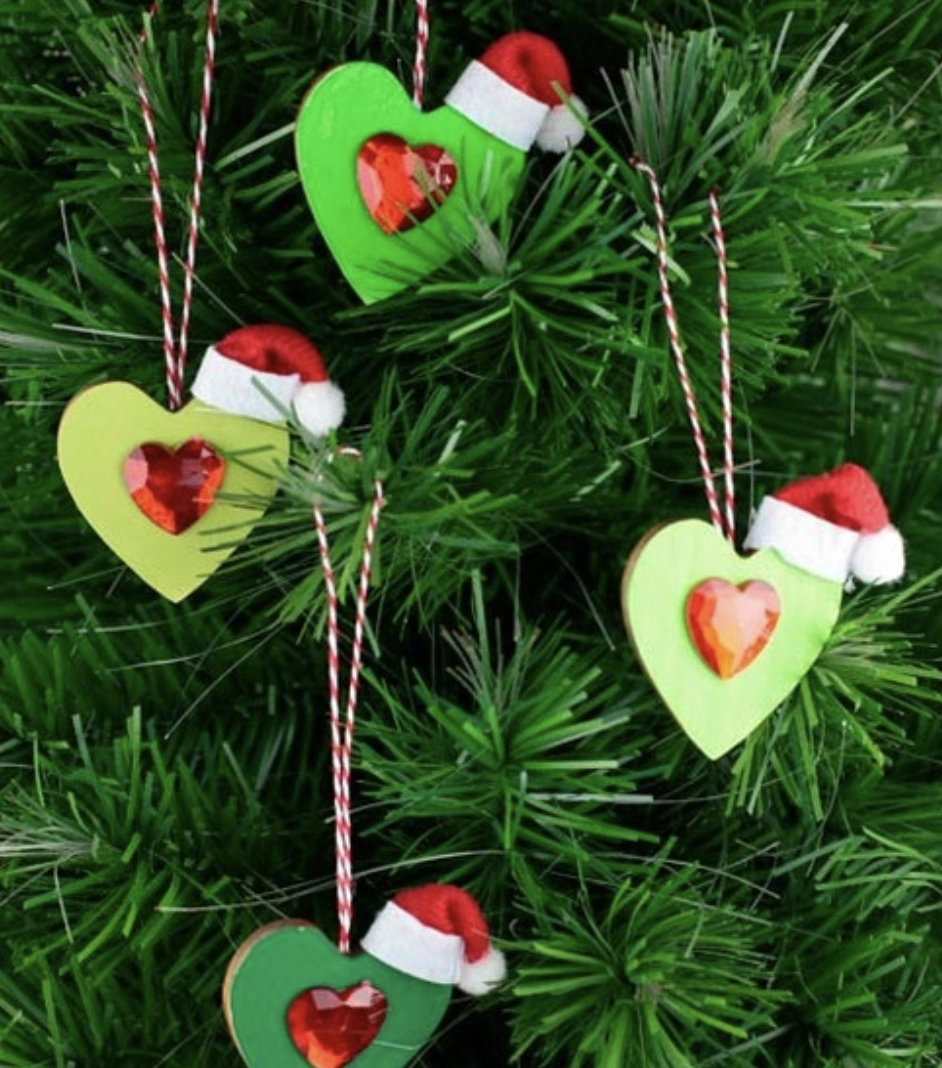
Painted Wooden Heart Christmas Tree Ornaments with Tiny Santa Hats
Credit: @nontoygifts
Does anyone else feel a pang of guilt binning their kid’s craft productions? These ornaments banish that problem completely!
Instead of collecting dust, they earn a proud spot on the tree for all to admire. This tradition began during a session of holiday crafts for kids last year, and now those hearts serve as a tender timestamp.
They’re sweet, full of cheer, and storing them with the seasonal decor feels justified. Total victory!
How to Make This Craft Cut heart shapes from thin plywood or cardboard Select green, red and other holiday-themed fabric scraps Cut the fabric slightly larger than the heart and glue the fabric to the heart using craft glue Fold edges and glue to back of heart Cut small Santa hats from felt and glue them to the top points of each heart Use cotton for trim Glue a sparkly gem to the center of each heart Attach baker’s twine to the top of each heart for hanging If desired, add small jingle bells or beads for extra flair
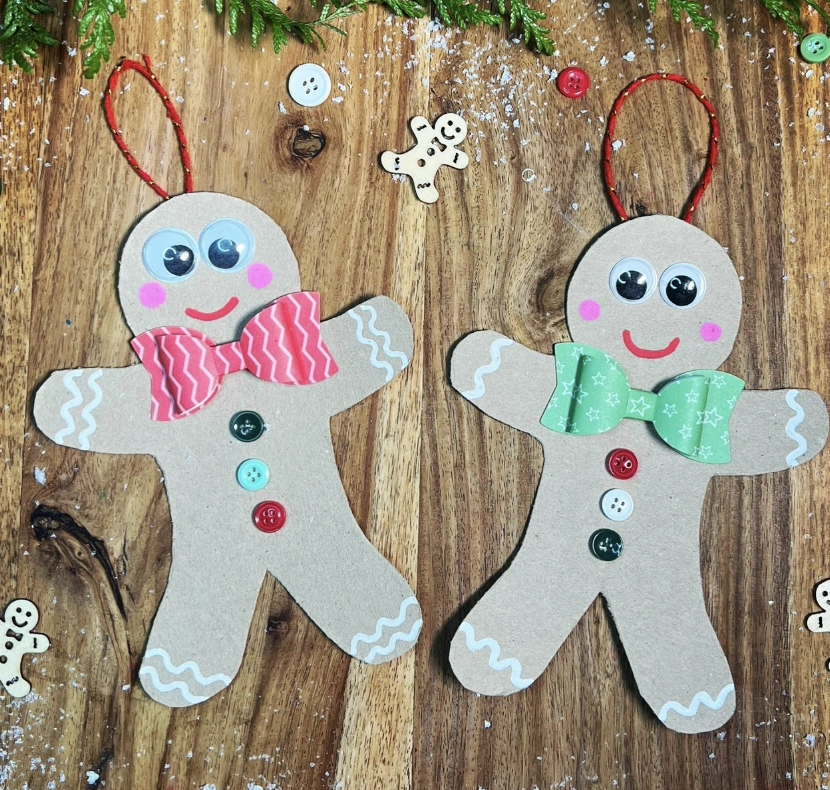
Two Handmade Gingerbread Man Ornaments: Googly Eyes and Button Accents
Credit: @whattodowithrasemoquette
Think of the grandparent whose heart belongs to simple, sincere treasures! They will adore these gingerbread men, stitched together with affection and a pinch of delightful wobbliness.
These go beyond simple ornaments; they register as miniature masterpieces from tiny hands. On the hunt for unique preschool Christmas gifts for parents who treasure emotion over mass-produced flawlessness? These could mature into beloved keepsakes, marking a truly special Christmas chapter.
How to Make This Craft On brown cardstock, trace and cut out gingerbread man shapes Use white puffy paint to create the -icing- trim along the edges Let dry completely Glue googly eyes onto each gingerbread person Cut out small bow ties from patterned scrapbook paper Glue a bow tie below the head Select colorful buttons and glue them to the gingerbread body Punch a small hole at the top of each figure Thread twine through the hole for hanging Arrange the gingerbread people into a garland
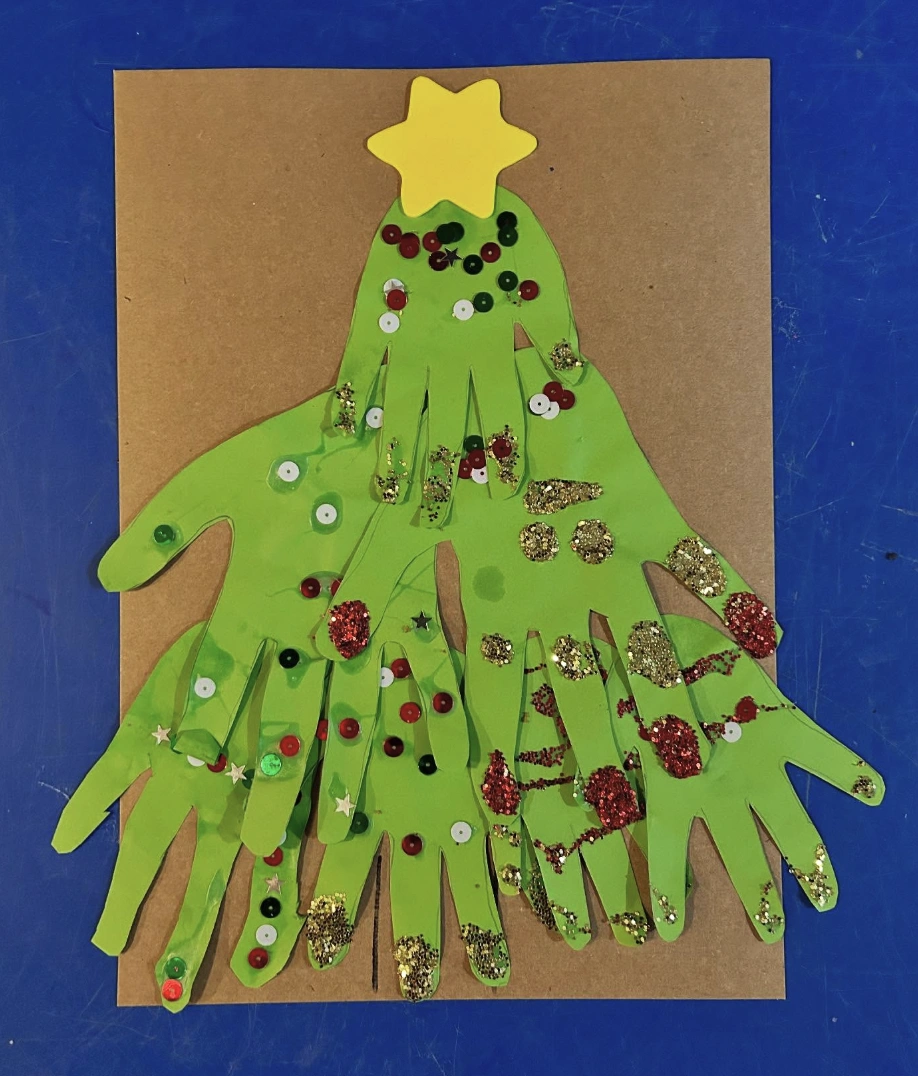
Handprint Christmas Tree Craft with Sequins and Glitter
Credit: @littletribechildminding
This precious handprint Christmas tree, dripping with glitter and sequins, radiates an elevated, almost runway-ready energy. It feels playful, echoing recent fashion moments that embrace youthful exuberance.
Step away from stark minimalism because these are the surprising splashes of hue your space craves. Plus, weaving in Christmas activities for toddlers like this invites everyone into the creative fold.
How to Make This Craft Trace child’s hands multiple times on green construction paper Cut out each handprint Glue the first handprint to brown construction paper as the bottom layer Overlap the remaining handprints to create a tree shape Cut a yellow star shape for the top of the tree Decorate the tree with glitter and colorful sequins Let glue dry completely before handling Present as a homemade holiday card
Adorable Handprint Santa Ornaments on Striped Tablecloth

Credit: @fraeullein_jasmin
A whole afternoon dedicated to Christmas crafts for kids easy projects with the little crew is on the calendar. And these handprint Santa ornaments register as the cutest creation ever.
They’re marked for production at the annual Christmas bash. Can you picture all the cousins splattered in paint, squealing with laughter?
They’ll hang beautifully on the tree or journey to the grandparents as gifts. So wonderfully festive and simple!
How to Make This Craft Preheat oven to 200 degrees Roll out air-dry clay to ¼ inch thickness Use a cookie cutter or stencil to cut out Santa head shapes Create a hole for hanging with a straw before baking Bake until hard, let cool completely Paint a beard and hat with white and red acrylic paints, respectively Sketch facial features in pencil then trace with paint Allow paint to dry, then seal with Mod Podge if desired Thread ribbon through the hole and tie for hanging Add white pom poms to the bottom of the hat
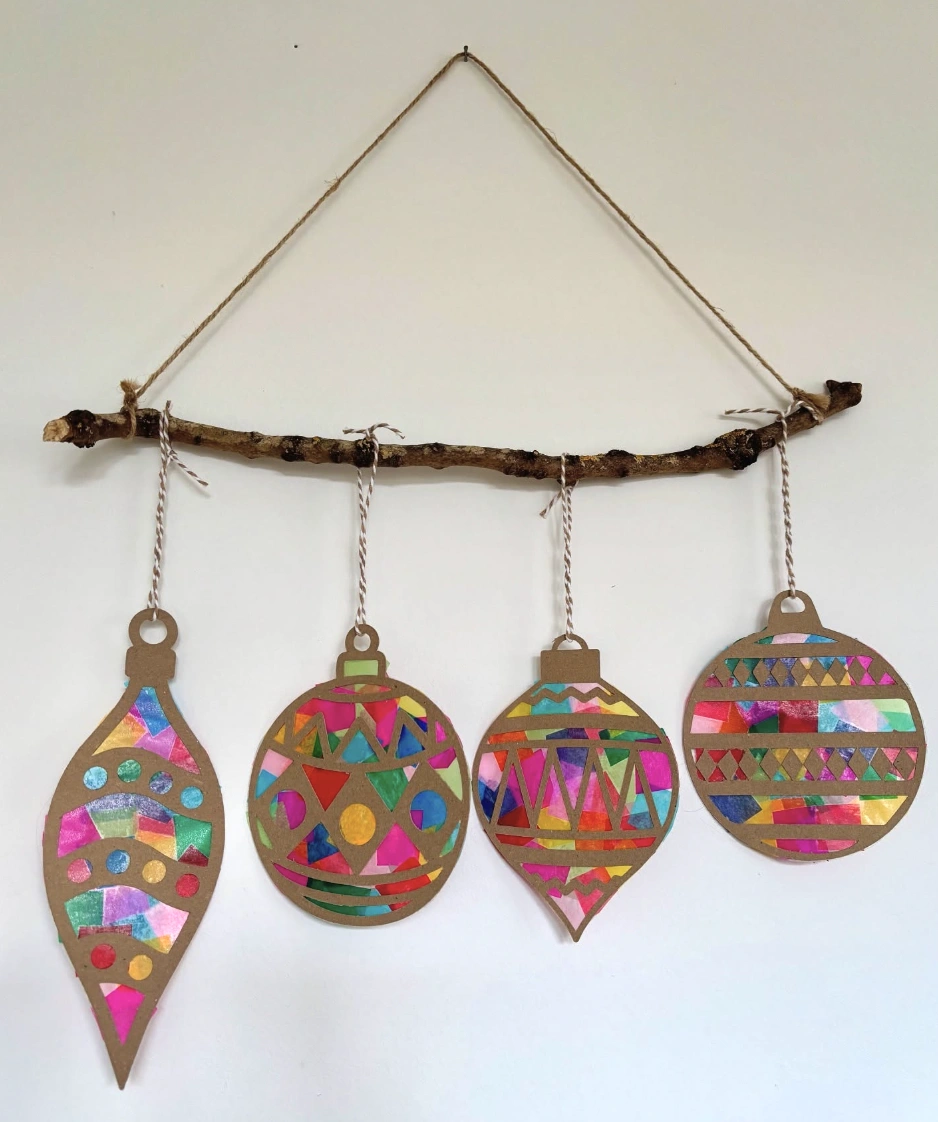
Natural Branch Ornament Hanger with Toddler-Crafted Baubles
Credit: @makemerryandcreate
The understated beauty of this display catches the eye immediately. A rough, untouched tree branch mounts against a plain wall, creating a gentle foundation for the real stars.
Upon closer inspection, each cardboard ornament reveals its own vivid tissue paper collage. Creations like this stand out as ideal Christmas crafts for toddlers, championing raw creativity over rigid perfection.
How to Make This Craft Gather a sturdy branch from outside Cut out cardboard ornament shapes of varying sizes Cut colorful tissue paper into small squares Coat the cardboard ornaments with glue Press tissue paper squares onto the glue until covered Seal tissue paper with a second coat of glue Let glue dry Punch holes at the top of each ornament Cut pieces of twine for hanging the ornaments Attach the ornaments to the branch at different lengths Tie a longer piece of twine to each end of the branch to create a hanger
Salt Dough Snowman Ornaments, Perfect Christmas Art for Toddlers
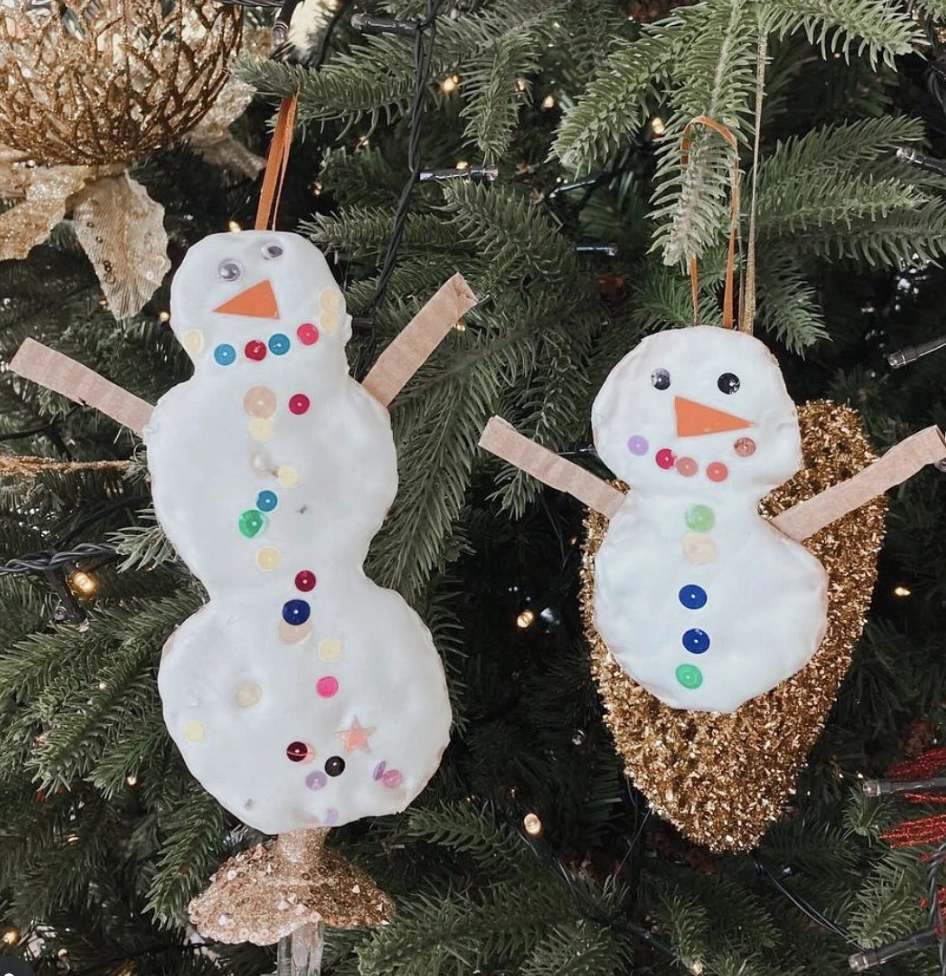
Credit: @kidwave.gr
These salt dough snowmen pack surprising durability and they magnetically hold the attention of little ones for a solid stretch during the holiday whirlwind! Plus, guiding some Christmas art for toddlers offers a quiet pocket of calm. A clear win on all fronts, if you ask anyone.
How to Make This Craft Roll out thick layer of craft glue on wax paper in snowman shape Cover craft glue in white glitter Insert colored beads into the glue for buttons Cut small triangles from orange paper and press into the glue for the nose Allow glitter to dry completely, about 10-12 hours Peel the snowmen off of the wax paper Break small twigs from outside for arms Glue twigs to snowmen as arms Glue ribbon to the back of snowmen as a hanger Decorate snowmen with additional beads if desired
Beaded Candy Cane Ornaments: An Easy Toddler Project
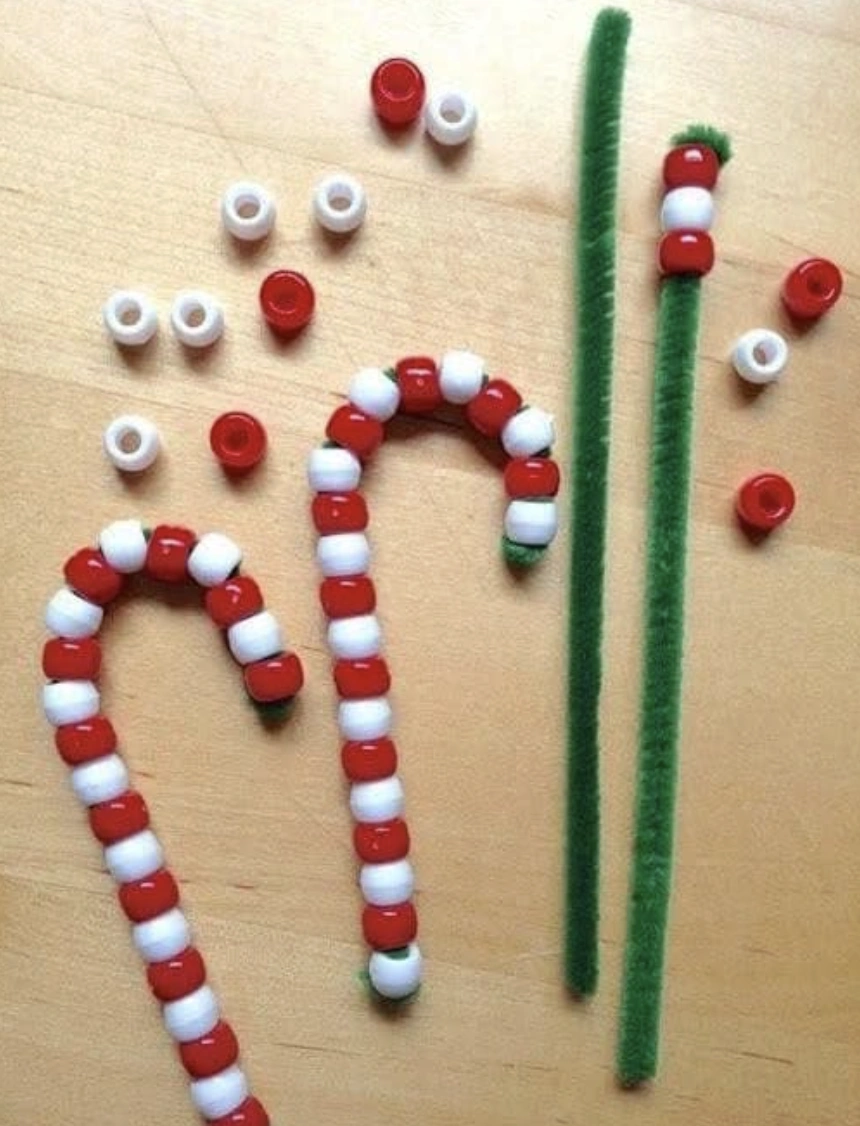
Credit: @haleyselinaa
These beaded candy canes plug into that playful yet fashion-forward current. Consider it the toddler interpretation of the Y2K beaded handbag revival that refuses to quit!
Truthfully, few tasks beat the simplicity of sliding beads onto pipe cleaners, cementing these as the prime easy Christmas crafts for toddlers. Kids can whip up ornaments or even tiny bags. It’s all about approachable luxury, tailored for them.
How to Make This Craft Gather green pipe cleaners, red beads, and white beads Bend the top of a pipe cleaner over to create a stopper String red and white beads onto the pipe cleaner, alternating colors Leave about an inch of pipe cleaner empty at the bottom Curve the pipe cleaner into a candy cane shape Secure the bottom beads by bending the pipe cleaner end Twist the bottom end to secure Use as ornaments, gift embellishments, or festive decor
Clear Christmas Ornaments Filled with Colorful Fabric Scraps
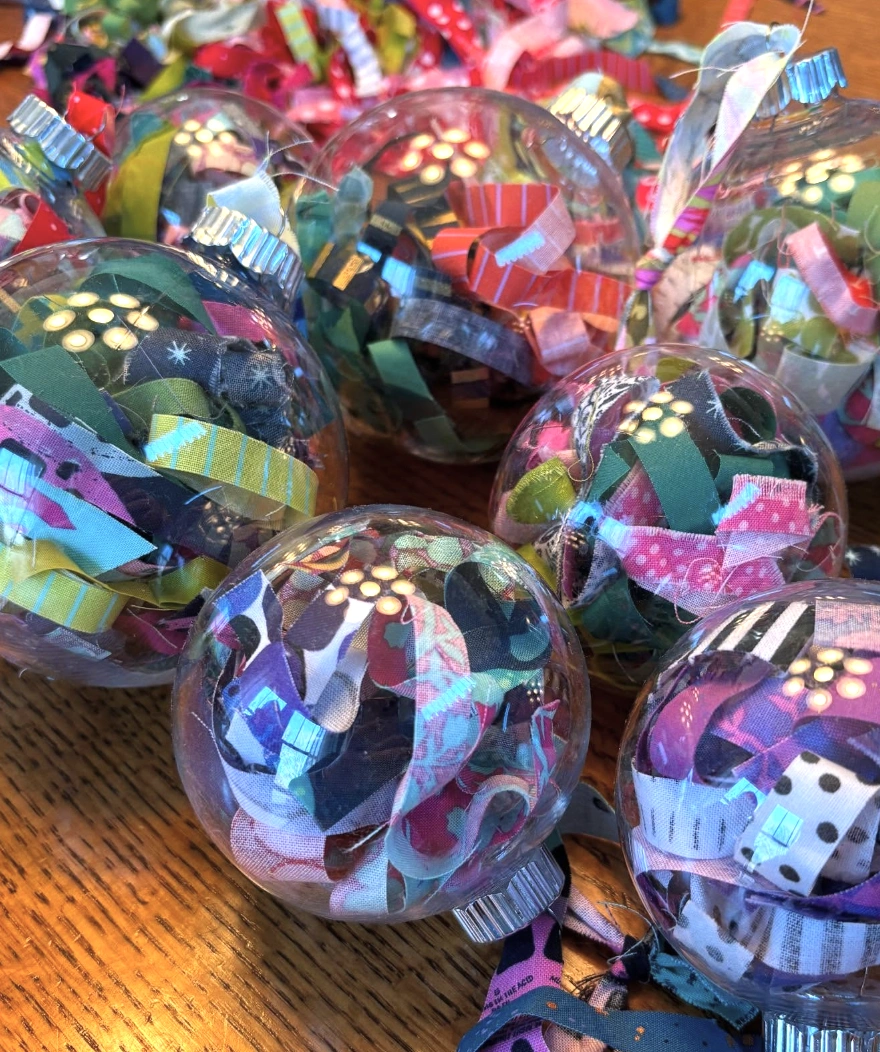
Credit: @kjlorfeld
Let’s be straightforward, a slight wonkiness defines them, yet that’s exactly where their magic lives. These ornaments echo the sort of creation a parent clutches close.
Small children crafting these as preschool Christmas gifts for parents imbues each fabric snippet with a secret story. Hanging them on the tree floods the room with a wave of nostalgic, handmade warmth.
How to Make This Craft Gather your scraps: colorful cotton, silk, or even ribbon leftovers work great Cut the fabric into small strips roughly 1/2 inch wide and 2-3 inches long Carefully remove the ornament cap from the clear plastic ball Start feeding the fabric scraps into the ornament Use a small tool or skewer to arrange the fabric evenly inside Continue filling until the ornament is packed to your liking Replace the ornament cap securely Add a decorative ribbon or ornament hook to hang it on your tree Display and enjoy!
DIY Cardboard Christmas Tree Toddler Activity with Pom Poms and Pipe Cleaners
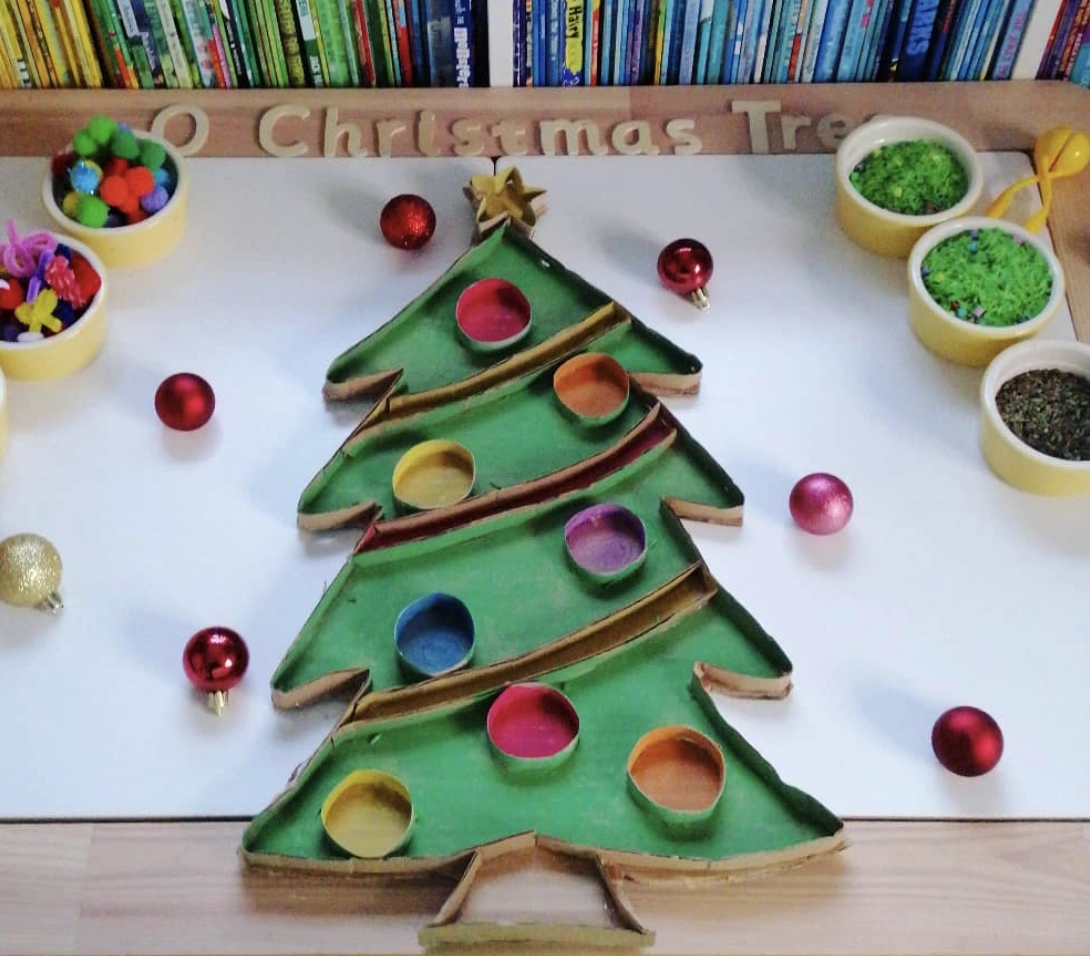
Credit: @play_and_learn_with_rhys
That cardboard Christmas tree radiates pure cuteness, right? The rainbow ‘ornaments’—those pom poms and pipe cleaners—are a stroke of genius!
Little hands probably adore the power to decorate and redesign it endlessly. Scouting for easy holiday crafts for kids?
This setup could genuinely absorb their focus for ages! It’s a total delight!
How to Make This Craft First, sketch a simple Christmas tree shape on a piece of cardboard Cut the tree out Create several round recesses that are spread out on the tree Paint tree shape with green craft paint and let it completely dry Prep small bowls of colorful crafting materials Pom poms, dyed rice, glitter Let kids explore and fill in the different recesses on the tree with various objects Encourage sensory exploration of colors and textures Adult supervision is recommended during play
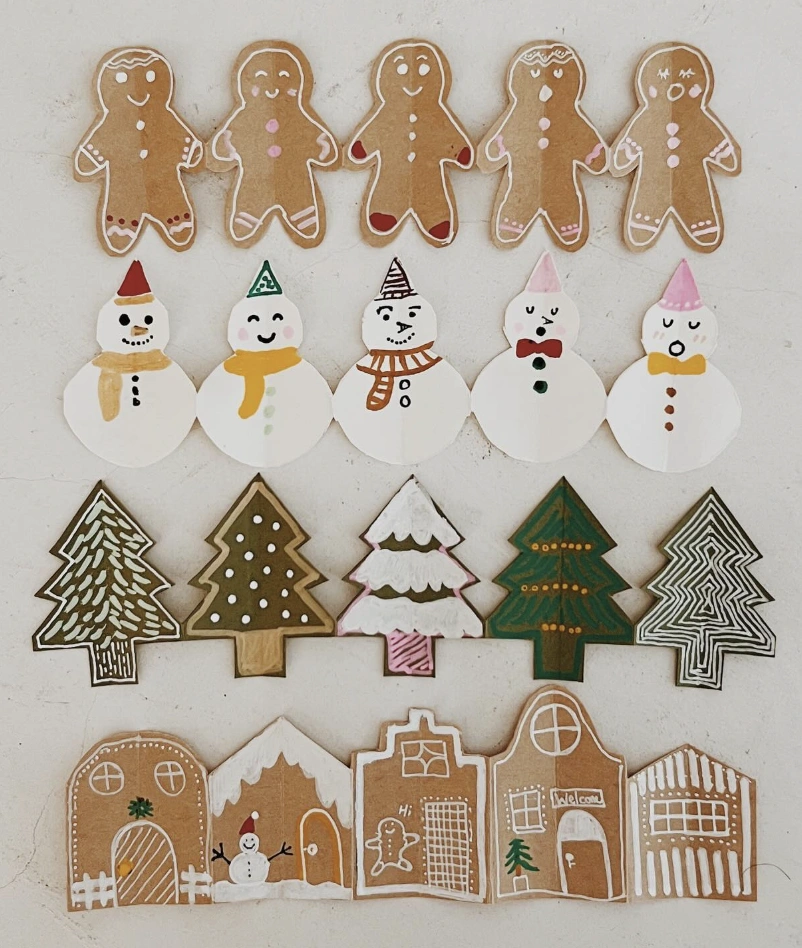
Easy Toddler Christmas Crafts: Paper Gingerbread Men, Snowmen, Trees & Houses
Credit: @alandalicia
Moms hunting for straightforward victories, this one lands squarely in your lap. We all grasp the sheer exhaustion that Christmas handprint crafts with toddlers can trigger.
That’s precisely why these paper crafts resonate so strongly. Prepping the bulk in advance and then releasing the kids with a set of markers is the move.
It’s ideal for keeping energetic little hands productively busy (and somewhat tidy) on a brisk afternoon. This feels entirely manageable.
How to Make This Craft Sketch out your designs on paper: gingerbread men, snowmen, Christmas trees, houses Cut out these design templates Trace those templates onto brown and white construction paper Cut out the traced shapes Decorate the cut-out shapes with colored markers or paint Punch holes in the top of each shape String the shapes together with twine or ribbon Hang and enjoy your festive banner!
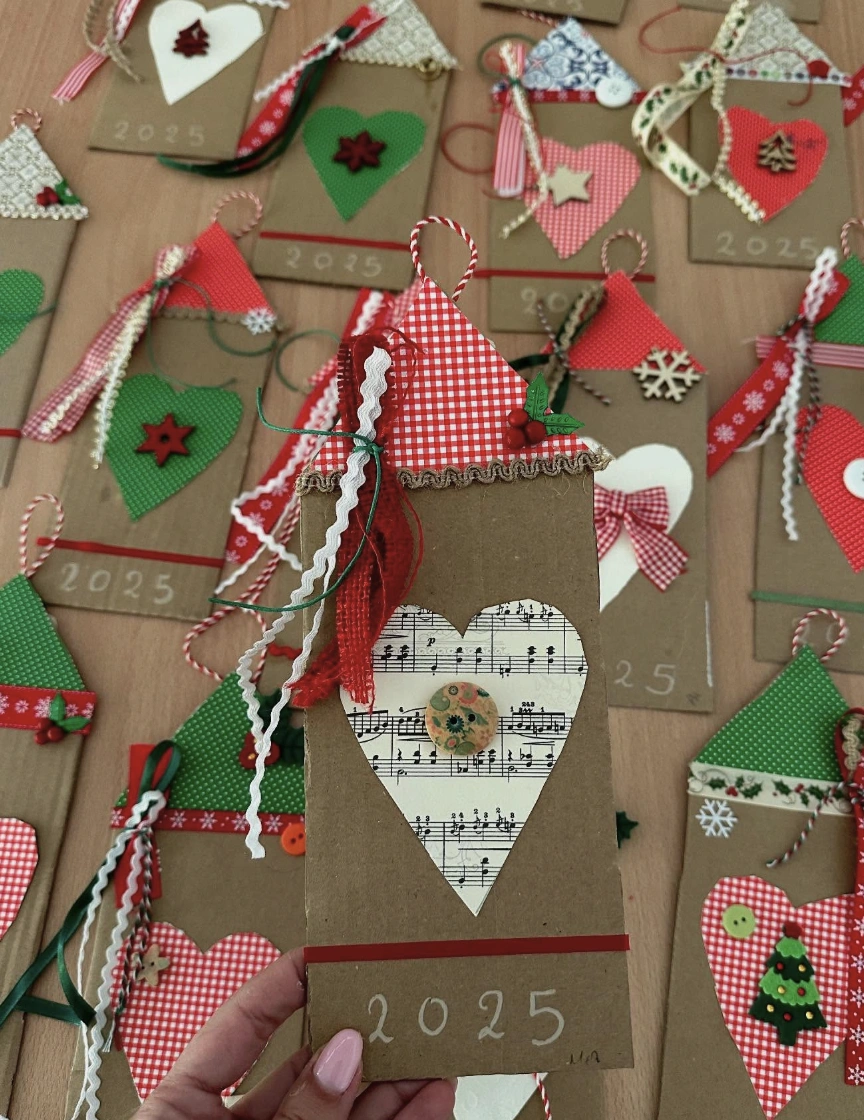
Adorable Handmade Cardboard Christmas Ornament Craft Project
Credit: @evis_school_world
Stumped on how to occupy your small companions during the festive rush? The solution sits right here!
These simple cardboard ornaments answer the call. The real struggle involved finding age-appropriate christmas activities for toddlers that didn’t devolve into pure chaos, and these keep things wonderfully manageable.
Brace yourself for memory-making (and adorable ornament crafting!) armed with basic paper scraps, kid-safe glue, and trusty cardboard. You truly have this handled!
How to Make This Craft Get some cardboard – cereal boxes work great Cut the cardboard into rectangular shapes, about 4×6 inches Fold each rectangle in half to create a card shape Cut out heart or tree shapes from scrapbook paper or fabric Glue these shapes to the front of the cards Add ribbon, buttons, lace, and other embellishments using glue Write -To- and -From- on the inside of the card Add the gift card Write the year Spread some holiday cheer!
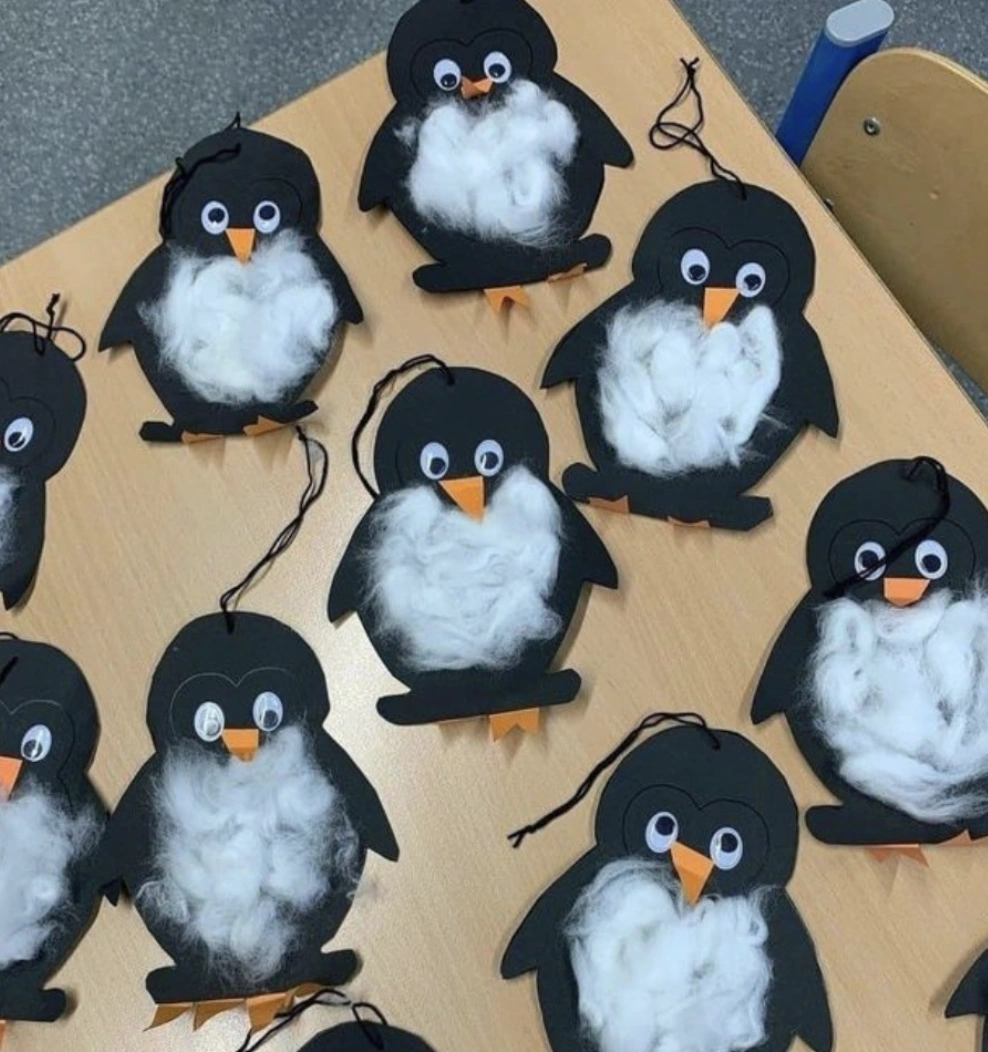
Festive Penguin Ornaments: Black Paper, Cotton Ball Bodies, Orange Beaks
Credit: @veritas_education
These penguin ornaments hit the adorable meter hard! Remember the quest for winter crafts for toddlers just days ago?
These fit the bill perfectly! They project an undeniably sweet, homespun aura, which aligns with everything trending right now!
And the black and white palette feels so timeless, meaning they’ll never clash with existing holiday arrangements. Making these with the children this season is non-negotiable!
How to Make This Craft Start by drawing a penguin shape on black construction paper, and cut it out Cut out a small orange triangle for the beak and two small orange feet from construction paper Glue the beak and feet onto the penguin’s body Pull apart cotton balls to make them fluffy Glue the cotton balls onto the penguin’s belly Glue on googly eyes to the penguins face Punch a small hole at the top of the penguin Thread a string or ribbon through the hole for hanging Admire your adorable penguin ornaments!
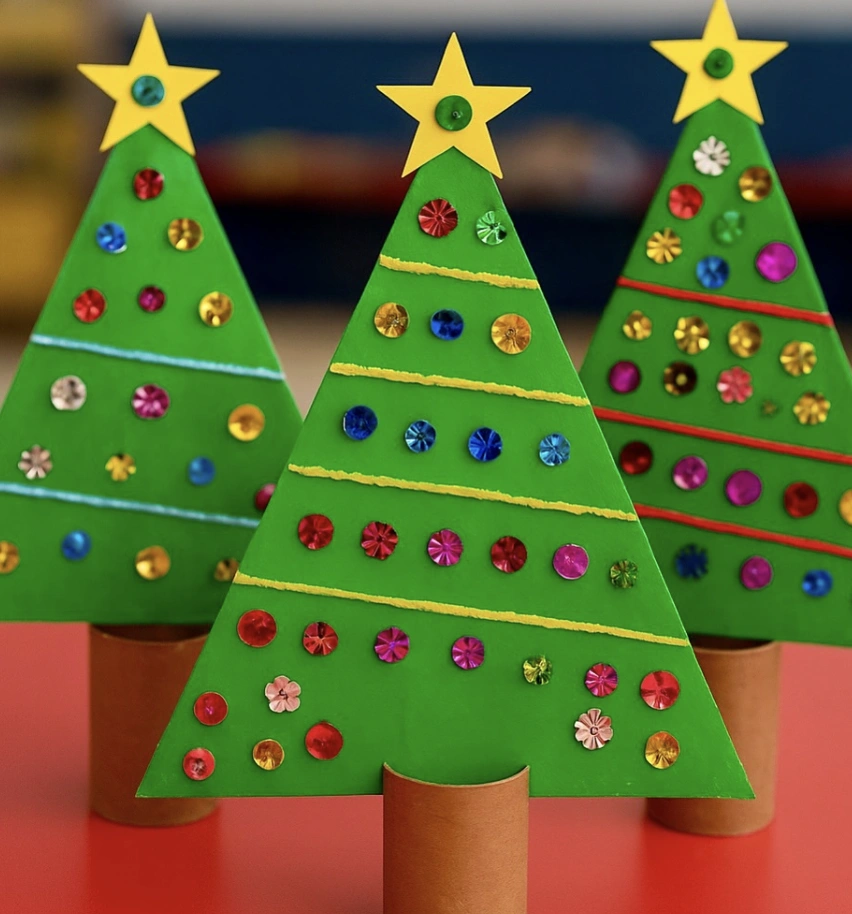
Green Cardstock Christmas Trees with Sequins and Cardboard Tube Bases
Credit: @kikka_arte
There’s a unique soulfulness to handmade decorations, isn’t there? Placing one or two of these on a bookshelf or a quiet side table infuses the corner with a childlike tenderness.
It calls to mind the search for easy december crafts for toddlers to share with a niece and nephew, something cheerfully straightforward they could feel genuinely proud of. A small number of well-placed accents always trumps a cluttered spread, yes?
How to Make This Craft Grab green cardstock, a pencil, and scissors Draw and cut out a triangle Using colored craft tape, add horizontal strips across the triangle Select sequins of different colors and glue these at random onto the green cardstock Punch a hole in the yellow cardstock to match the sequin size Get your glue gun and stick one small sequin on top of the paper Grab a pair of scissors and cut the brown toilet paper roll in half Add glue to the bottom of the triangle and the inside of the paper roll Let the glue dry fully Now you’ve got your very own homemade Christmas tree
Egg Carton Christmas Tree Ornaments with Wooden Stars
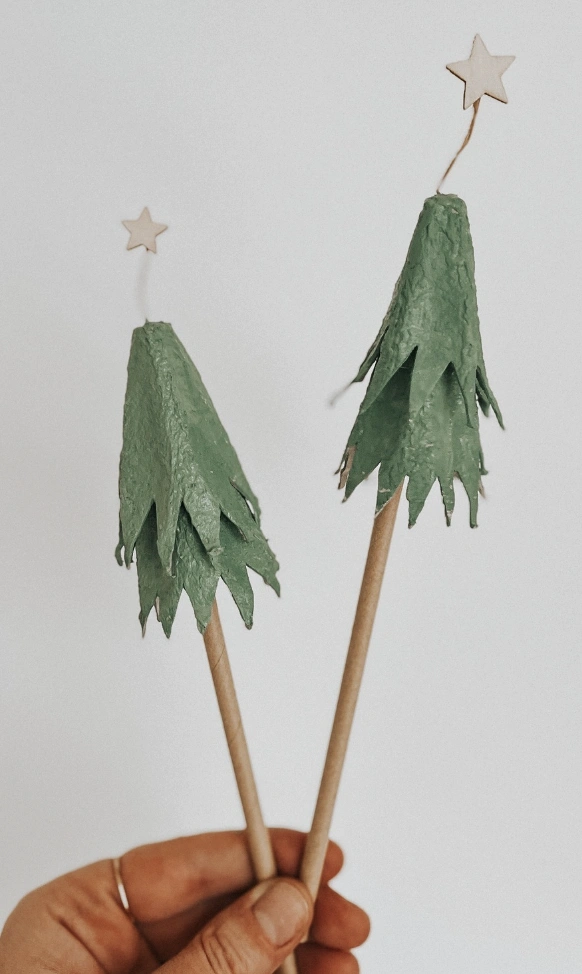
Credit: @fraeullein_jasmin
Truthfully, this project is tailor-made for holiday crafts for toddlers and letting them attack the green paint with wild abandon. The irregular edges and thick paint blobs?
They build character. And believe it, showcasing their handiwork elevates the entire holiday feeling to something truly magical.
How to Make This Craft First, raid that recycling bin! You’re gonna need an egg carton Carefully separate the individual egg cups Now, grab your scissors and get to snipping! Cut each cup to resemble tree branches It doesn’t have to be perfect Get your green paint ready Slather that egg carton shape with a beautiful coat of green paint Let it dry completely Find a small, thin wooden dowel Poke a small hole in the top of the egg carton tree Insert the wooden dowel into the hole Make sure it’s nice and secure Find any little wooden star Glue that on top of the tree
Upcycled Cardboard Reindeer – Easy Toddler Christmas Project
Credit: @kikka_arte
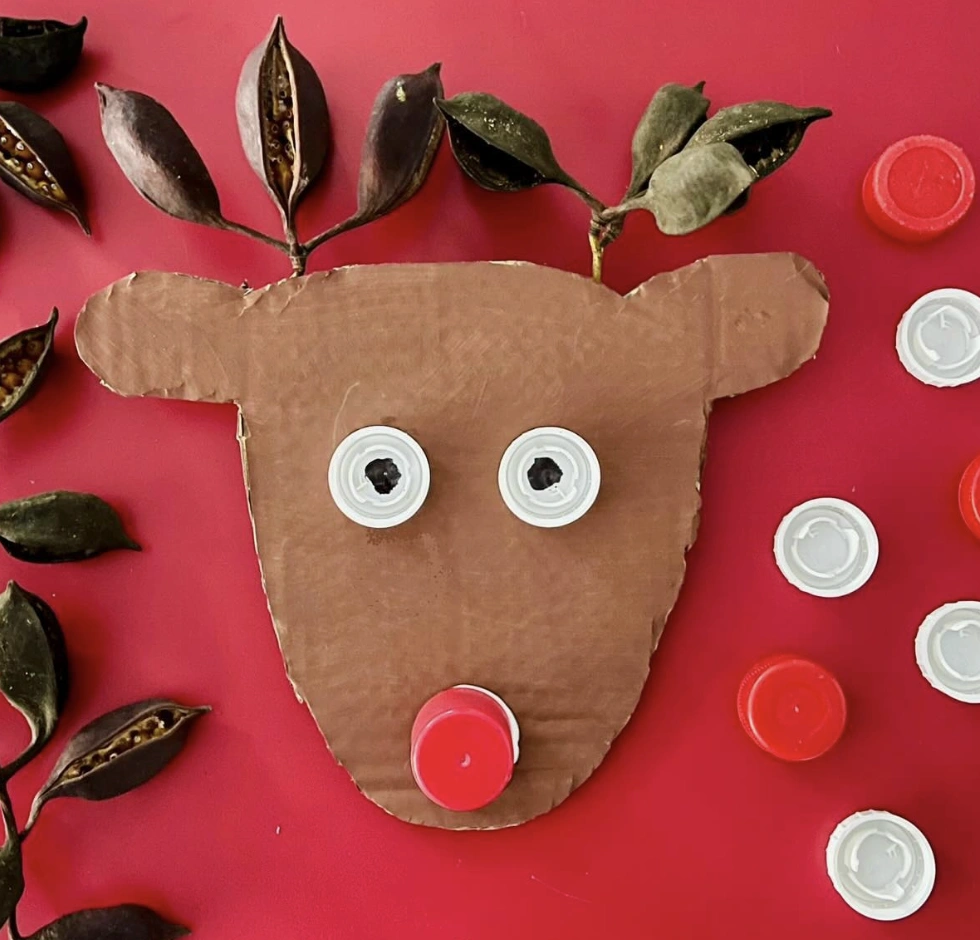
Full disclosure, no one’s winning a domestic goddess trophy for this, and that’s the entire point! This reindeer craft celebrates being perfectly imperfect.
When the hunt is on for profoundly easy Christmas crafts for toddlers, this one stands victorious. The raw simplicity of the materials shines: cardboard, bottle caps, even seed pods transformed into antlers.
Cleanup afterward barely registers as a chore! Truly, just grab the glue and watch the creative chaos unfold.
How to Make This Craft First, get a piece of cardboard and sketch out the basic head shape Don’t worry, it doesn’t have to be perfect Now, raid your recycling bin for some bottle caps White caps will become eyes Grab your glue Apply glue to the rim of the bottle caps and stick to the cardboard head Find a single red bottle cap for the nose Follow Step 3 to glue Start looking for natural elements Gather fallen seed pods for antlers Lay out the seed pods in antler positions Once you’re happy with the arrangement, carefully glue the seed pods to the cardboard Let everything dry completely
Adorable Santa Claus Ornament Made from Toddler’s Handprint
Credit: @growing_up_murphy
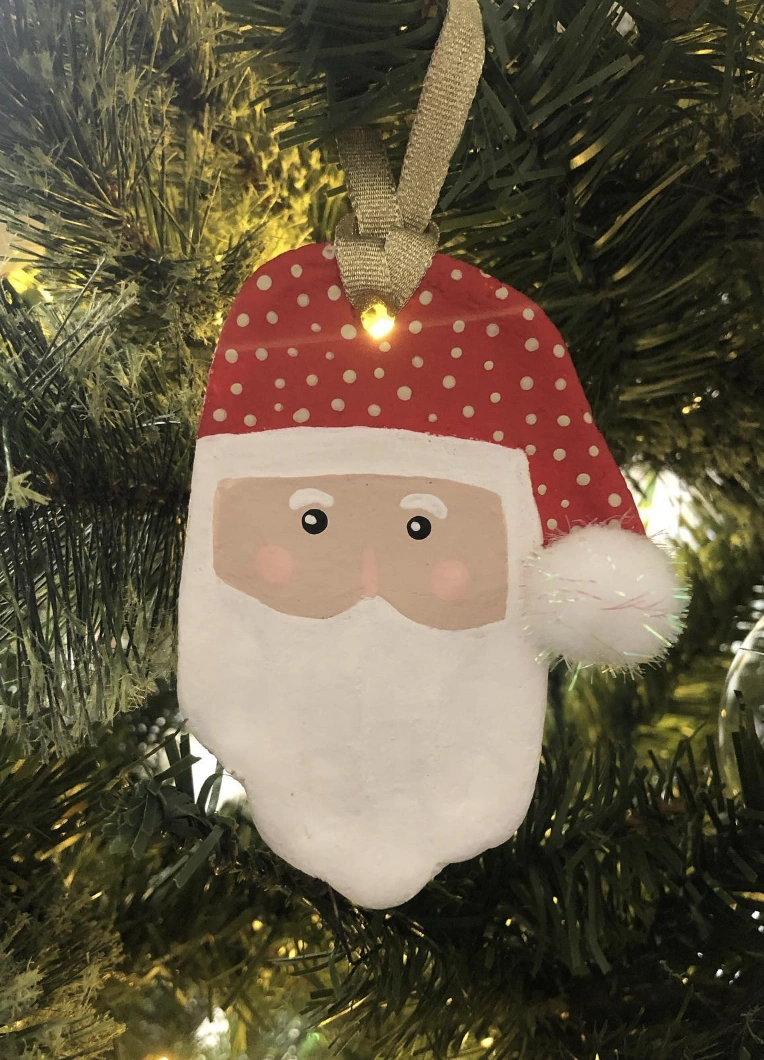
Struggling to simultaneously occupy the kids and generate cute ornaments? The solution has arrived.
This Santa ornament is a complete triumph. Consider all the joyous memories bottled up while creating Christmas handprint crafts with your small ones!
This year, skip the mass-produced aisle fillers completely. This homemade charm is where the real magic resides.
How to Make This Craft Grab your clay Start with a ball of white clay, then shape into the basic form of Santa’s face For the hat, use red clay Shape it separately and then attach it to the top of the face Pinch a small amount of white clay and roll it into a sausage shape Stick it to the bottom of the face for the beard Create the polka dots by mixing red clay with white clay Bake the clay according to package directions Let it cool completely Using a fine-tipped paintbrush, add detail to the eyes and cheeks with acrylic paint Drill a small hole at the top for hanging, if needed Thread a ribbon or string through the hole to create a hanger
Finger-Painted Christmas Tree with Cereal Ornaments and Ribbon Garland
Credit: @once.upon.a.playtime
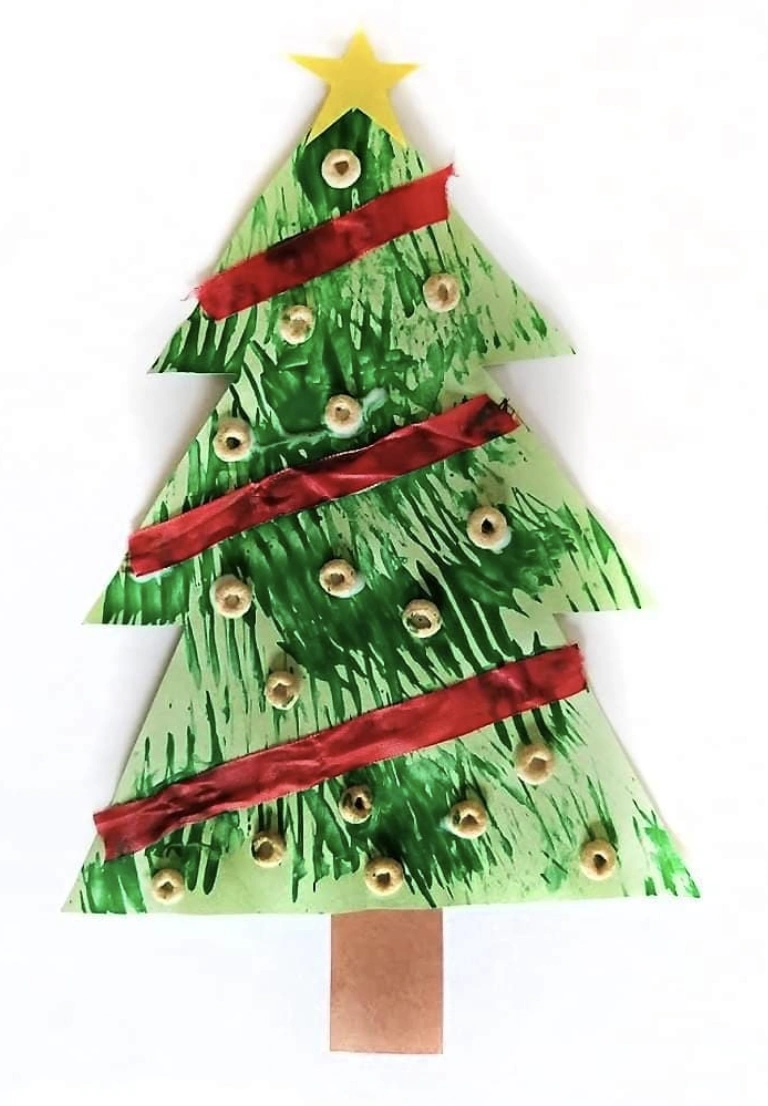
The use of actual Cheerios as ornaments is a clever, edible detail that delights. A red ribbon ‘garland’ cuts beautifully against the green paint.
This craft completely satisfies the brief for simple preschool Christmas gifts for parents. Messy, yes, undeniably, yet saturated with affection and memory, which is the only currency that truly counts.
How to Make This Craft Get a piece of cardboard, then cut out the overall tree shape Now grab your green paint Slather that cardboard shape with a base coat While the paint is drying, gather red ribbon to be used for garland Arrange pieces of red ribbon to give the affect of garland, then glue Apply white glue to cardboard, the stick on your cereal Use yellow cardstock to cut out the star, glue on the top of the tree Cut a rectangular brown piece of cardstock for the trunk, glue below the Christmas tree Let the glue and paint dry
DIY Cardboard Christmas Trees with Gold Star and Twine
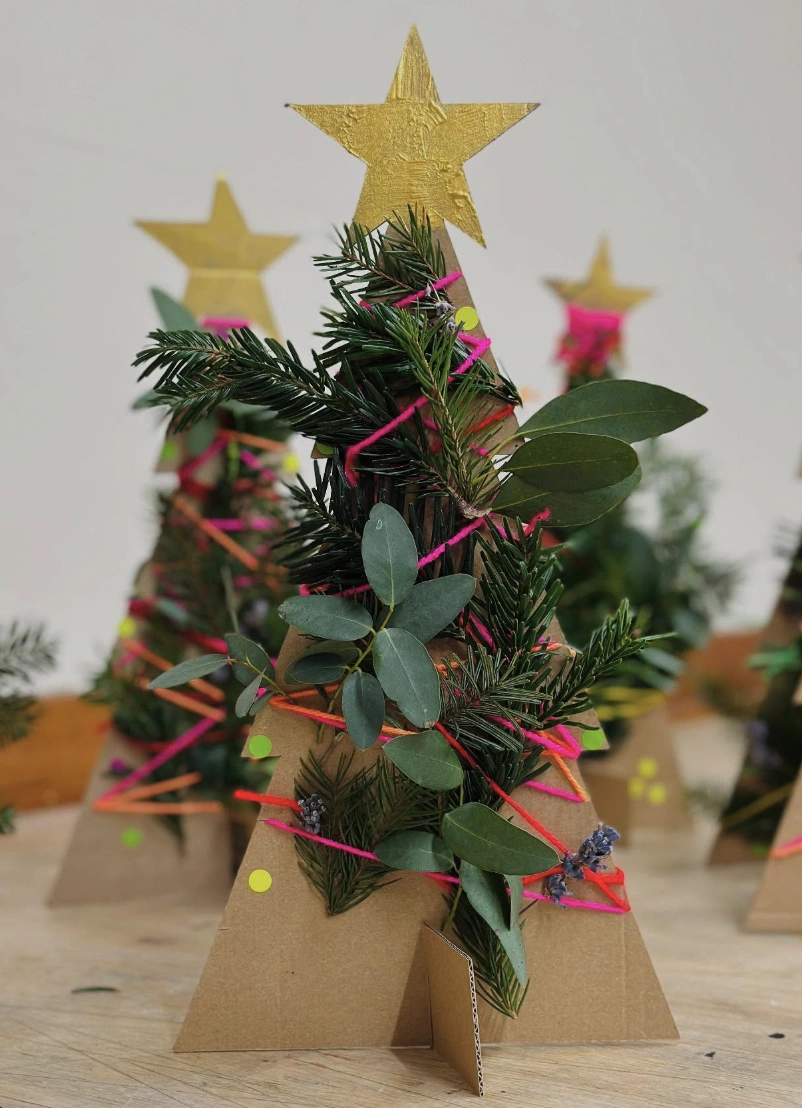
Credit: @ourartclub
Obsession levels with these mini Christmas trees are sky-high! An entire afternoon is already being mentally cleared for this endeavor!
Picture it now: hot cocoa steaming, fuzzy socks warming, and a surface buried in supplies for winter crafts for toddlers. It’s destined to be the most precious holiday vignette imaginable!
The vision includes using them as brunch centerpieces or surprising friends with them as small, festive tokens. So deeply festive and so beautifully simple!
How to Make This Craft Cut cardboard into triangle shapes, creating varying sizes Cut a slit halfway up from the bottom of the triangle Cut a slit halfway down from the top Slide cardboard pieces together to make 3-D tree Wrap neon colored yarn around the cardboard structure Gather fallen evergreen branches from your yard Tuck branches into the yarn Glue gold paper star to the top Affix small colored circle stickers as ornaments Voila! A charming, rustic forest
Textured Paper Plate Christmas Tree Ornament Project for Toddlers
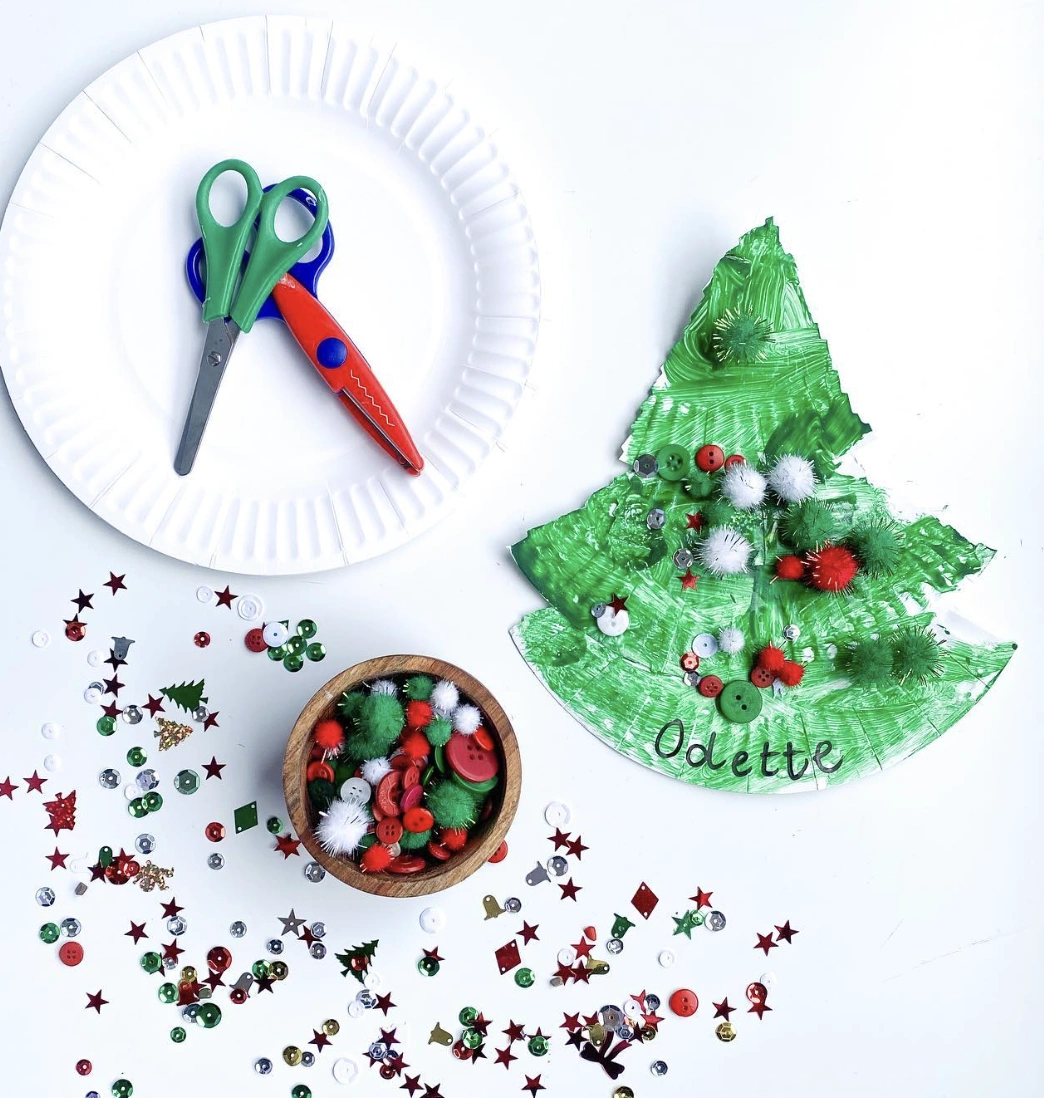
Credit: @allievansfamilydaycare
Let go of intricate patterns and glittery chaos; this is a different creature entirely. This approach to christmas crafts for kids easy prioritizes the sensory journey of making something.
The slightly wobbly painted tree, the haphazard placement of pompoms and buttons, even a child’s name drifting across the base: every piece sings of pure, unfiltered happiness. These transform into keepsakes anchoring authentic meaning.
How to Make This Craft Grab your paper plate and fold it in half Now, sketch out the shape of a Christmas tree on it Take those snazzy craft scissors and carefully cut along the lines you drew to make a tree shape Slap on some green paint—make it vibrant While that’s drying, gather buttons, pom poms, and glitter glue Squeeze drops of glue on the tree in various places Stick the buttons and pom poms onto the glue spots as ornaments Outline tree shape with more glue Sprinkle with glitter for extra sparkle Use a marker to write the child’s name along the base, and you’re golden!
Toddler-Made Holiday Wreath: Cupcake Liners, Buttons, and Natural Leaves
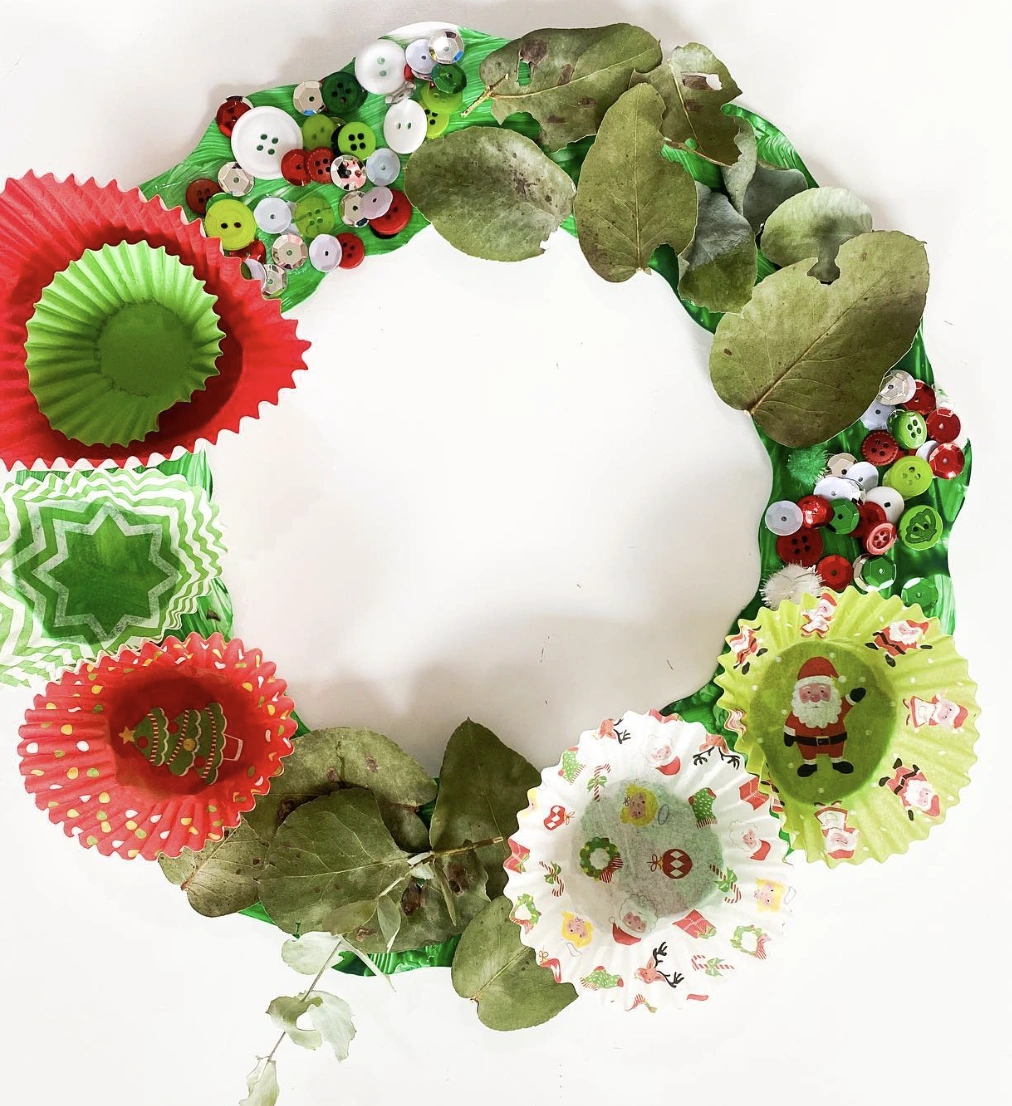
Credit: @allievansfamilydaycare
Let’s be honest about this wreath. It speaks directly to the mother who isn’t chasing immaculate results.
This is the language of holiday survival mode, darling. The creative mom with toddlers underfoot, the woman who understands that beauty blooms straight from the pandemonium.
This creation loudly proclaims “we tried,” and that effort carries a chicness all its own. On top of that, hands-on Christmas crafts for toddlers rescue the day when those tiny whirlwinds need ten minutes of focused activity.
How to Make This Craft Find a sturdy, circular base, like an embroidery hoop Paint the base green and let it dry; be patient Flatten those colorful cupcake liners Strategically glue cupcake liners around the ring’s circumference Hunt around for fallen leaves that catch your eye; secure these with craft glue Raid your button stash for various colors and sizes Affix buttons around cupcake liners and leaves Let it all dry completely Hang it somewhere it will get a lot of attention!
Turquoise Cardboard Christmas Trees with Sparkly Square -Ornaments-
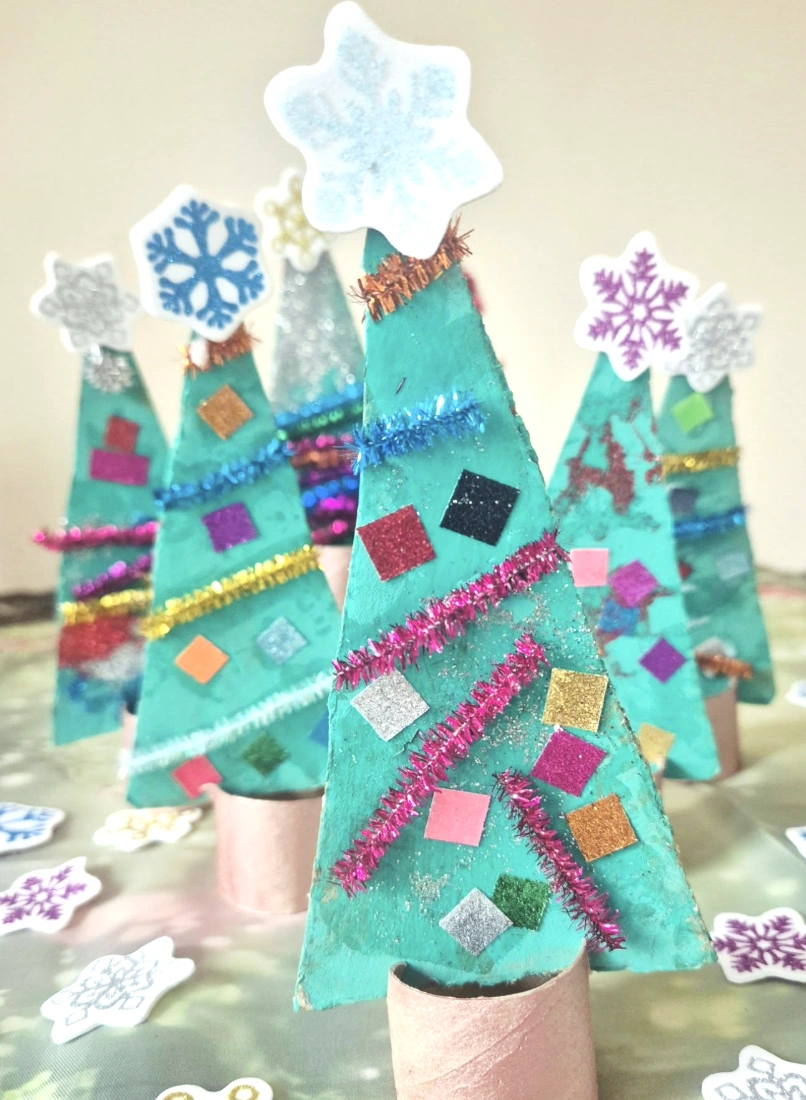
Credit: @ourbookishplaydays
Easy cleanup is the current reigning philosophy. The charm here springs from recycled toilet paper rolls as the base.
Those tiny sparkly squares deliver the ideal dose of contained festive chaos, which feels totally manageable. The thought of producing an entire glittering forest of these is taking hold. A brilliant move if you’re searching for absorbing december crafts for toddlers; they also transform into wonderfully sweet decor.
How to Make This Craft Raid your recycling bin for cardboard tubes; these are your tree trunks Cut cardboard into triangle shapes Paint each triangle a festive color, like teal While the paint dries, cut squares from different glitter papers Apply squares with glue Wrap tree with pipe cleaner for a shiny garland look Glue the painted triangle to the top of a cardboard tube trunk Top with a decorative snowflake sticker Repeat and arrange for a cheerful winter display
Festive Tabletop Snowmen – Easy Christmas Craft
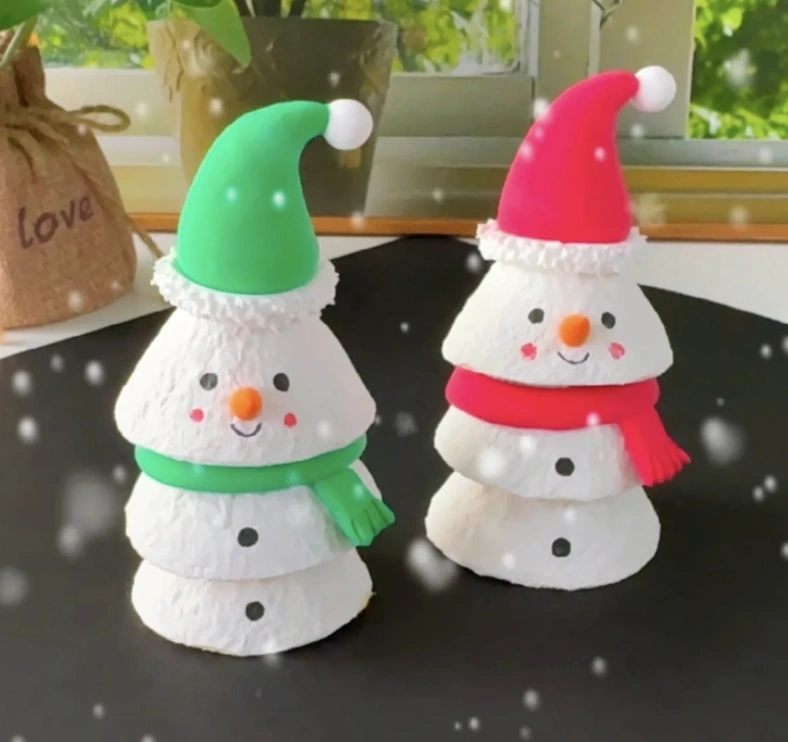
Credit: @make_diy_11
Digging up engaging pastimes for the youngest family members during the holidays can feel like a real puzzle. And these charming snowmen solved the riddle!
They come together simply, embracing the inevitable mess, and they sprinkle a layer of handmade warmth across the decorations. It’s that perfect fusion of spirited fun and uncomplicated artistry, genuinely inspiring Christmas art for toddlers. The pride they feel displaying them afterward is the real prize.
How to Make This Craft Round up three different-sized terra cotta pots for each snowman Paint the pots with white acrylic paint; let them dry completely Stack the pots, largest to smallest, to form the snowman’s body Glue them together For the hat, use a smaller pot or create one from felt Paint the hats red and green Add small pom-poms to the top of the hats Affix the hats with glue Draw smiley faces with a black marker Glue on small orange beads for noses Tie colorful scarves around their necks for extra cheer Display these dapper snowmen anywhere that needs brightening up!
Handprint Christmas Tree Craft with Paper Star Topper

Credit: @allievansfamilydaycare
Shift the focus slightly away from perfect results and toward the joyful ritual: this is art, darling. It presents as a super sweet handprint christmas tree, finished with vivid baubles and a star bearing a personal touch.
This piece defines sentimental chic, and it’s the ultimate fix when racking your brain for captivating Christmas activities for toddlers. Frame it prominently, bestow it as a heartfelt gift, claim it with pride. Utterly enchanting.
How to Make This Craft Trace child’s hand multiple times on green construction paper Cut out the handprints Arrange the handprints into a tree shape, gluing them together Cut out a brown rectangle for the tree trunk Glue trunk to the bottom of the tree Cut out a yellow star Write the child’s name on the star Glue the star to the top of the tree Use paint or markers to add ornaments Glue tree to large white paper with drawing of sun in the corner
Paper Cutout Christmas Characters: Gingerbread Men, Snowmen, Trees, and Houses
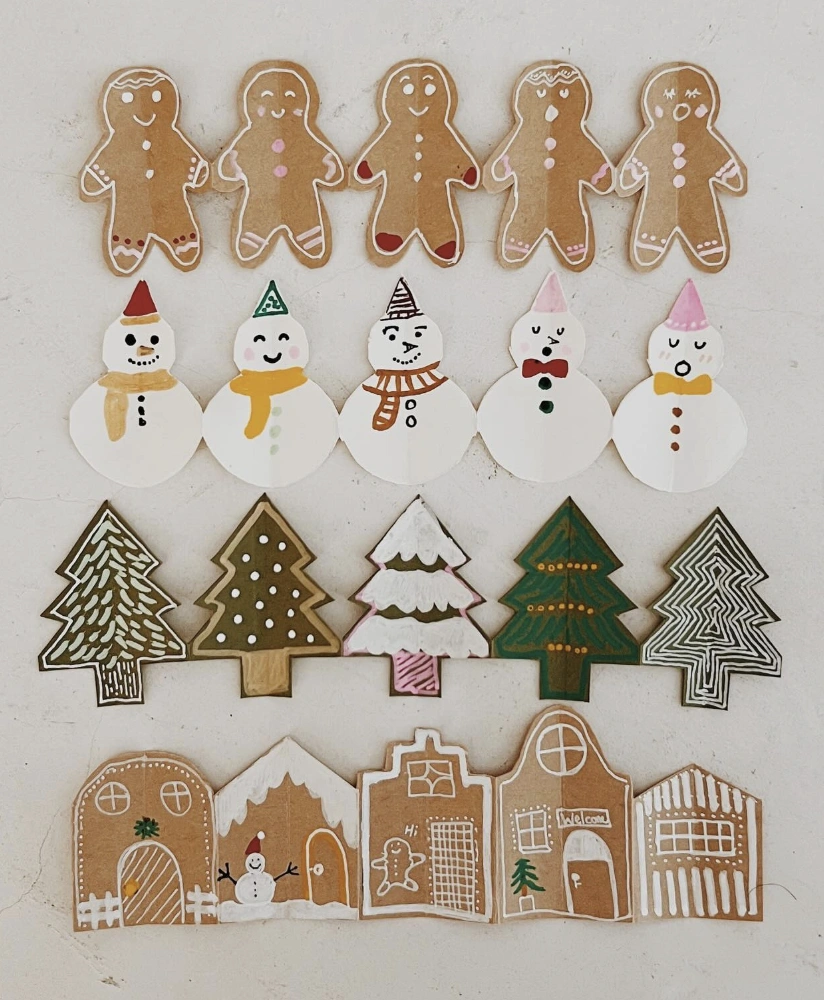
Credit: @alandalicia
Okay, but truly, how endearing are these paper cutouts?! Genuinely besotted with this whole look, it channels such major curated-feed energy.
These are also sparking floods of inspiration for easy holiday crafts for toddlers. Picture the possibilities: string them as a cheerful garland or dress up plain cards with their charm! Absolute adoration for these, along with a serious urge to attempt a similar style!
How to Make This Craft Find or draw templates for gingerbread people, snowmen, trees, and houses Trace templates onto cardstock or kraft paper Cut out the shapes Use a white gel pen or paint to add details like icing, snow, and trim Use colored markers or pencils to add more details like faces, buttons, and decorations Punch a hole at the top of each ornament Thread twine or ribbon through the holes Hang them up!
Cardboard Gingerbread People: Fun Holiday Crafts for Kids
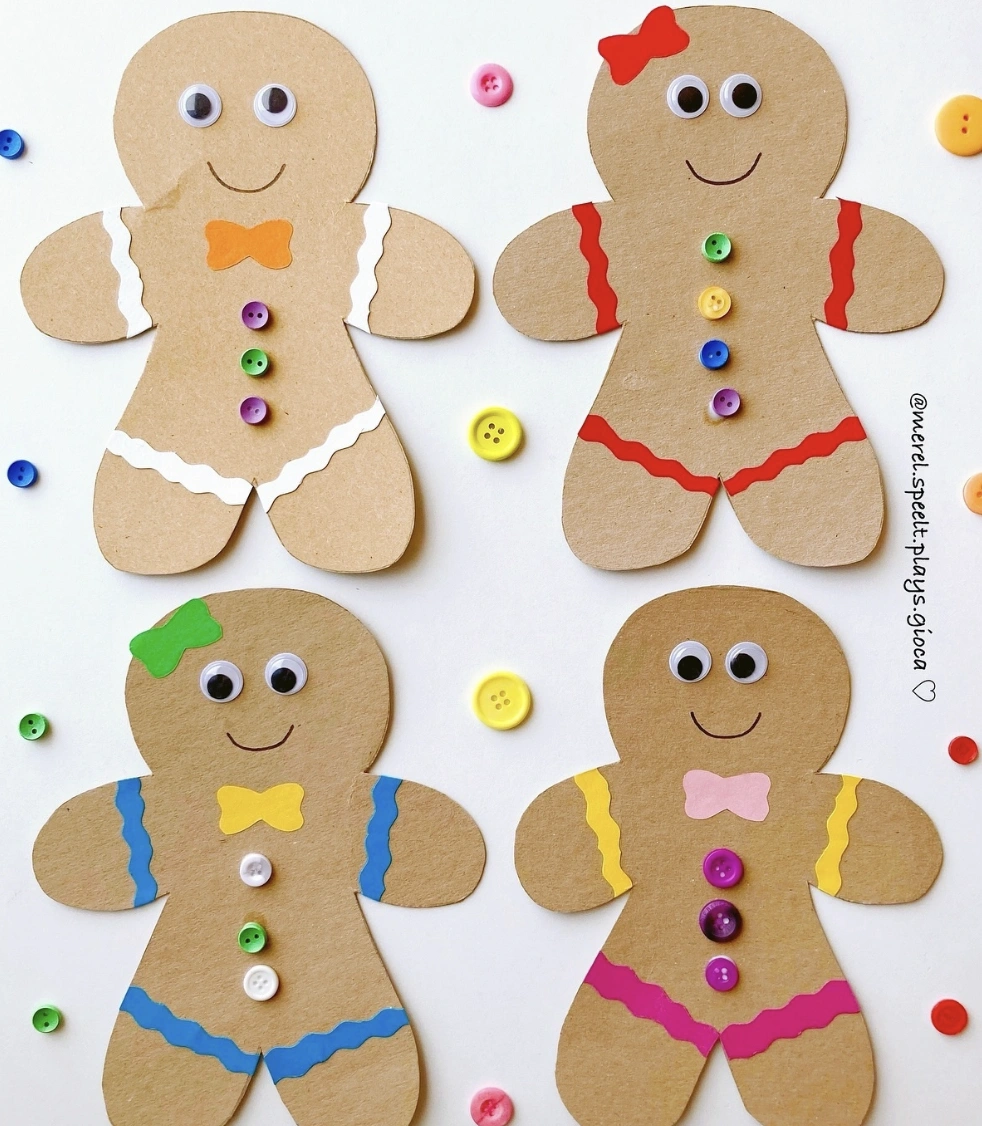
Credit: @merel.speelt.plays.gioca
These outshine the standard store-bought gingerbread kits by a mile, right? The cardboard base makes them far sturdier than simple paper versions, and the opportunity to fully customize each character is a huge bonus.
The googly eyes and tiny button features are completely lovable. They’d be prime candidates for a proud spot on the refrigerator gallery.
This feels like an exceptionally relaxing way to dive into some holiday crafts for kids. What do you think, shall we craft a batch side by side?
How to Make This Craft Cut out gingerbread person shapes from brown cardstock Glue on googly eyes Cut out small bows and ribbon strips from colored paper Attach the paper accessories to the gingerbread people Glue on small colorful buttons down the center Use a black marker to draw on a simple smile
Festive Holiday Garland: Handmade Christmas Figures and Gift Cutouts
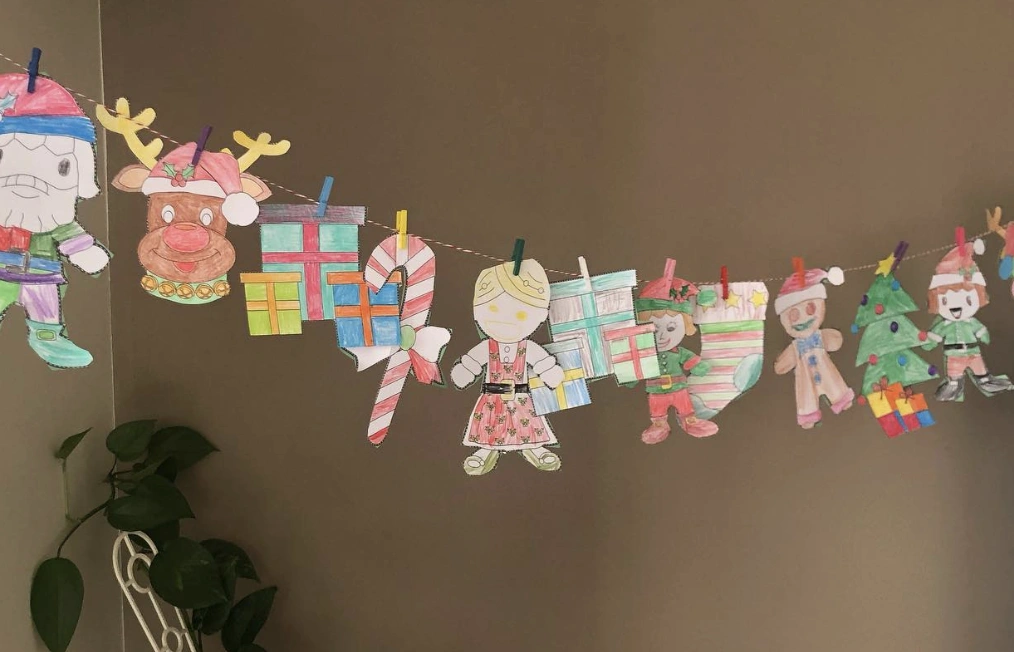
Credit: @zztotz
For an injection of playfulness, consider draping a garland across the room. This specific version features vivid, hand-colored paper cutouts pegged onto a humble piece of string.
Note the clever use of simple clothespins to secure each piece, making assembly a breeze. It hits the mark perfectly if you’re seeking simple holiday crafts for toddlers.
The homespun quality wraps any room in a uniquely personal, heartwarming layer. Once the season wraps, the whole thing packs away neatly for next year’s debut.
How to Make This Craft Find or draw Christmas-themed templates or coloring pages Color the templates with crayons, markers, or colored pencils Carefully cut out each character Cut a length of string or twine Attach clothespins to the string, spacing them evenly Clip the characters onto the clothespins Hang up your garland!
Hand-Painted Wooden Santa Claus with Candy Cane
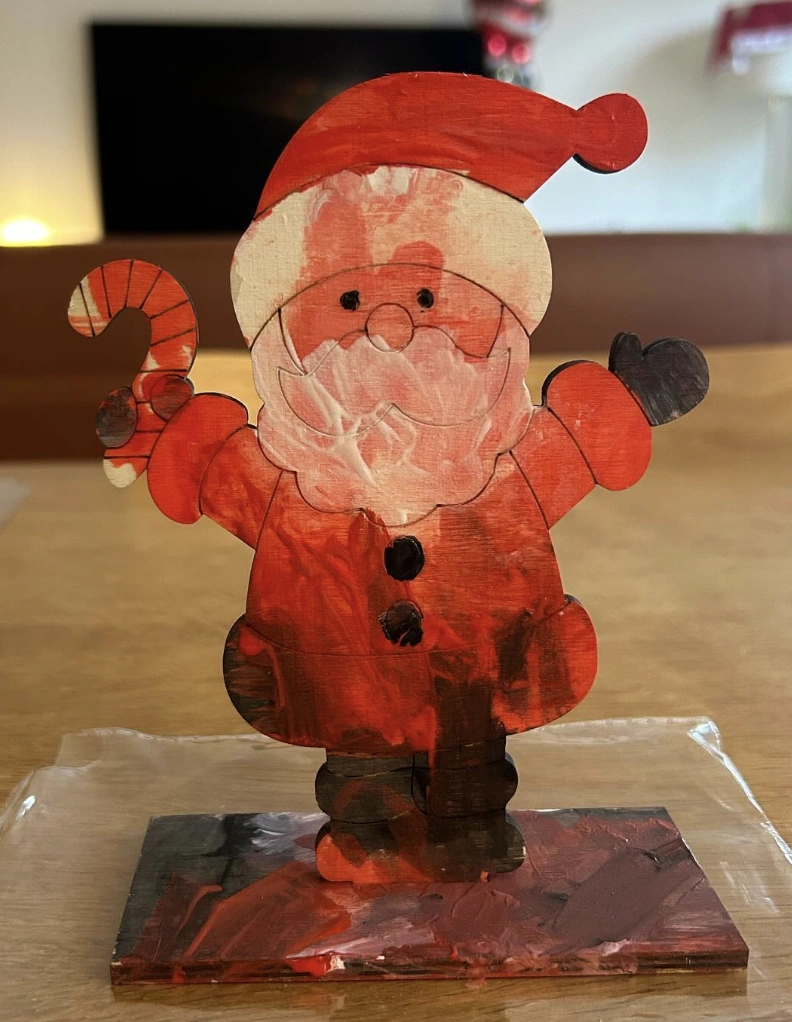
Credit: @they.callmequiqui
Perfection isn’t the destination here, and that fact is precisely the charm. It possesses that sought-after artisanal, rustic spirit that feels wholly on-trend.
This piece would anchor a mantle display beautifully. For anyone seeking Christmas art for toddlers that furnishes a genuine creative channel for kids, this choice wins decisively. The festive crimson hue grounds it, and the entire effect is disarmingly sweet.
How to Make This Craft Purchase a wooden Santa craft blank or cut out wooden Santa shapes using a template Paint the body of Santa with red paint Paint the face and beard with white paint, letting the wood grain show through Paint the base with a darker red color Paint candy cane with red and white Allow the paint to dry completely Assemble all components If separate pieces, glue the Santa figure together Allow glue to dry before displaying
Christmas Ornaments: Salt Dough Imprint Decorations
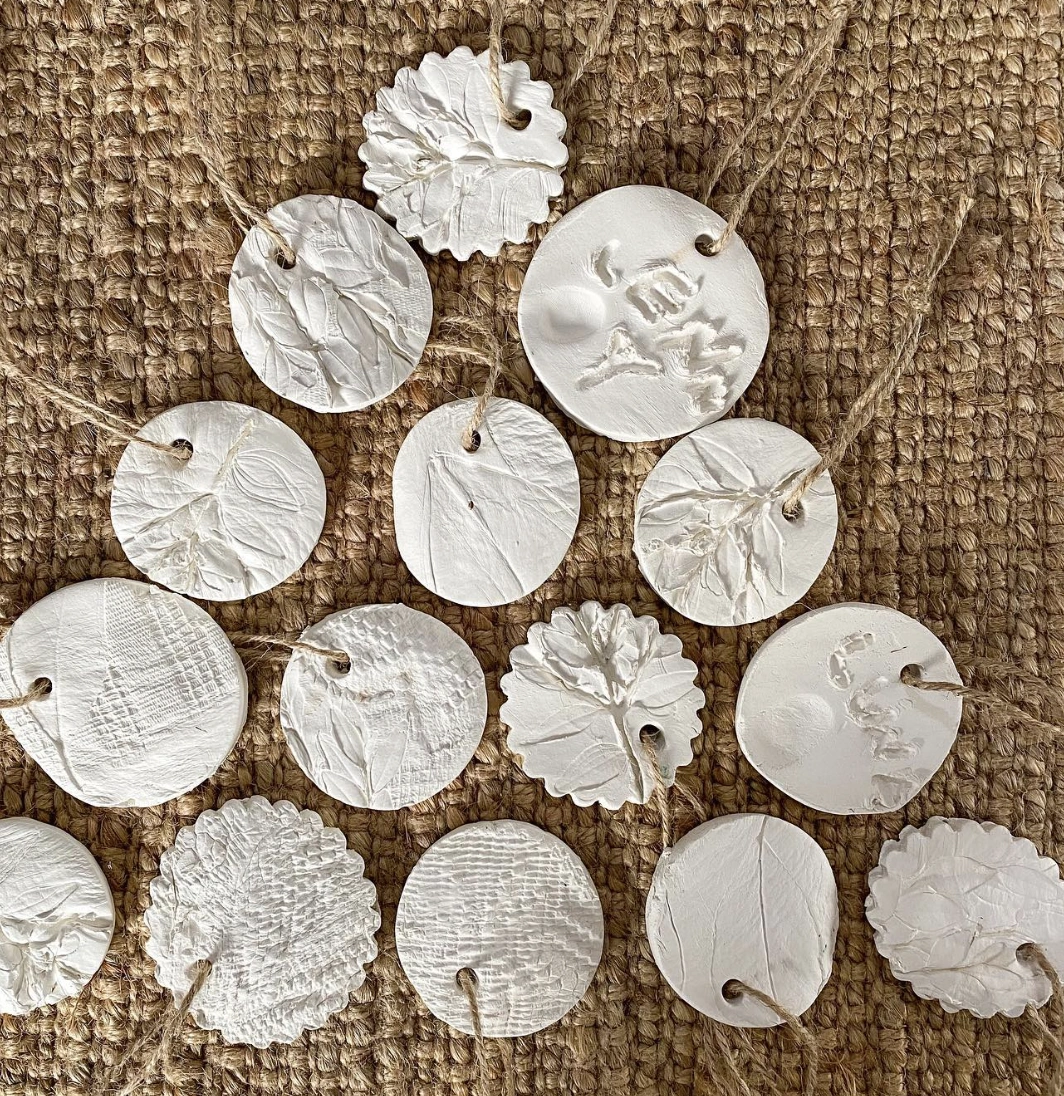
Credit: @allievansfamilydaycare
The house once functioned as a cyclone of loose glitter and attacked construction paper throughout December. Carving out time to craft genuinely beautiful handmade Christmas decorations felt like a pipe dream!
These salt dough ornaments dismantle that feeling entirely. The secret weapon?
Rope the toddlers into the action! These are flawless for simple december crafts for toddlers to assist in forging gorgeous decorations. They manage to be shockingly simple, and the resulting mess is minimal, freeing up valuable time for high-priority missions, like concealing the candy cane stash!
How to Make This Craft Gather fresh, pressed leaves and flowers Mix plaster of paris according to package directions Pour plaster into small silicone molds or onto parchment paper Press leaves/flowers gently into the wet plaster surface Use a straw or toothpick to create a hole for hanging Allow the plaster to fully harden Carefully remove ornaments from molds or peel off parchment paper Thread jute string through the hole for hanging Gently wipe excess plaster debris Hang the ornaments
Colorful Salt Dough Ornament Crafts with Rustic Twine Hangers
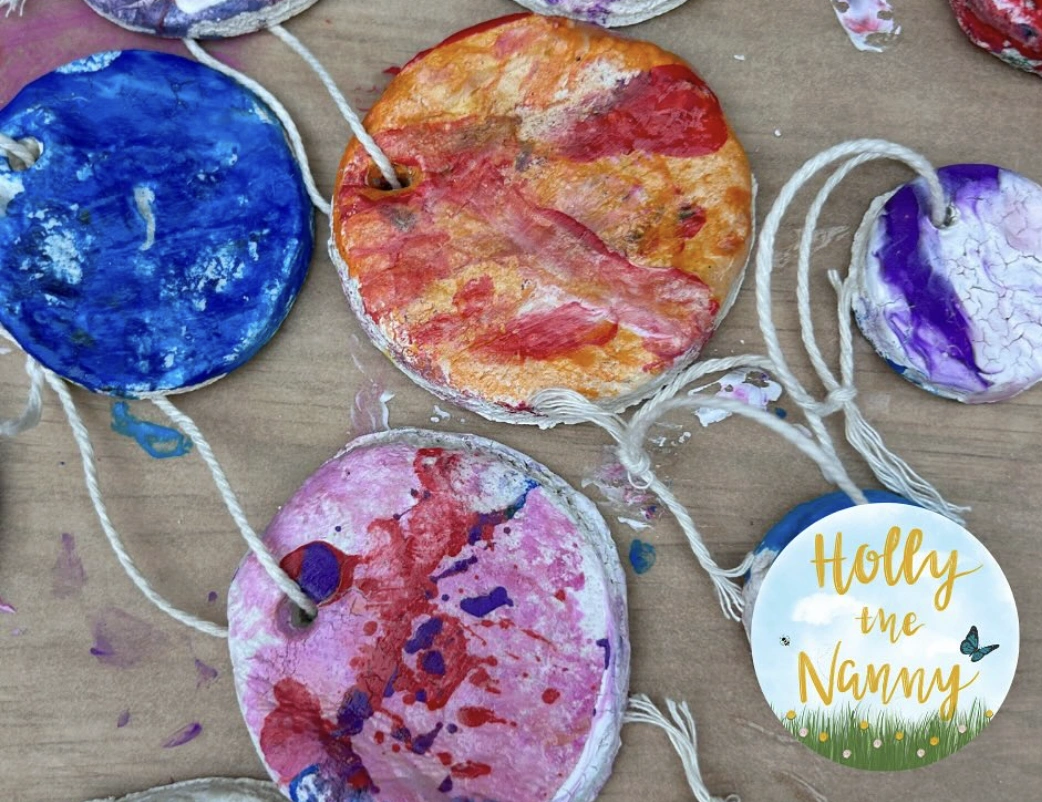
Credit: @nannytaxuk
These pieces broadcast their handmade origins in the most wonderful manner possible. The unpredictable watercolor effect washing over each ornament is completely captivating.
Those thick, almost chunky borders announce clearly that these didn’t roll off an assembly line, and that distinction makes them incredibly special! They’re an ideal channel for including small children in some spirited holiday crafts for kids. The rustic twine fastener introduces a cozy finishing note that makes these ornaments feel right at home on any Christmas tree.
How to Make This Craft Lay down a protected surface like newspaper Gather circular gypsum pieces Choose a palette of acrylic paint colors and pour each color into separate small containers Add a flow medium to each color, following the ratio on the product label Layer each color into a single cup Swiftly flip the cup onto a gypsum piece to release all paint Tilt the gypsum piece to spread the paint to the edges Remove excess paint Let the pendants dry for 24 hours Seal the pendants with clear varnish Drill a small hole and add the string
Felt Gnome Christmas Tree Ornaments with White Ribbon Hangers
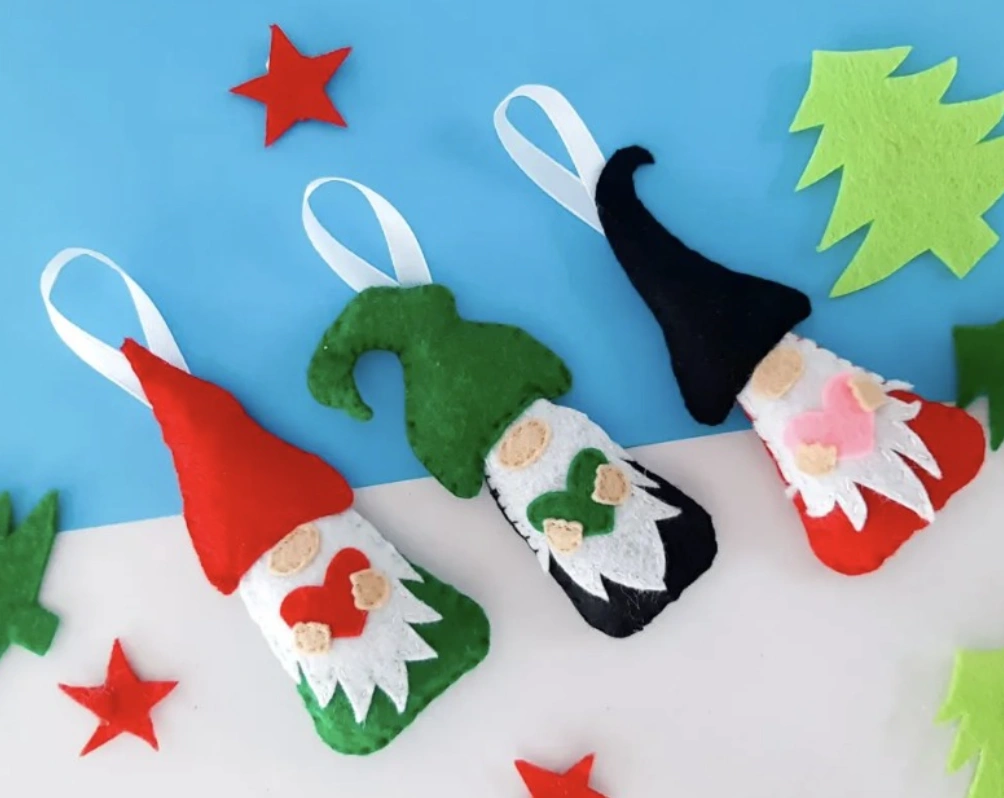
Credit: @hellocreativefamily
These felt gnomes have reached maximum cuteness capacity! They’d be the perfect activity for a cozy little DIY Christmas gathering!
Crafting them together and then decorating the tree with the finished products would cement the memory. It embodies the ideal snug atmosphere for a relaxed Saturday indoors.
The search for Christmas crafts for kids easy enough for a niece and nephew to run with ends triumphantly with these ornaments. And truthfully, who can resist a gnome?
How to Make This Craft Download gnome pattern from online tutorial Cut felt pieces according to pattern; hats, bodies, beards Stitch beard to gnome body with needle and thread Attach small heart embellishments to beard Sew front and back of body together, leaving opening at the bottom Stuff gnome with fiberfill Sew bottom opening closed Form the hat by rolling in to a cone and sewing along the seam 9 Add ribbon loop to top of hat for hanging Glue hat to top of gnome body
Handprint Santa Art on Brown Paper Bags
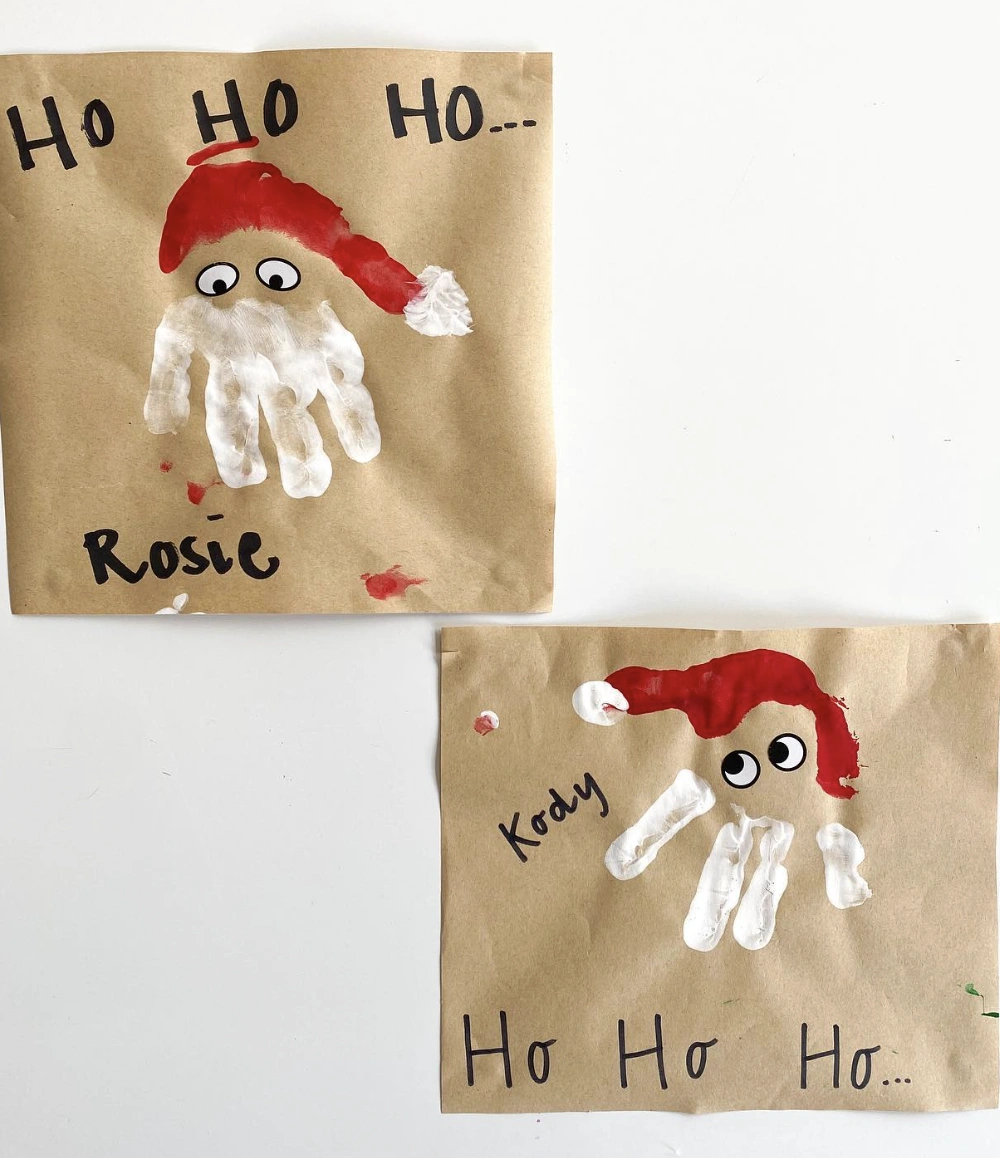
Credit: @allievansfamilydaycare
Set aside those generic holiday greeting cards; these handmade Santa bags carry infinitely more soul. Each one transforms a child’s handprint into Santa’s fluffy beard, completed with a painted red cap and playful googly eyes.
These represent exactly the kind of precious, charmingly imperfect preschool Christmas gifts for parents that instantly graduate to keepsake status. Honestly, this lands miles ahead of another store-bought trinket in the chic department.
How to Make This Craft Lay brown paper bags flat on a protected surface Cover child’s palm and fingers with white paint Press painted hand firmly onto the paper bag Let the white handprint dry completely Paint a red Santa hat on top of the handprint Add a white pom-pom to the end of the hat Glue googly eyes onto the palm Write child’s name beneath Santa using marker Write -Ho Ho Ho – above the Santa handprint Allow paint to dry completely before use
Final Thoughts
Hopefully these gentle ideas ignite a spark of creativity within your home this Christmas season! Witnessing the swell of pride they feel for their own creations is a remarkable thing.
The anticipation for setting up the dedicated little crafting station again soon is already building! These winter crafts for toddlers genuinely deliver an avalanche of happiness.