


Spring has officially arrived, and there is no better way to welcome the season than with charming Dollar Tree Easter crafts.
From adorable bunny accents to inventive Easter baskets, these DIY projects are just right for sprinkling a little festive magic throughout your living space.
Using budget friendly finds from Dollar Tree, you can let your imagination soar and craft gorgeous Easter decor that will genuinely wow your family and friends.
Be sure to browse our easy Easter craft ideas for kids, too.
Come along as we dive into a collection of fun and simple crafts guaranteed to brighten your spring celebrations.
1. Dollar Tree Dice Bunnies
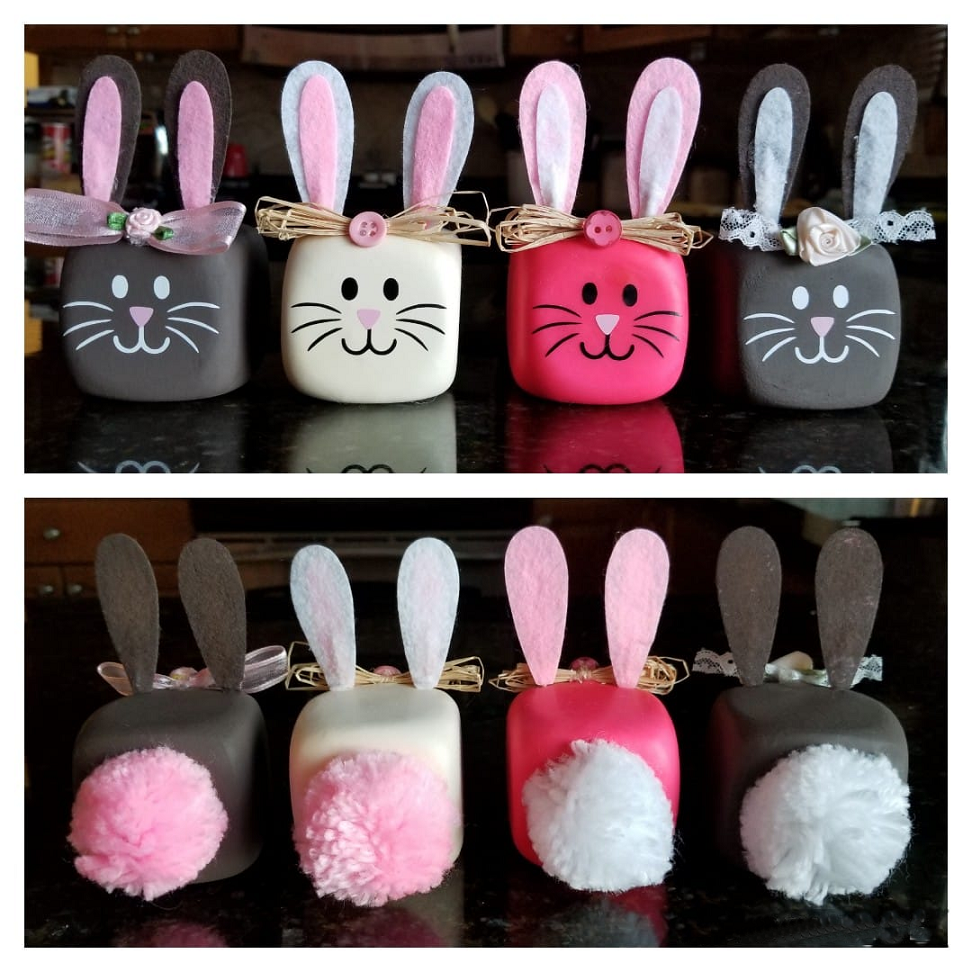
This project from Crafty Morning delivers a playful spin on your Easter decorating with the cutest little dice bunnies.
These sweet little creatures are super simple to assemble and make a whimsical addition to your lineup of spring Dollar Tree crafts.
Pop them onto a table as a centerpiece or tuck them around the house as cheerful accents.
Materials Required
Dollar Tree dice
Balloons
Felt (in your choice of colours)
Toothpicks
Black Sharpie for the bunny’s face
Pom poms or buttons
Ribbon
Hot glue gun
Steps to Make the Craft
Stretch a balloon over each die and trim away the extra length so the dice are wrapped up completely.
Slice the felt into four ear shapes, all matching in size.
Glue two ear pieces together with a toothpick sandwiched in the middle to create ears that stand upright.
Sketch the bunny’s face directly onto the balloon using a black Sharpie.
Attach a pom pom or button for the nose and glue a ribbon around the neck to give it a little extra personality.
For full details, visit Crafty Morning.
2. DIY Dollar Tree Carrot Basket
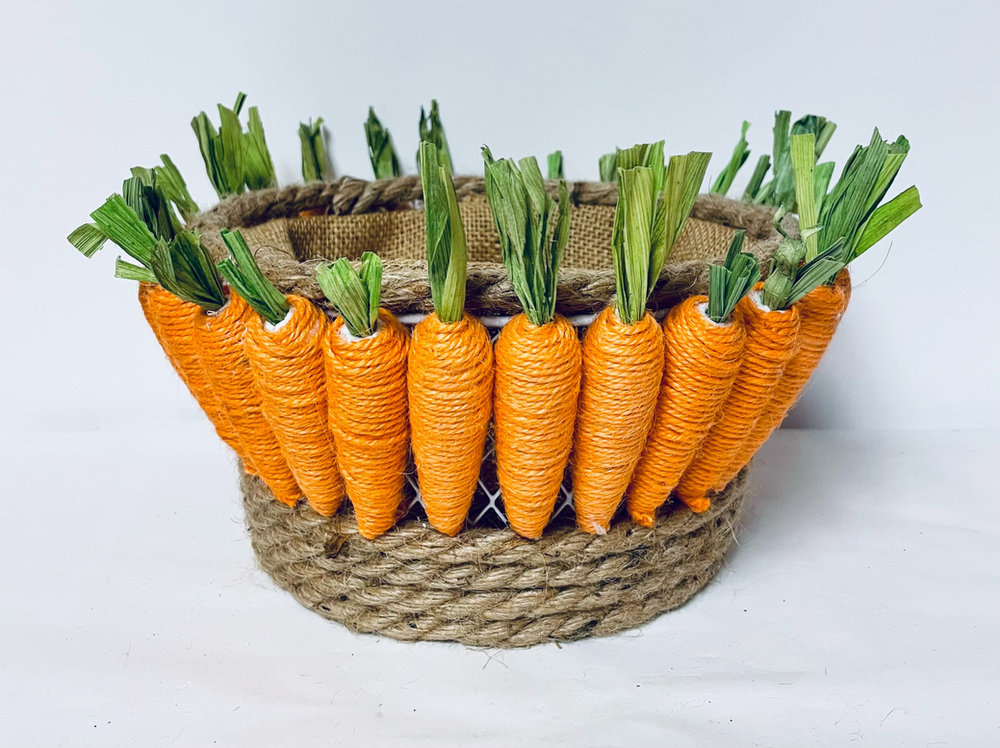
This project from Crazy for Couponing is a playful and imaginative route to crafting a delightful carrot shaped basket just in time for Easter.
This sweet creation is fantastic for stashing goodies or simply serving as a decorative highlight in your home.
Materials Required
5 packages of Dollar Tree carrots
Dollar Tree wire basket
1 package of Dollar Tree nautical rope (11.4 ft)
Hot glue gun and glue sticks
Burlap fabric (or any fabric you have on hand for lining)
Steps to Make the Craft
Adhere the nautical rope around the base edge of the wire basket, circling it roughly four times.
Secure the carrots all over the sides of the basket until every inch is covered.
If you like, line the interior of the basket with burlap by gluing it around the top rim.
Let everything dry thoroughly before putting your carrot basket to use.
For full details, visit Crazy for Couponing.
3. DIY Dollar Tree Easter Bunny Coasters
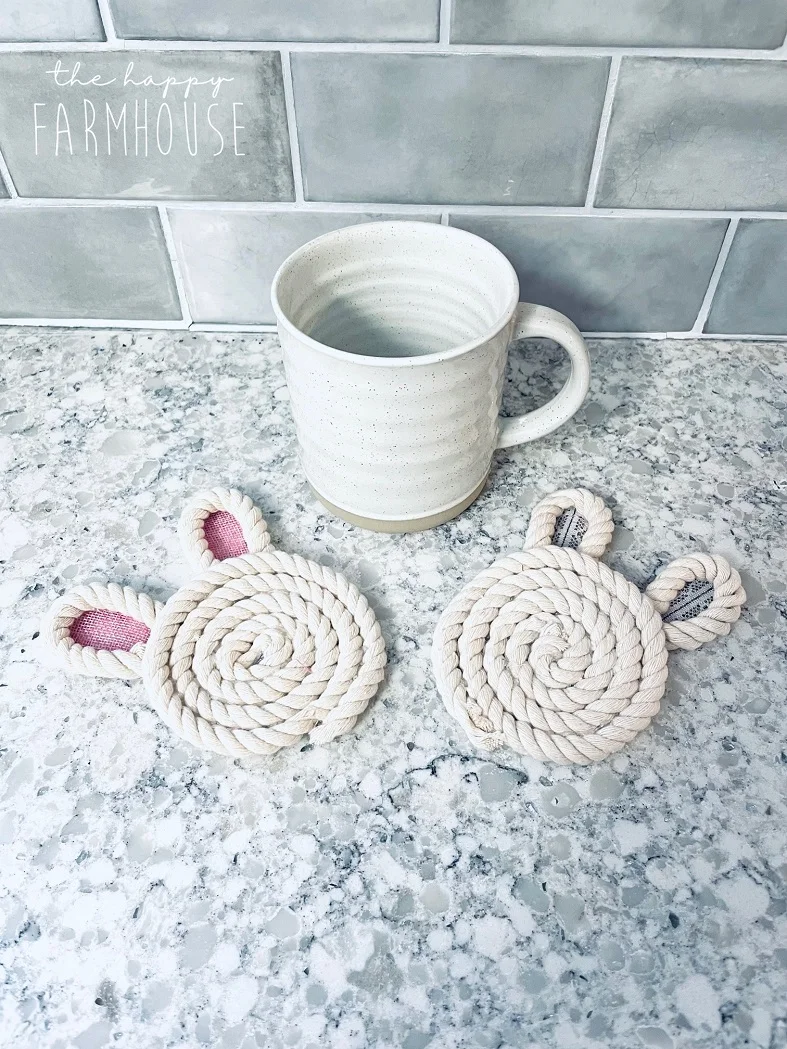
This project from The Happy Farmhouse brings a country inspired feel to your Easter gathering with adorable rope bunny coasters.
These coasters pull double duty, protecting your surfaces while doubling as cute decor pieces your guests are sure to notice.
Materials Required
Dollar Tree Nautical Rope (11 ft, if available)
Dollar Tree Pink Burlap Ribbon
Dollar Tree Lace Burlap Ribbon
Hot glue gun
Scissors
Steps to Make the Craft
Slice the pink burlap ribbon in half, then snip two 4 inch sections from each half, leaving you with four 4 inch pieces.
Apply hot glue to the long stretch of nautical rope and begin coiling it, winding it flat until you have used the entire rope.
Fold every 4 inch burlap section in half and glue the ends to the backside of the coil to shape the bunny ears.
Cut extra 4 inch sections of each ribbon style to refine the ears, making sure they sit just right.
Glue the trimmed ribbon segments to the back of the ears for a more polished detail.
For full details, visit The Happy Farmhouse.
4. Dollar Tree Easter Egg Wreath
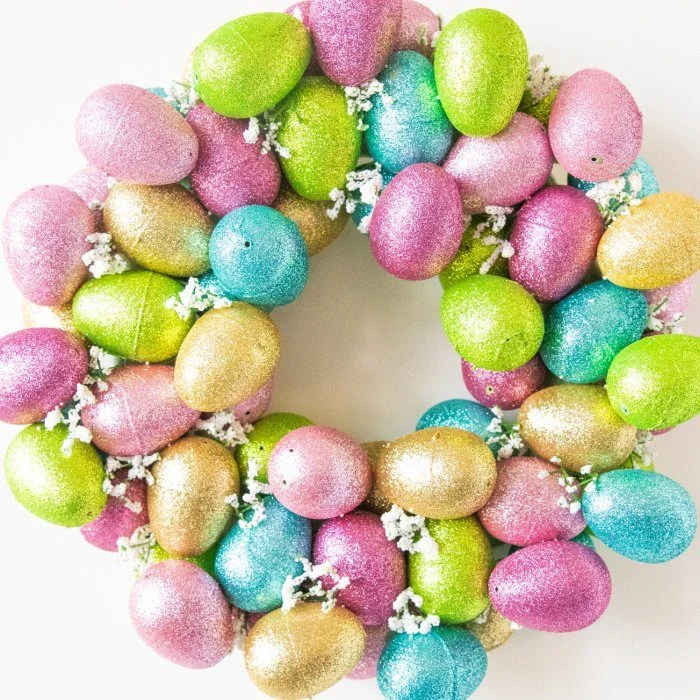
This project from Passion for Savings floods your spring decor with a vibrant pop of colour thanks to a lively Easter egg wreath.
Materials Required
Foam wreath form
Plastic Easter eggs (various colours)
Ribbon (for hanging)
Small flowers
Hot glue gun
Scissors
Steps to Make the Craft
Start by fastening the ribbon to the top of the foam wreath form so you can hang it later.
Begin attaching the plastic Easter eggs all around the wreath, nestling them snugly together until the entire form disappears.
Snip apart small flowers and tuck them into any remaining gaps to layer in extra visual interest.
Once every piece is in place, trim away any leftover ribbon and double check that all your elements are glued down firmly.
For full details, visit Passion for Savings.
5. Dollar Tree Carrot Eggs
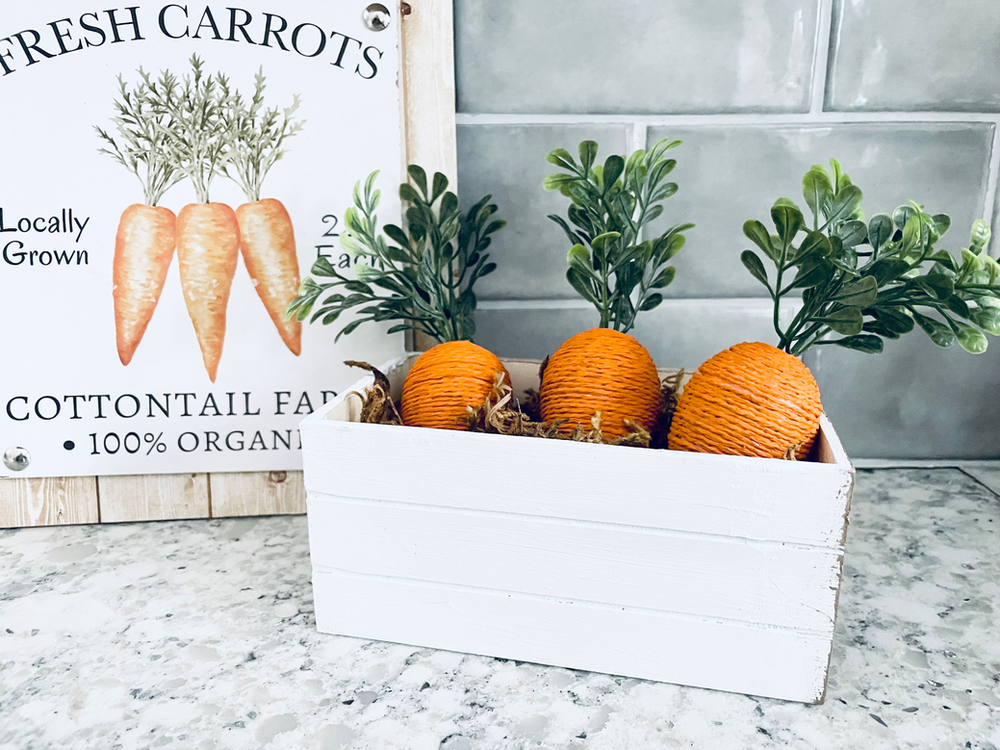
This project from Crazy for Couponing infuses a playful and fanciful note into your Easter decorating with darling carrot eggs.
They are a lovely accent for your Easter table or tucked into a festive seasonal arrangement.
Materials Required
Dollar Tree twine eggs (4 pack with sticks attached)
Waverly chalk paint in pumpkin (or acrylic paint)
Paintbrush
Boxwood pick (available at Walmart if not at Dollar Tree)
Hot glue gun (optional, for securing boxwood pieces)
Steps to Make the Craft
Brush two coats of chalk paint onto the twine eggs.
After they are completely dry, use the stick from the eggs to widen the opening where the stick was originally attached.
If you want extra security, squeeze a dab of hot glue inside the hole.
Pull small sprigs off the boxwood pick and nestle them into the opening you created.
Show off your darling DIY carrot eggs as a feature of your Easter decor or hand them out as sweet little gifts.
For full details, visit Crazy for Couponing.
6. Easter Craft Wands
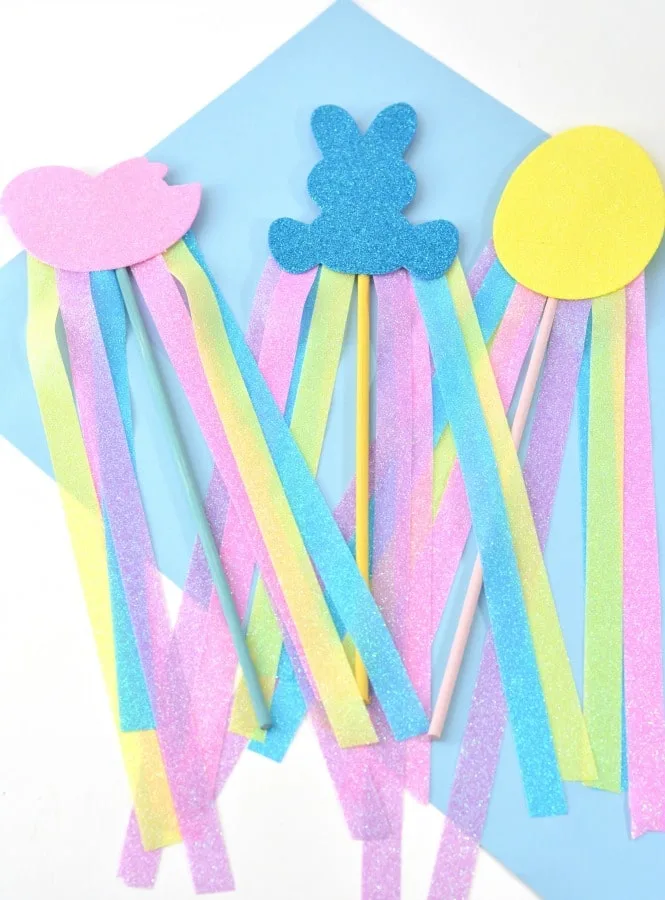
This project from So Easy Being Green is a joyful way to whip up celebratory Easter wands that kids will absolutely adore.
Materials Required
Glitter Easter themed foam craft shapes
Wooden dowels
Glitter ribbon
Scissors
Craft paint
Paintbrush
Steps to Make the Craft
Coat the wooden dowels in soft pastel Easter shades using craft paint.
When the dowels are dry, glue each one to the back of a glitter foam craft shape.
Chop strips of glitter ribbon in various lengths to give the wands a lively, bouncy feel.
Glue the ribbon strips to the back of the foam shapes right on the wooden dowels.
Switch up your wands with different colours and silhouettes to match any holiday or party theme.
For full details, visit So Easy Being Green.
7. DIY Topiary Trees
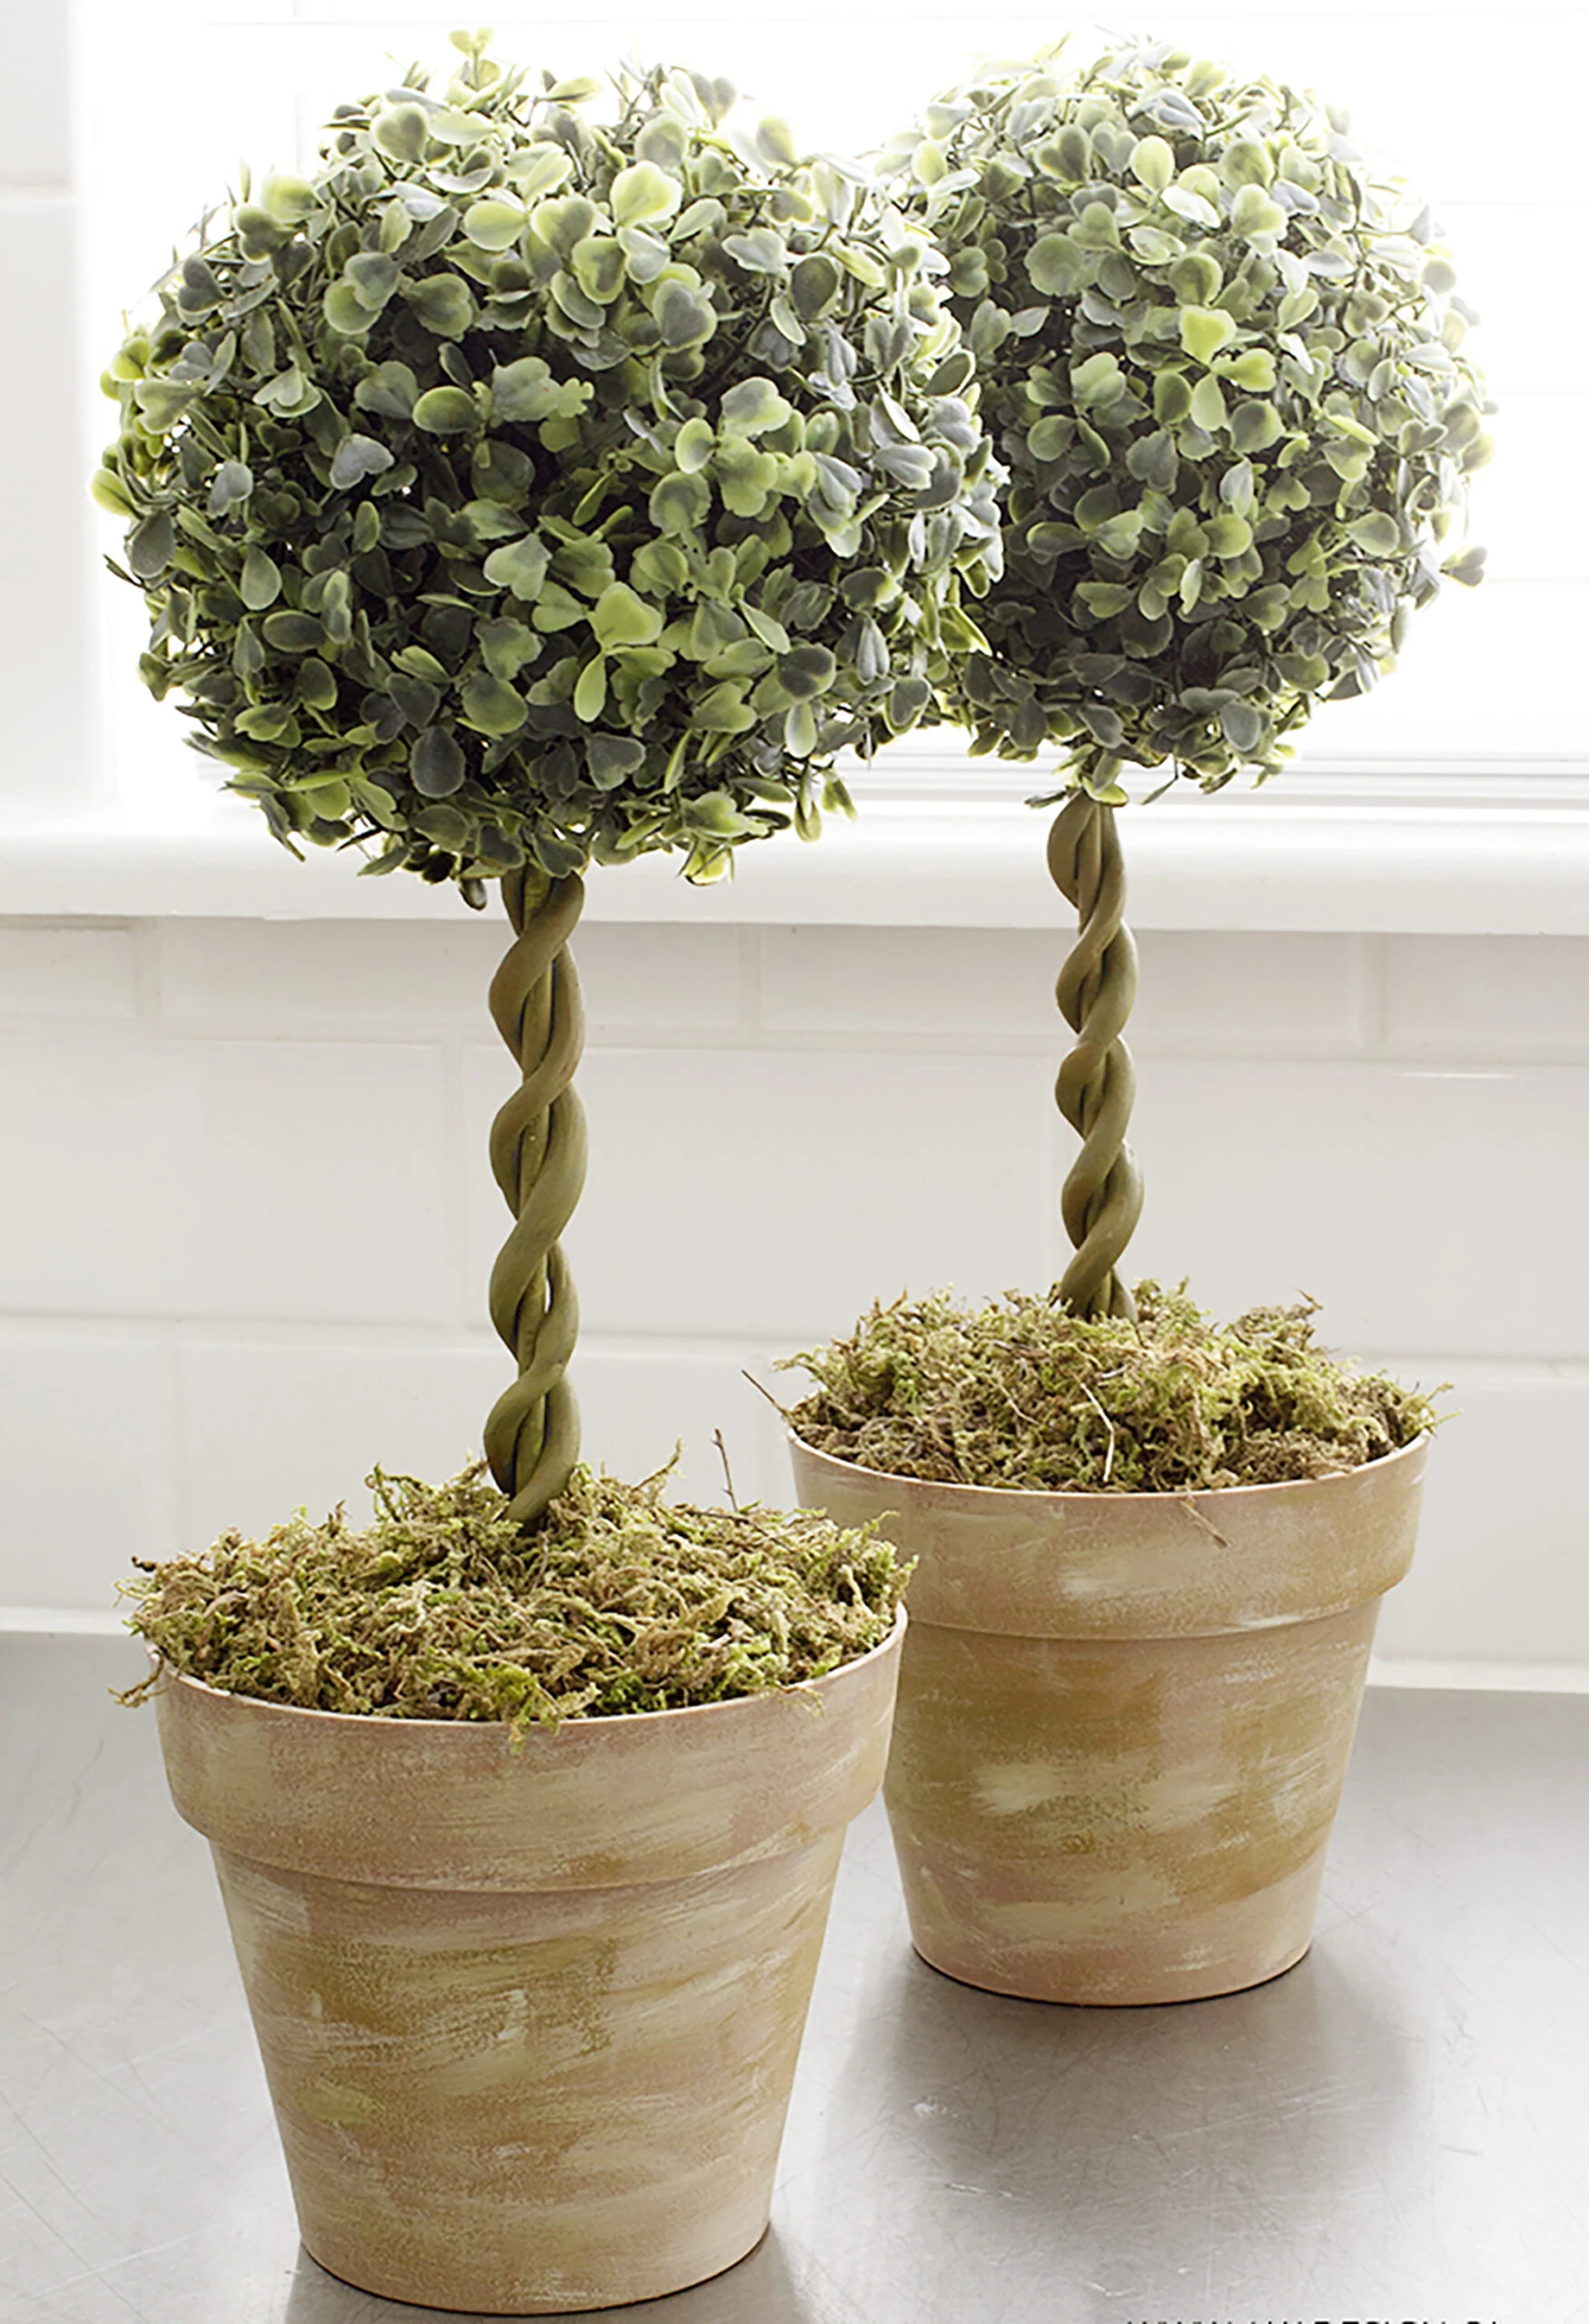
This project from Homemade Lovely presents a clever method to craft gorgeous topiary trees using low cost supplies from the dollar store.
These lovely adornments are ideal for bringing a hint of greenery into your home for Easter or any season at all.
Materials Required
Faux greenery balls
Pots (terra cotta or bamboo)
Floral foam
Skewers
Modeling clay
Moss
Paint (green, brown, white)
Plastic dish
Napkins
Hairspray (optional)
Steps to Make the Craft
Trim floral foam to sit snugly inside the pots and anchor it with hot glue.
Push a skewer into the foam, glue on a faux greenery ball, and hold it steady until it sets.
Paint the skewer green, twist modeling clay around it to resemble winding vines, and paint the clay.
Dry brush layers of mossy green and white paint across the pots for a timeworn, vintage look.
Glue moss across the top of the floral foam, tucking it neatly around the entire edge.
For full details, visit Homemade Lovely.
8. String Easter Eggs Craft
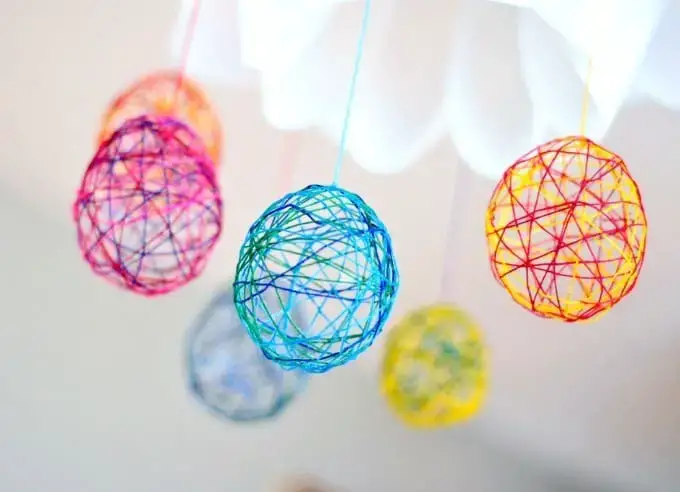
This charming project from Craft Whack lets you create breathtaking string Easter eggs that will elevate your holiday display in the prettiest way.
Materials Required
Balloons
Colourful string or yarn
White glue or Mod Podge
Water
Mixing bowl
Scissors
Steps to Make the Craft
Blow up small balloons to whatever egg size you prefer and set them to the side.
In a mixing bowl, stir together white glue or Mod Podge with a splash of water to create a thinner consistency.
Submerge the string or yarn into the glue mixture, then wrap it around the balloon in every direction, leaving some open gaps for an airy, decorative effect.
Once the balloon is fully wrapped, let it dry entirely.
After the string has hardened, gently pop the balloon and carefully pull it out from inside the string egg.
For full details, visit Craft Whack.
9. Moss Covered Bunny Burlap Canvas
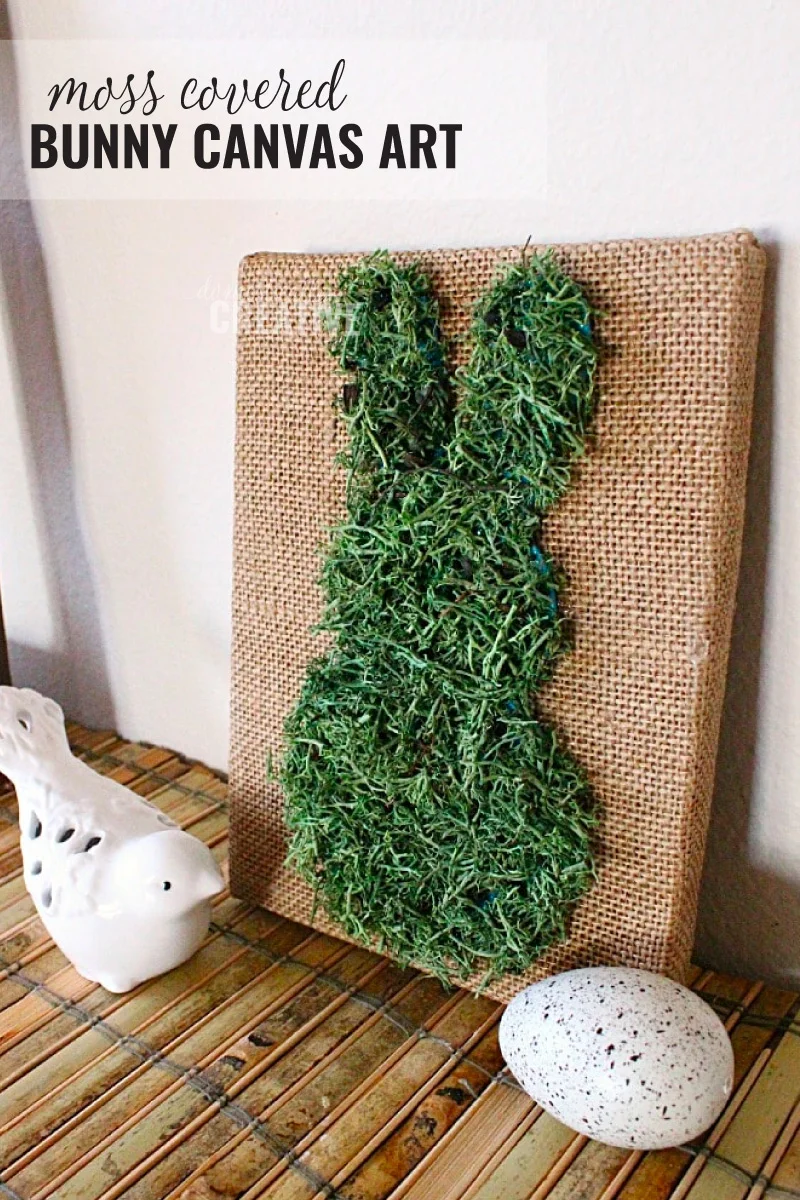
This project from Domestically Creative is a delightful method to produce a moss covered bunny decoration that lends a rustic warmth to your Easter display.
Materials Required
Burlap canvas (or a canvas covered with burlap)
Faux moss (available at Dollar Store)
Bunny silhouette (cut from cardboard or purchase from Dollar Store)
Hot glue
Scissors
Ribbon (optional for decoration)
Steps to Make the Craft
Cut a bunny silhouette from cardboard or grab a ready made version.
Glue faux moss all over the bunny silhouette until it is completely blanketed in green.
Affix the moss covered bunny to the burlap canvas with hot glue.
If you like, add a ribbon around the canvas or at the very top of the bunny for an extra decorative flourish.
For full details, visit Domestically Creative.
As you soak up the joy of the Easter season, these charming crafts provide a fantastic chance to unleash your creativity and weave a personal touch into your home decor.
From enchanting string Easter eggs to fanciful moss covered bunny canvases, each project is not only a pleasure to make but also a wonderful way to mark the holiday alongside family and friends.
Gather up your supplies, jump right into these crafts, and let your imagination roam free.
Whether you are crafting on your own or getting the kids involved, these projects are bound to generate smiles and a real sense of achievement.
Share your creations, handy tips, and any unique twists you try in the comments below.
Let’s inspire one another and make this Easter a truly memorable one brimming with creativity and joy.
Happy crafting!