


Spring bursts with creative potential, and Easter’s arrival makes it all the more exciting.
We’ve rounded up some cheerful Spring Crafts For Kids that promise to engage tiny fingers and spark hours of playful imagination.
Covering everything from Easter Preschool Crafts to lively Easter Activities For Kids, each project puts simplicity and enjoyment front and center, so they work great for toddlers and bigger kids alike.
Whether you’re hunting for straightforward Easy Easter Crafts For Kids or one of a kind Easter Craft Ideas, a little treasure awaits everyone here.
Jump straight into these happy little projects and watch your spring celebrations come alive with color.
1. Easiest No Sew Easter Bunny Craft

This clever project from Feeling Nifty turns everyday socks into charming Easter bunnies with zero stitching required.
It’s wonderfully straightforward, wonderfully enjoyable, and a fabulous pick for springtime fun.
Your kids will adore crafting these sweet bunnies that instantly lift the holiday spirit.
Materials Required
Any socks
Uncooked rice or cotton balls
Rubber bands
Black marker
Scissors
Ribbon (optional)
Steps to Make the Craft
Grab a sock and stuff it with rice or cotton balls, keeping roughly 4 inches free at the top.
Pinch the top of the sock together and wrap a rubber band tightly around it.
Snip away the leftover sock fabric above the band.
Define the head and body by securing another rubber band between those two sections.
Form the ears by slicing the top portion of the sock right down the middle.
Sketch a bunny ear shape with your marker and cut along the drawn lines.
Add eyes and a nose using the marker, and if the mood strikes, finish with a sweet ribbon tied around the neck.
For full details, visit Feeling Nifty.
2. Shaving Cream Marbled Paper Easter Eggs

This hands on project from Typically Simple delivers a wildly creative method for whipping up gorgeously marbled Easter eggs using shaving cream.
It puts an unexpected spin on the usual egg decorating routine.
Those vivid colors and dreamy swirled designs make these eggs a true showstopper for any Easter setup.
Materials Required
Shaving cream
Watercolour
Tray or box lid
Cardstock or heavy paper cut into egg shapes
Scraper or spatula
Steps to Make the Craft
Smooth a generous layer of shaving cream evenly across a tray or lid.
Dot watercolour randomly across the shaving cream surface.
Drag a scraper or spatula through the colors, swirling everything into a marbled dream.
Push a paper egg shape gently onto the colorful cream, making sure every bit connects.
Lift the paper, scrape away the excess shaving cream, and let the paint dry to uncover a stunning marbled masterpiece.
For full details, visit Typically Simple.
3. Pom Pom Bunny Craft

This adorable idea from One Little Project helps you whip up fluffy pom pom bunnies that scream Easter cheer.
Kids adore this playful and achievable project, which secretly builds fine motor skills while keeping creativity flowing.
Use these fuzzy little creatures as sweet decorations or heartfelt handmade gifts all through spring.
Materials Required
Yarn (in various colours)
Scissors
Cardstock
Free printable bunny template (from One Little Project)
Googly eyes
Pom Pom (for the nose)
Glue
Steps to Make the Craft
Print the bunny template onto colored cardstock and cut it out, making two side slits as marked on the template.
Cut a 14 inch length of yarn and loop it around all four fingers roughly 100 times.
Tie that bundle tightly in the center, then snip all the loops open to fluff up a pom pom shape.
Set the pom pom on the cardstock bunny and thread the long yarn tails through those side slits.
Pull them snug and tie a secure double knot.
Stick a pom pom nose and a single googly eye onto the front and your creation is complete.
For full details, visit One Little Project.
4. Easter SunCatchers Craft
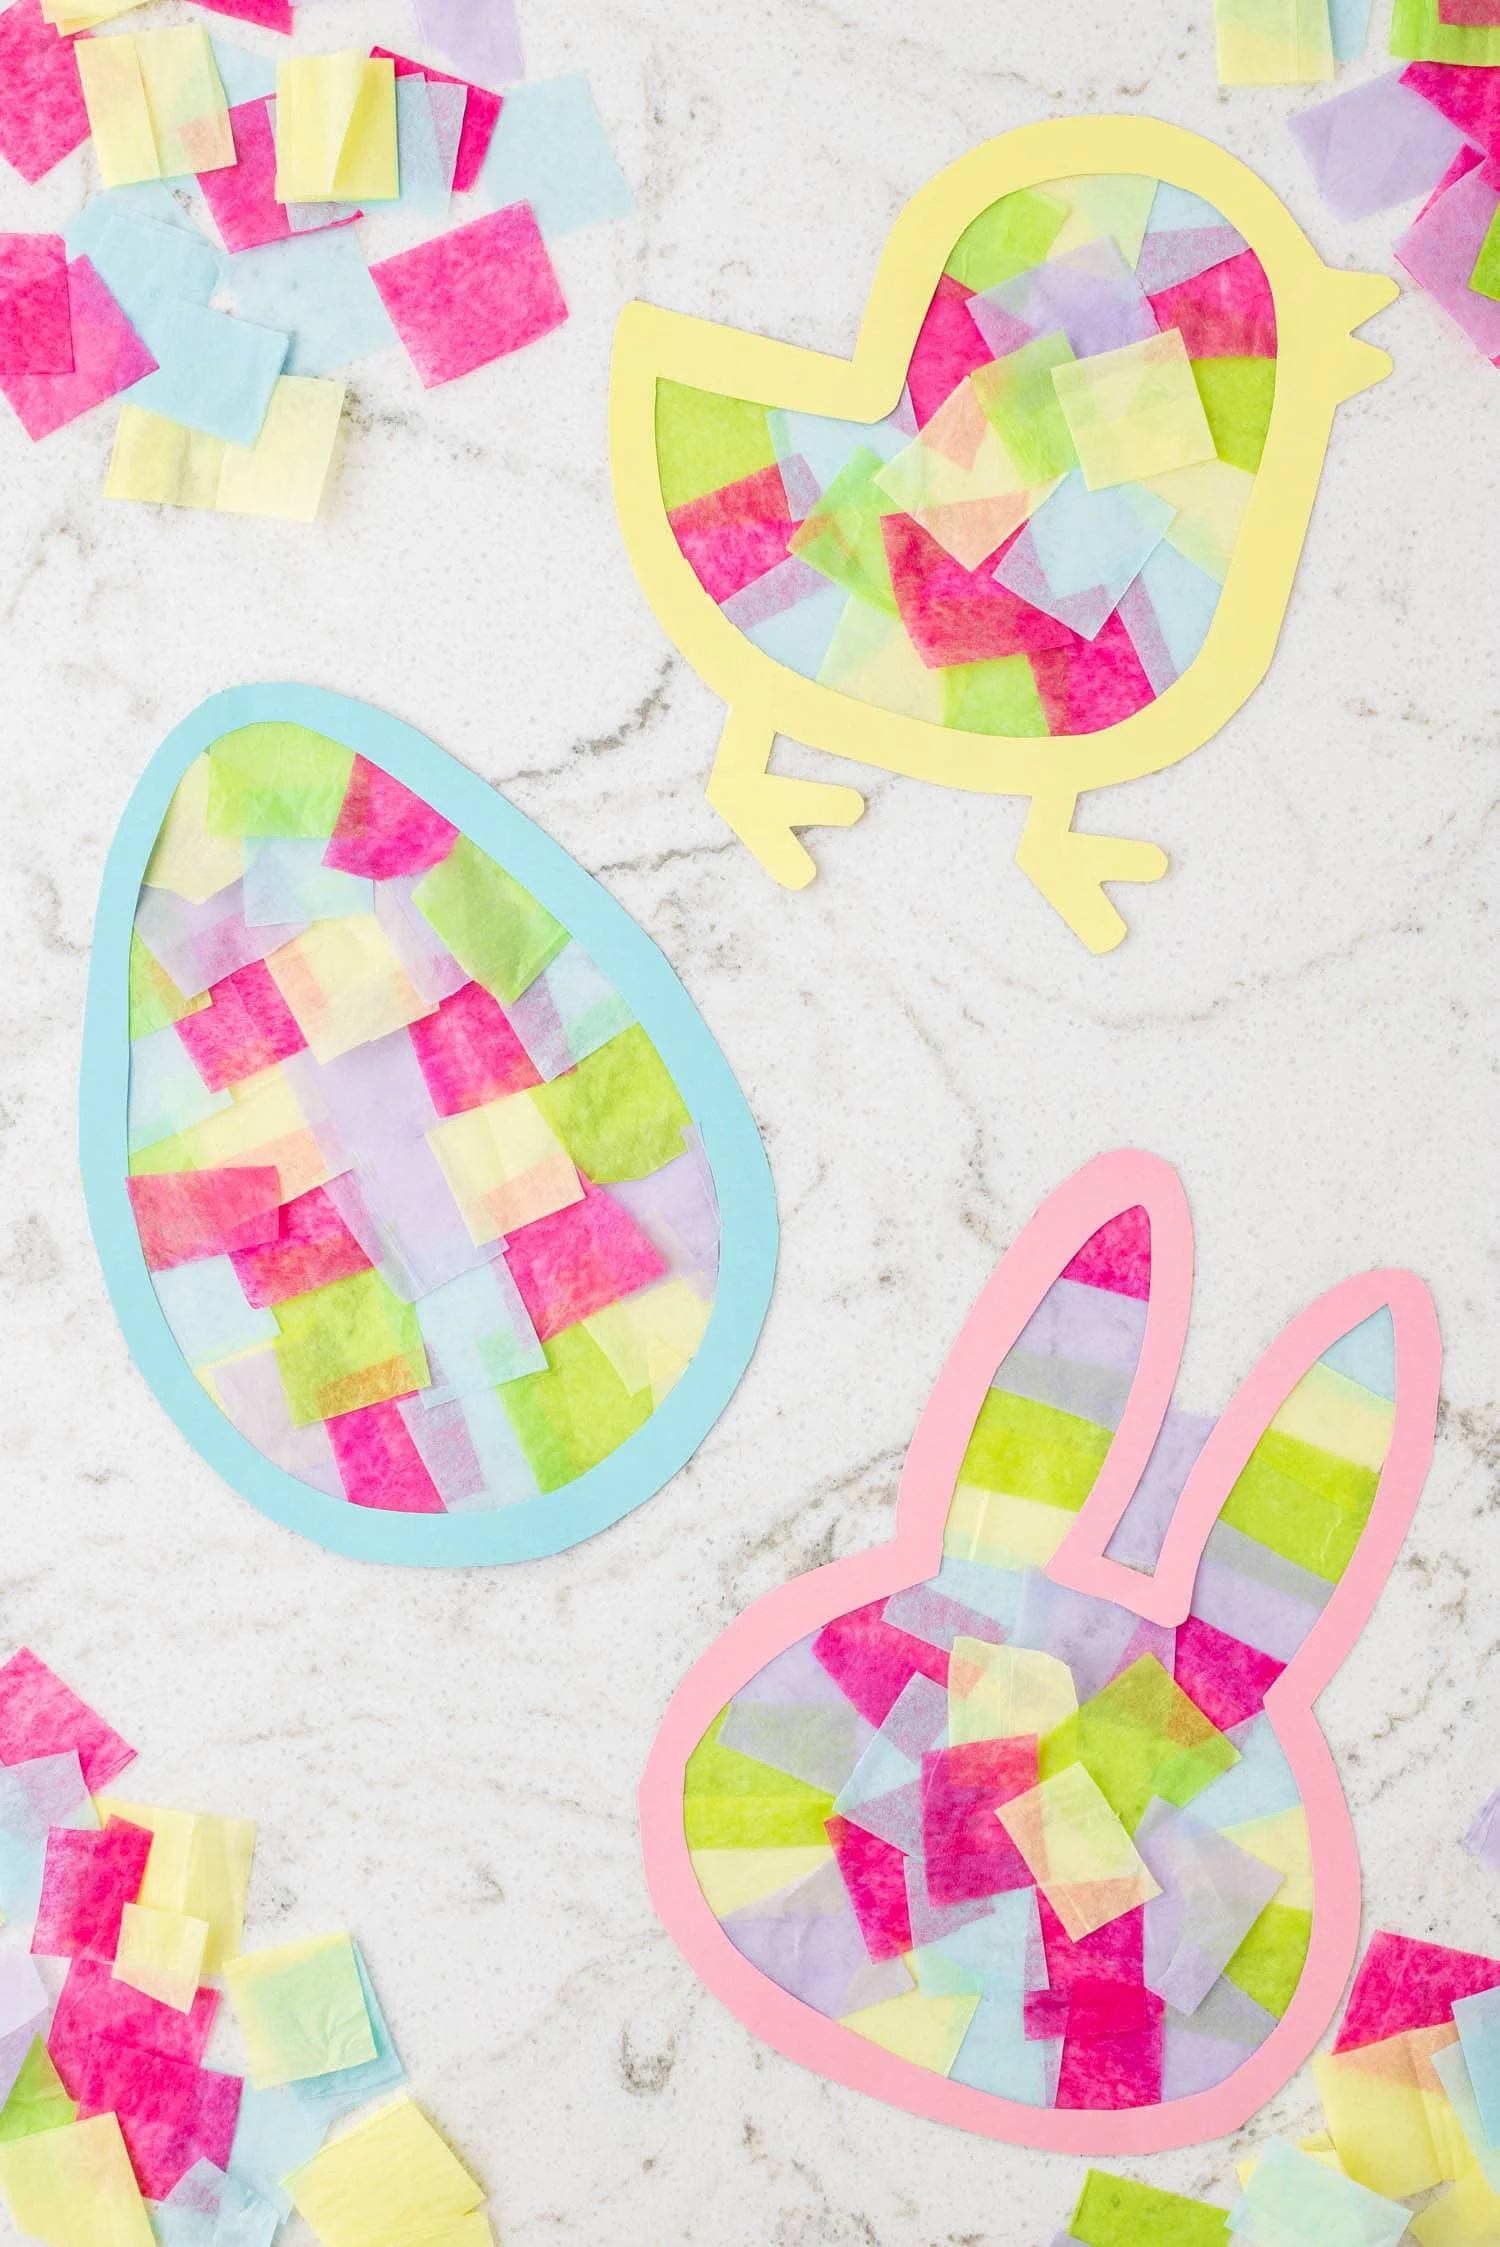
This vibrant idea from Kids Activity Zone lets you craft gorgeous suncatchers guaranteed to brighten every corner of your home this Easter.
The whole process sparks imagination while splashing your spring decor with joyful color.
Hang these beauties in a sunny window and watch them scatter dreamy patterns across the room.
Materials Required
Tissue paper (in various colours)
Scissors
Templates (from Kids Activity Zone)
Clear adhesive contact paper
String or ribbon (for hanging)
Steps to Make the Craft
Print out your selected templates.
Cut around the outer edge, then slice out the middle section leaving a ½ inch border.
Trace that shape onto cardstock and cut it out.
Chop tissue paper into 2 inch squares using a rainbow of colors.
Lay a piece of contact paper sticky side up over the cardstock shape.
Scatter and overlap the tissue paper squares across the open center.
Lift off the cardstock, swipe glue along its border, and press it onto the tissue paper collage.
Trim any extra contact paper peeking out, and your suncatcher is ready for hanging.
For full details, visit Kids Activity Zone.
5. Easter Gift Bags Craft
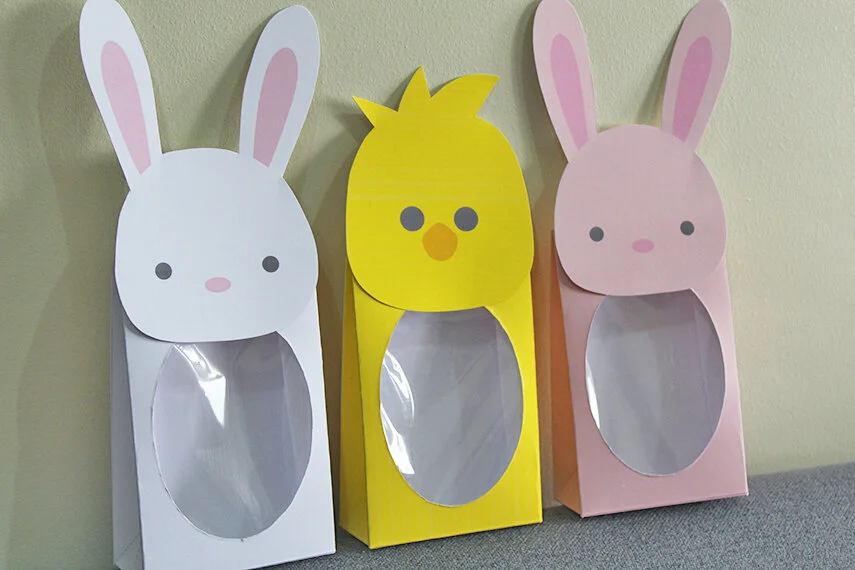
This sweet project from Party with Unicorns walks you through crafting adorable Easter gift bags that practically beg to be filled with treats.
Easy, fun, and loaded with personal charm, these bags bring a handmade touch straight to your holiday table.
Put them to work during egg hunts, pass them out as party favors, or give them as thoughtful little presents for the people you care about.
Materials Required
Printed template on a cardstock (from Party with Unicorns)
Scissors
Glue
Markers or crayons
Decorative items (stickers, ribbons, etc.)
Steps to Make the Craft
Print the template onto cardstock.
Cut carefully around the entire template shape.
Use a ruler to press crisp folds along all the straight lines.
Snip out the sections marked by dashed lines.
Tape a transparent cellophane sheet behind the template where the oblong opening sits.
Glue the side flaps to each other to build the bag structure.
Secure the bottom flaps together with glue to form a solid base.
Tuck your goodies inside, then glue or tape the top opening shut.
Finally, attach the head template piece to the front of the bag with glue.
And you’re done! Fill them with all kinds of goodies, and the kids will love them!
For full details, visit Party with Unicorns.
6. Cotton Ball Bunny Craft
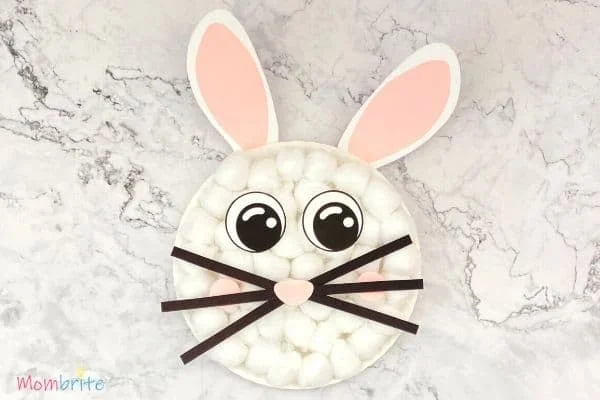
This fluffy and fun project from Mombrite helps you build the most adorable cotton ball bunnies around.
Little crafters get to flex their creative muscles while quietly working on those fine motor skills, too.
These cuddly looking bunnies double as seasonal decor or a playful Easter themed activity centerpiece.
Materials Required
Free bunny template (from Mombrite)
Paper plate
Cotton balls
White, pink, and black printer paper or cardstock
Scissors
Glue
Steps to Make the Craft
Print the cotton ball bunny template and cut apart all the pieces.
Trace the inner ear shapes, cheeks, and nose onto pink paper, then trace whiskers onto black paper and cut everything out.
Stick the inner ear patterns onto the matching outer ear shapes.
Glue the finished ears to the back side of the paper plate, pointing them outward, and hold them in place until the glue grips.
Cover the front of the paper plate with glue and press cotton balls across the entire surface.
Attach whiskers to the nose piece (or straight onto the cotton balls) and then fix the nose in place.
Glue on the eyes and pink cheeks directly onto the cotton ball surface.
Add the nose with whiskers, letting those whiskers overlap the cheeks just a bit.
For full details, visit Mombrite.
7. Easter Bunny Toilet Paper Roll Craft
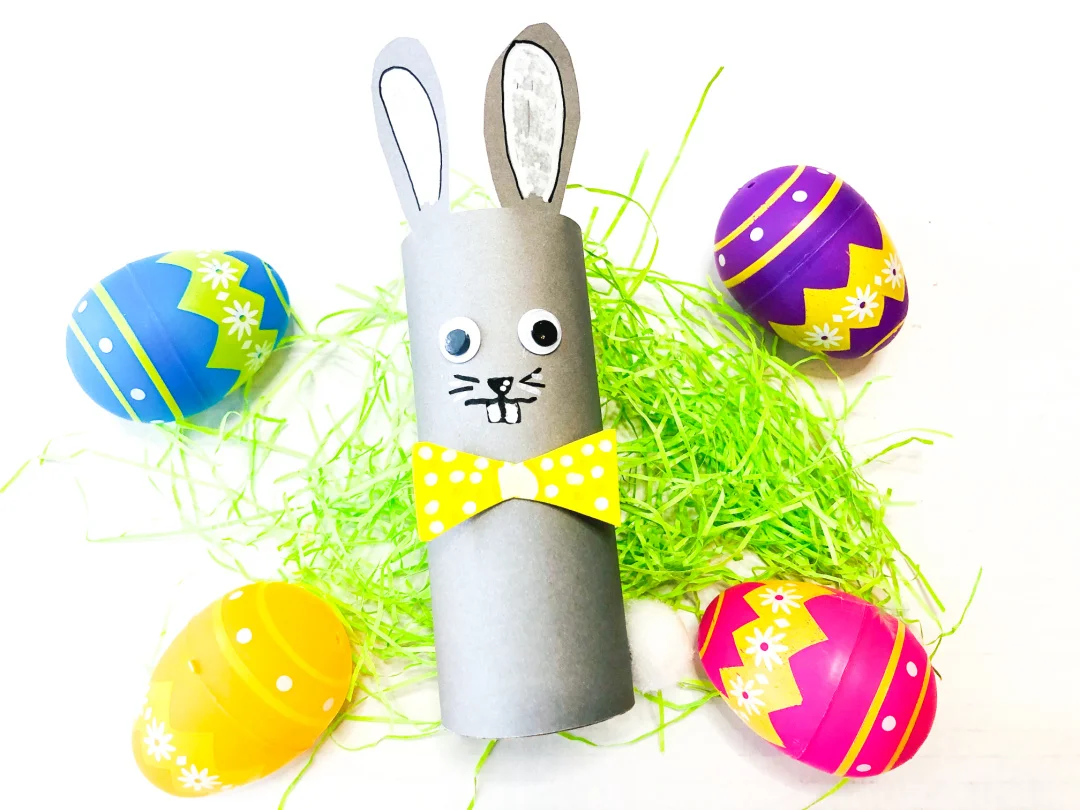
This clever craft from Mom Wife Busy Life reimagines empty toilet paper rolls as the cutest Easter bunnies you’ve ever seen.
The project champions recycling while layering a festive, handmade vibe into your Easter decorating scheme.
Materials Required
Empty toilet paper rolls
Coloured construction paper
Scissors
Glue
Googly eyes
Markers or crayons
Cotton balls (optional for the tail)
Steps to Make the Craft
Trim your paper to fit and glue it around the toilet paper roll so every bit of cardboard hides underneath.
Attach googly eyes to start building that bunny face.
Grab a paint pen or marker and sketch on the nose, mouth, and teeth.
Cut ear shapes from paper and embellish them with details using your paint pen or marker.
Fix the ears to the top of the roll, positioning them right above the eyes.
Snip out a bowtie shape, add decorative details, and glue it front and center on the roll.
Finish the bunny by gluing a pom pom tail to one side of the roll.
For full details, visit Mom Wife Busy Life.
8. Nature Easter Eggs Craft

This beautiful idea from Sprouting Wild Ones transforms natural treasures into stunning Easter eggs unlike anything store bought.
Kids get to flex their creative muscles while developing a deeper connection to the outdoors.
These one of a kind eggs work beautifully as decorations or as special surprises tucked into an Easter egg hunt.
Materials Required
Cardboard
Pencil
Sharp scissors
Nature items (leaves, flowers, small rocks, etc.)
Hot glue gun
Steps to Make the Craft
Trace and cut egg shapes from sheets of cardboard.
Head outside and gather natural treasures (think leaves, berries, seeds, twigs, sticks, stones, flowers, pine needles, bark) to use as your decorating supplies.
Plug in your hot glue gun and start arranging and adhering your nature finds however your heart desires.
For full details, visit Sprouting Wild Ones.
9. Handprint Bunnies Craft

This precious project from One Little Project turns a simple handprint into the sweetest keepsake bunny imaginable.
Kids get to pour their imagination into making these while capturing a tiny snapshot of their growing hands.
Materials Required
Any color construction paper
Coloured markers (pink and black)
Scissors
Steps to Make the Craft
Begin by tracing a handprint, deliberately making it a touch wider than usual so the fingers look plump instead of scrawny.
Cut out the handprint, keeping a defined V shape between each finger.
Snip a tiny slit next to the pinky finger, lining it up with the space beside the thumb.
Fold the pinky finger and thumb inward toward the middle to shape the bunny’s arms.
Trim away the middle finger entirely, leaving two tall bunny ears behind.
Color the inner ear sections pink and sketch an oval for the nose.
Use a black pen to draw the eyes, whiskers, and a sweet little mouth.
Draw two small paws near the bottom of the handprint to finish off your bunny.
For full details, visit One Little Project.
10. Easter Bunny Paper Plate Craft
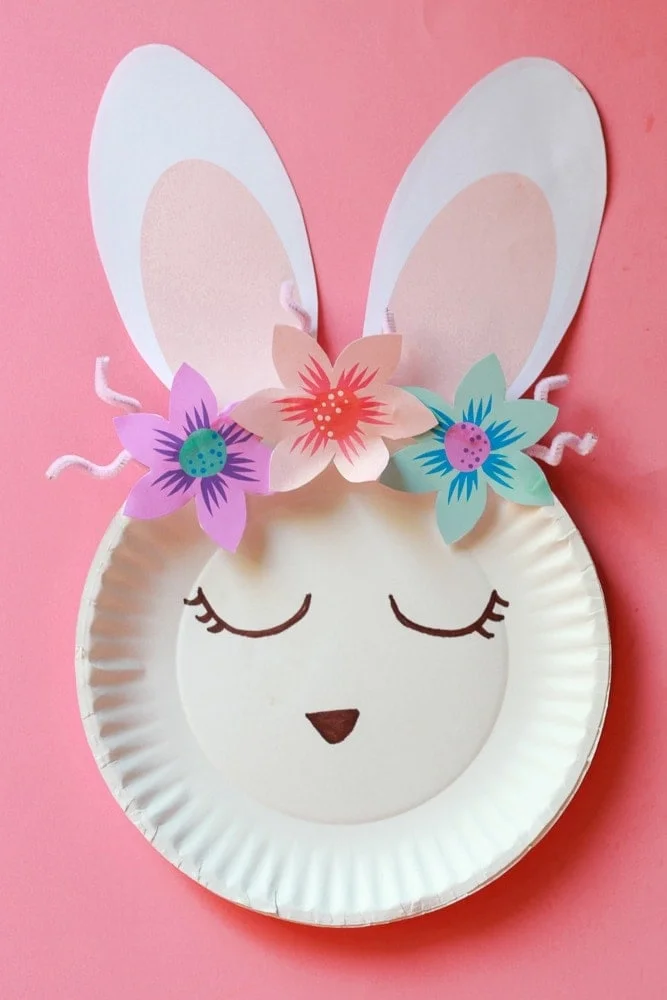
This breezy and delightful project from Mommy Made That turns an ordinary paper plate into an utterly charming Easter bunny in no time flat.
Materials Required
Paper plates
Free Easter Bunny Paper Plate Craft printable (from Mommy Made That)
Craft glue or glue gun
Scissors
Marker
Pipe cleaners (optional; use 2 for each bunny)
Googly eyes (optional, for the bunny’s face)
Steps to Make the Craft
Print and cut out every piece from the Easter Bunny Paper Plate Craft printable.
Using a black marker, draw the bunny’s sweet face right onto the paper plate.
Glue the bunny ears onto the back side of the paper plate.
Arrange and glue the flower cutouts across the top edge of the plate, forming a darling floral crown.
Cut pipe cleaners in half, fold those pieces in half, and twist the ends together into little curly cues.
Attach these curls to the back of the plate, tucking them between the flowers for extra whimsy.
Let all the glued pieces dry completely before showing off your creation.
For full details, visit Mommy Made That.
11. String Easter Eggs Craft
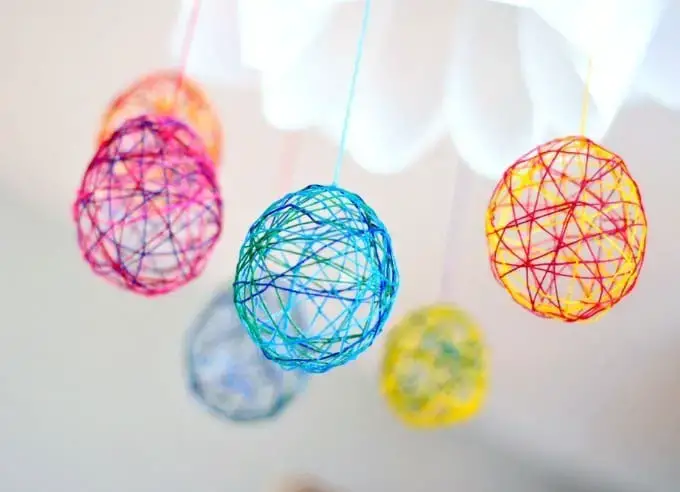
This artistic idea from Craft Whack guides you through crafting elegant string Easter eggs that elevate your holiday decorating game.
Materials Required
Balloons (small)
String or yarn (in various colours)
White glue or Mod Podge
Water
Bowl (for mixing glue)
Scissors
Steps to Make the Craft
Start by blowing up small balloons to whatever egg size you have in mind and set them aside.
Combine white glue or Mod Podge with a splash of water in a bowl, stirring until the mixture feels slightly thinner.
Soak lengths of string or yarn in the glue mixture, then begin wrapping them around a balloon in every direction, leaving little gaps here and there for a lacy, decorative look.
Place the wrapped balloon somewhere safe and let it dry completely—this might take several hours or even overnight.
Once the string feels hard and fully set, gently pop the balloon and wiggle it out from inside the string shell.
Your string Easter eggs are display ready. Hang them in a cluster or pile them into a pretty decorative bowl.
For full details, visit Craft Whack.
As you work your way through these cheerful crafts, keep in mind that the real magic lives in the moments of creating side by side.
Give that imagination full permission to roam, and never hold back from sprinkling your own unique flair onto each project.
Happy crafting, and here’s to an Easter overflowing with giggles, creativity, and the kind of memories that stick around forever.
Which craft caught your eye, and which one are you dying to test out first? Drop those thoughts in the comments below.
Leave a Comment
Your email address will not be published. Required fields are marked *
Type here..
Email*
Website